Changing the certificates in Harbor
Introduction
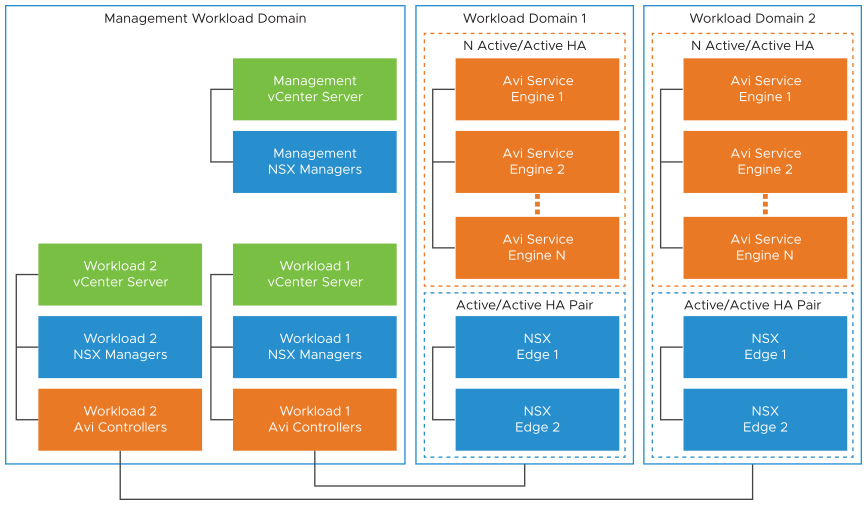
VMware Cloud Foundation (VCF) is a multi-cloud platform that provides a full-stack hyper-converged infrastructure (HCI) that is made for modernising data centers and deploying modern container-based applications.
VMware Avi load balancer (Avi) is a 100% software-defined multi-cloud application services platform with Software Load Balancers, Intelligent WAF (iWAF), and Container Ingress.
All modern applications use load balancing nowadays. Load balancing is the process of distributing network traffic across multiple servers.
Normally i would blog about Avi. I wanted to use Harbor that comes with vSphere with Tanzu for my ako/amko deployment.
Update: While writing the blog, i took the time to re-install vSphere with Tanzu. Now I am using Avi
The goal of this blog
The goal of this blog is to explain how to install Habor Service on the Supervisor cluster and replace Harbor certificates.
I will not go over the installation of VCF 5.2 itself. You might already have DRI (Developer Ready Infrastructure) configured. Harbor is then already installed as part of that.
My lab setup
For my setup, I am using the following:
VCF 5.2.1
vCenter 8.0u3b
NSX 4.2.1.0
ESX 8.0.3
Avi 22.1.7
Preparation
Please refer to installing service and installing Contour
It is important to have Contour running before you continue.
This blog does require you to have vSphere with Tanzu running.
You can also configure DRI (Developer Ready Infrastructure). See validated solution
Optional: If you want to use Avi, you need to onboard Avi to NSX before you install DRI.
A friend of mine wrote a good blog about how to do this. You can find it here.
Once onboarded, Tanzu and Avi will take care of the rest.
Installation
1. Install Harbor service.
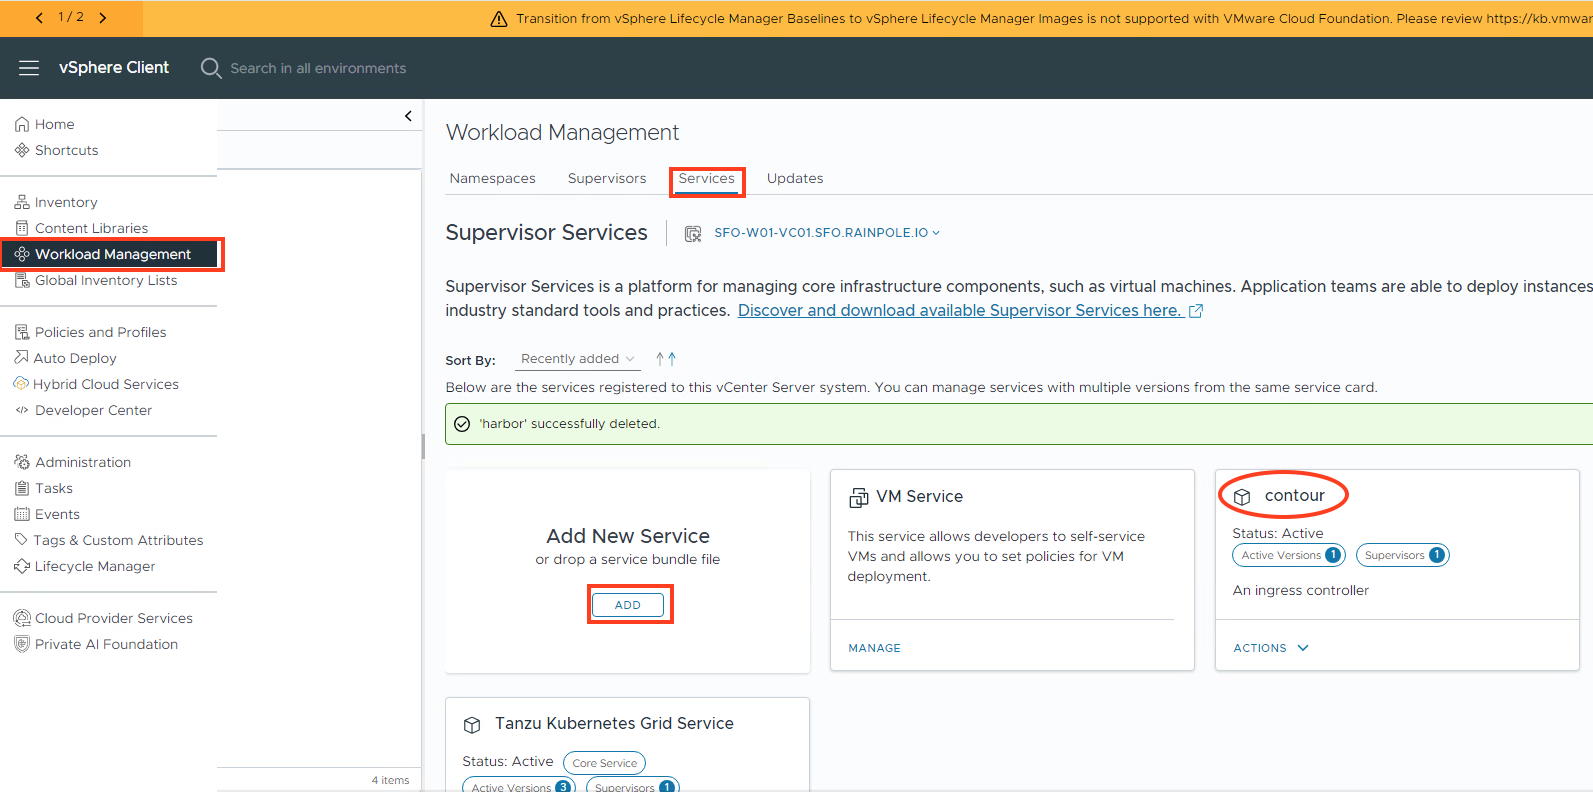
Select Add New Service
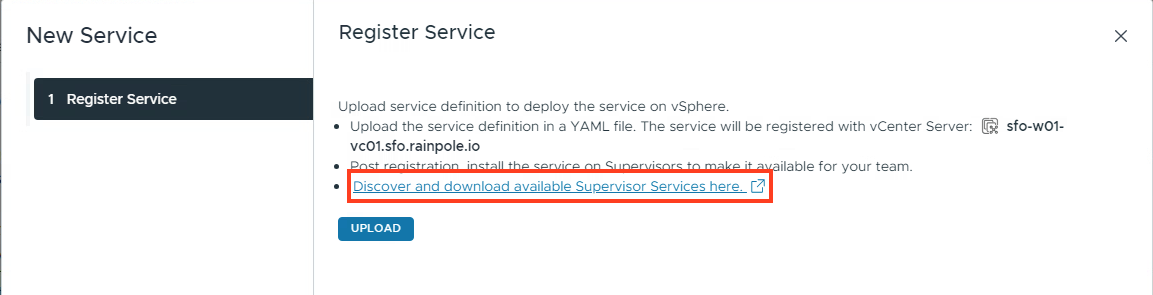
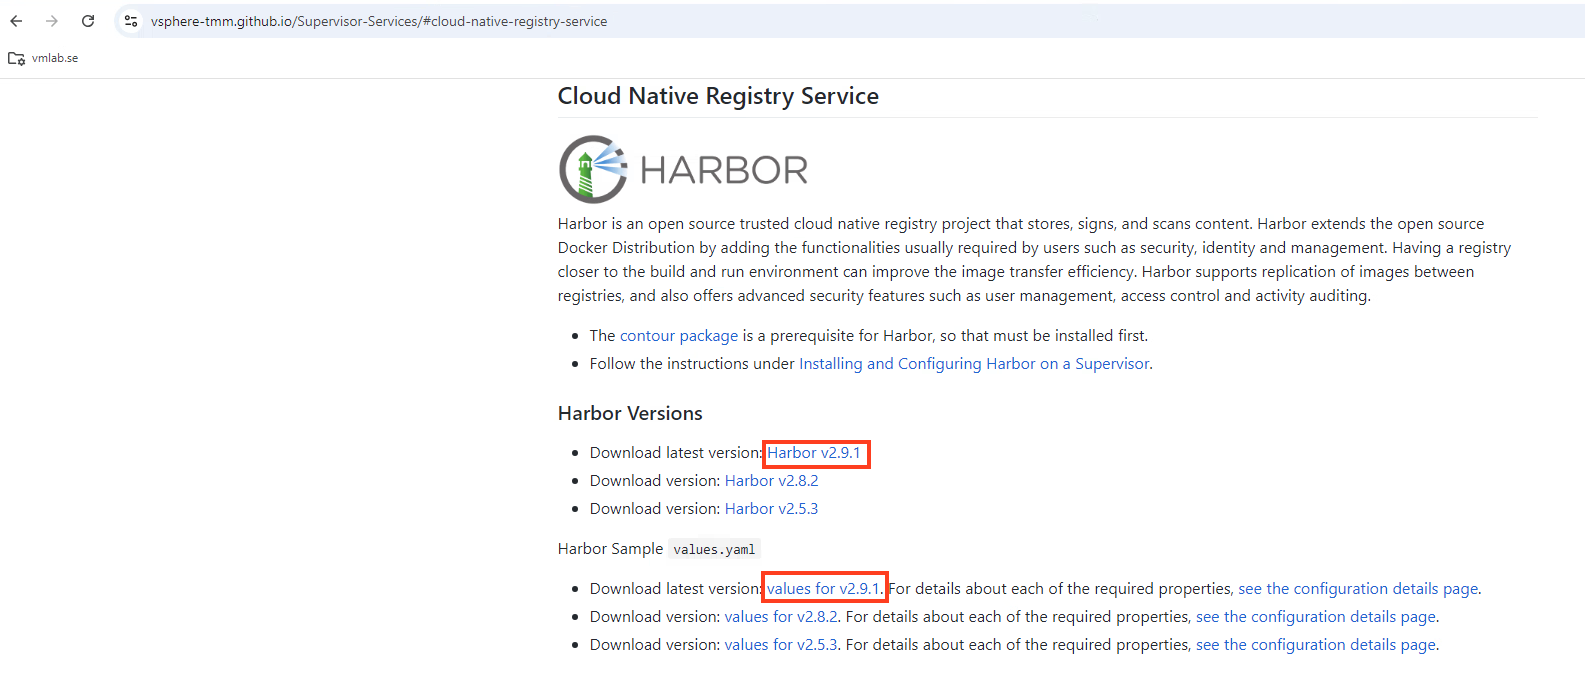
Follow the link to GitHub. Here you will find configuration files for various services.
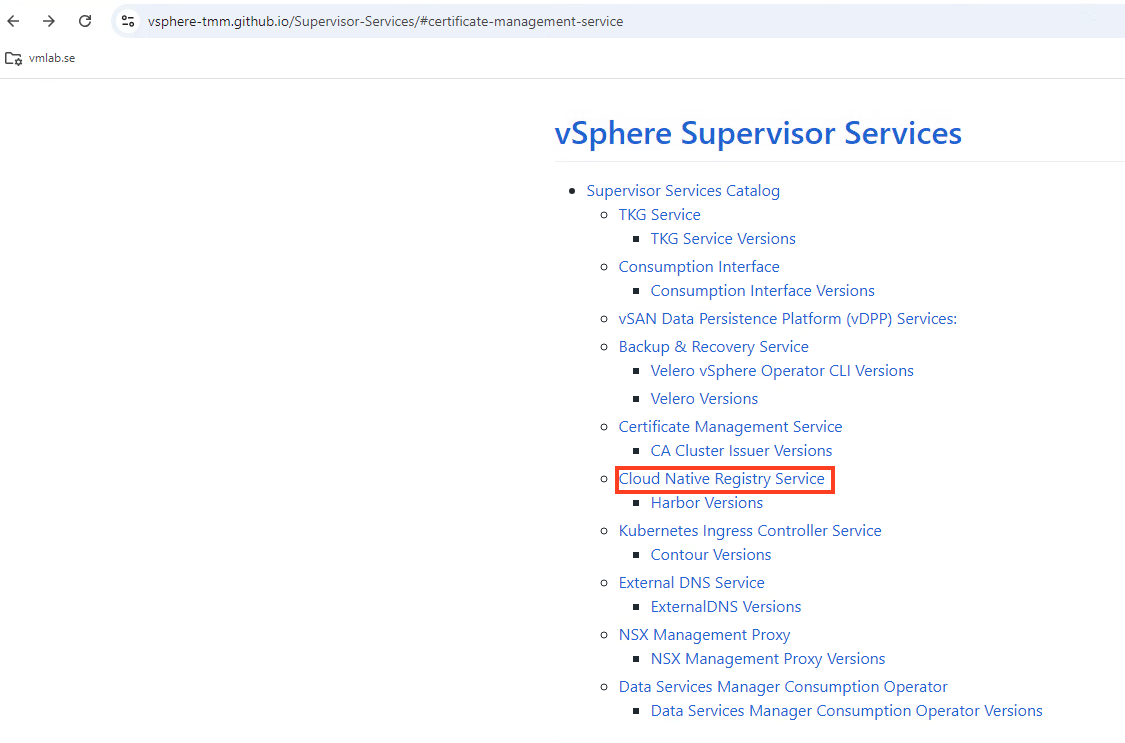
Download both Harbor v2.9.1 and values for v2.9.1
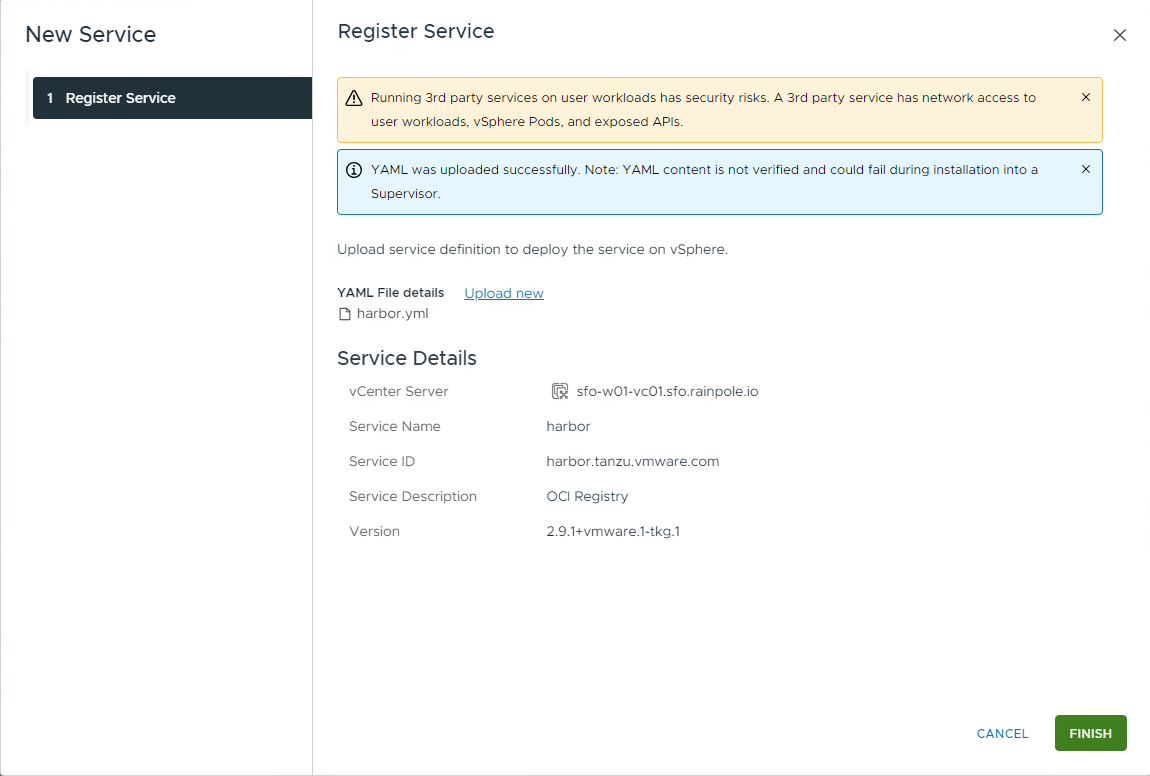
Press Upload and then finish.
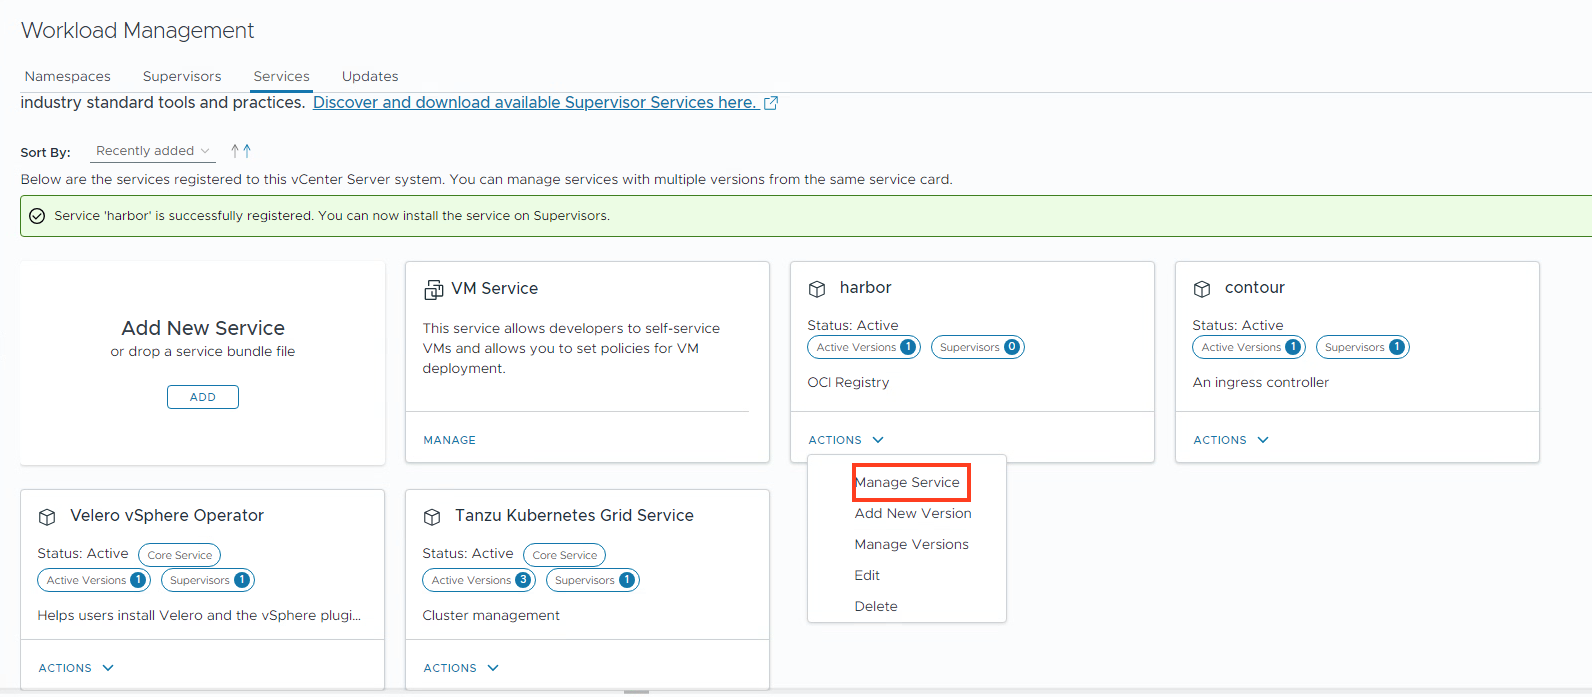
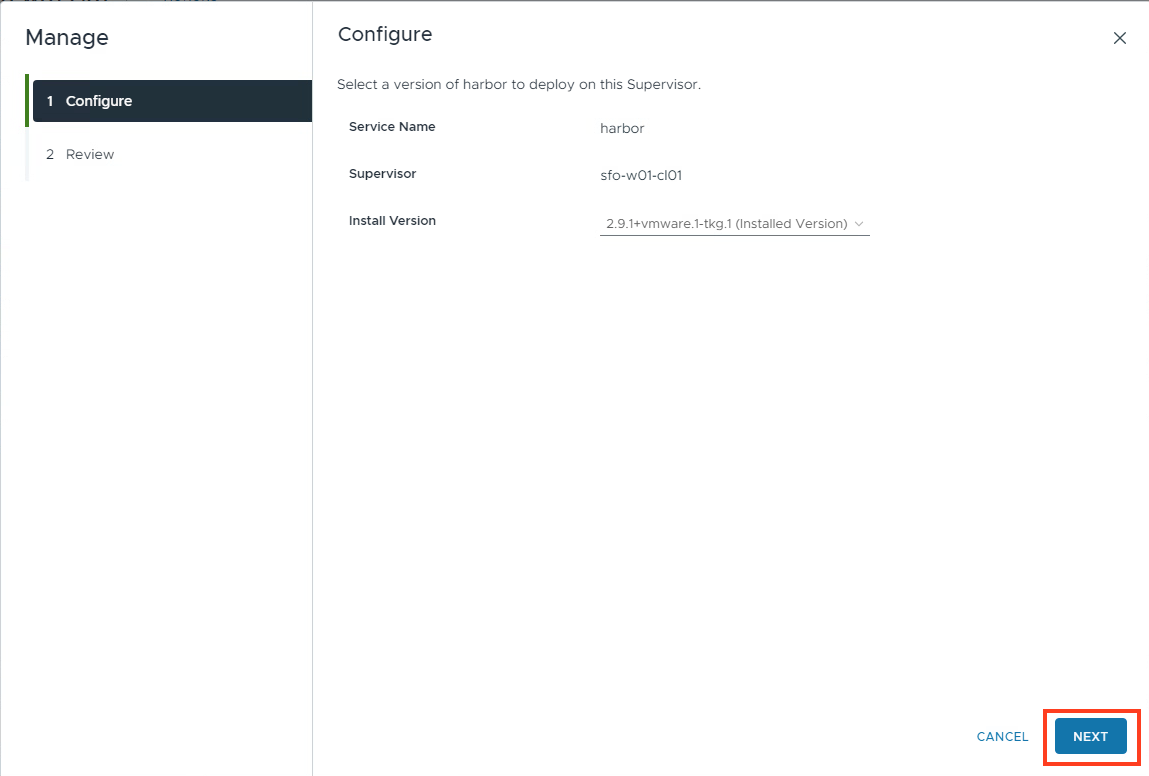
Go to Action->Manage Service
Select the Supervisor and press Next
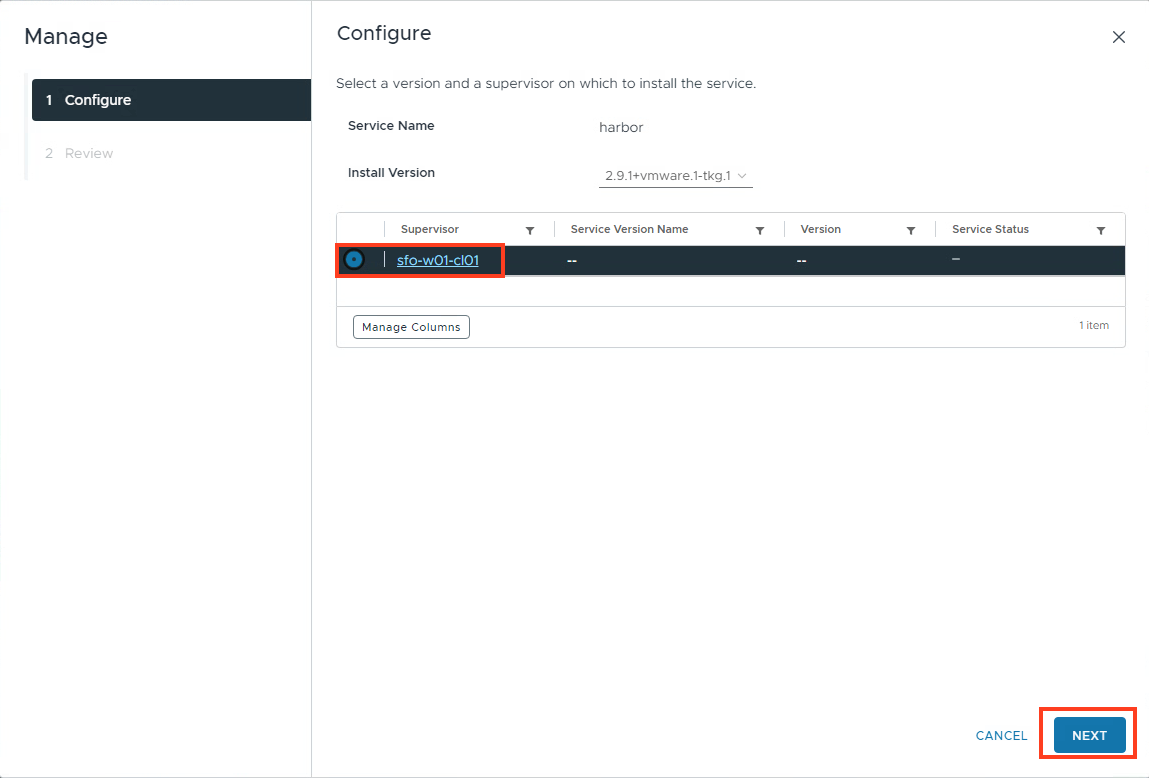
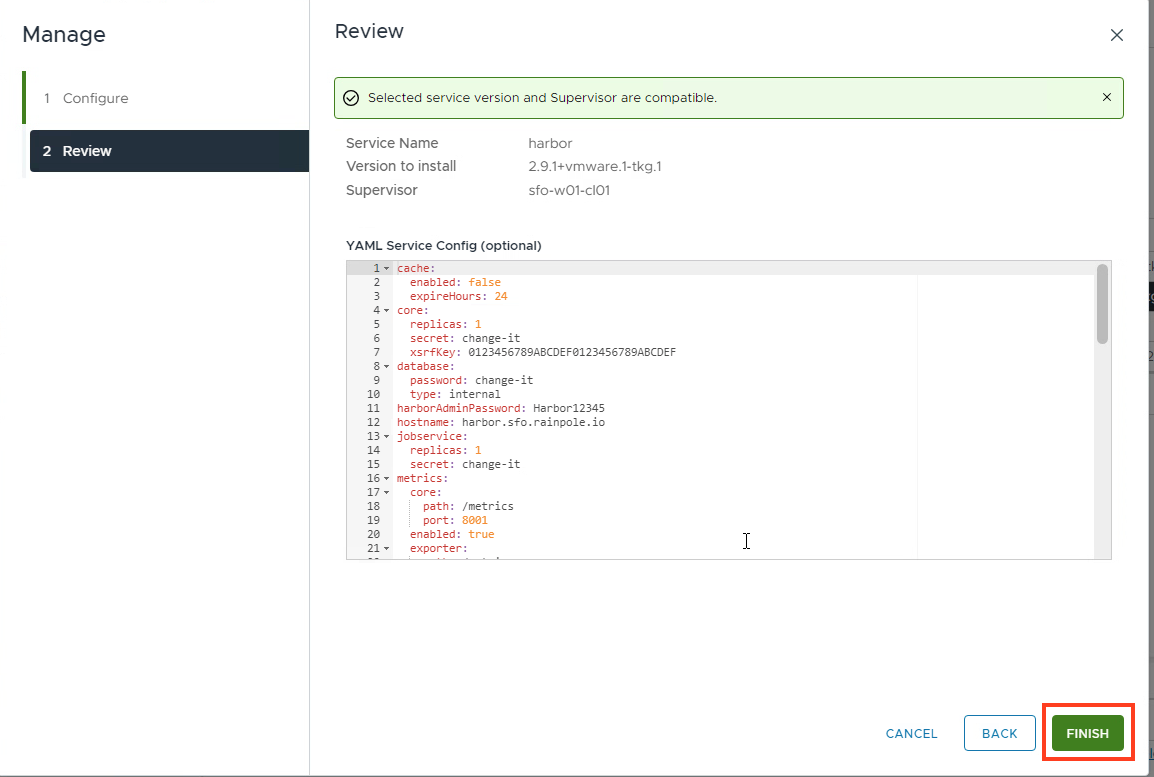
Paste in the values config (change setting where needed.)
Do not forget to change the hostname. In my case it is harbor.sfo.rainpole.io.
Add tlsCertificateSecretName: harbor-cert (This is the tls-secret you are going to use.)
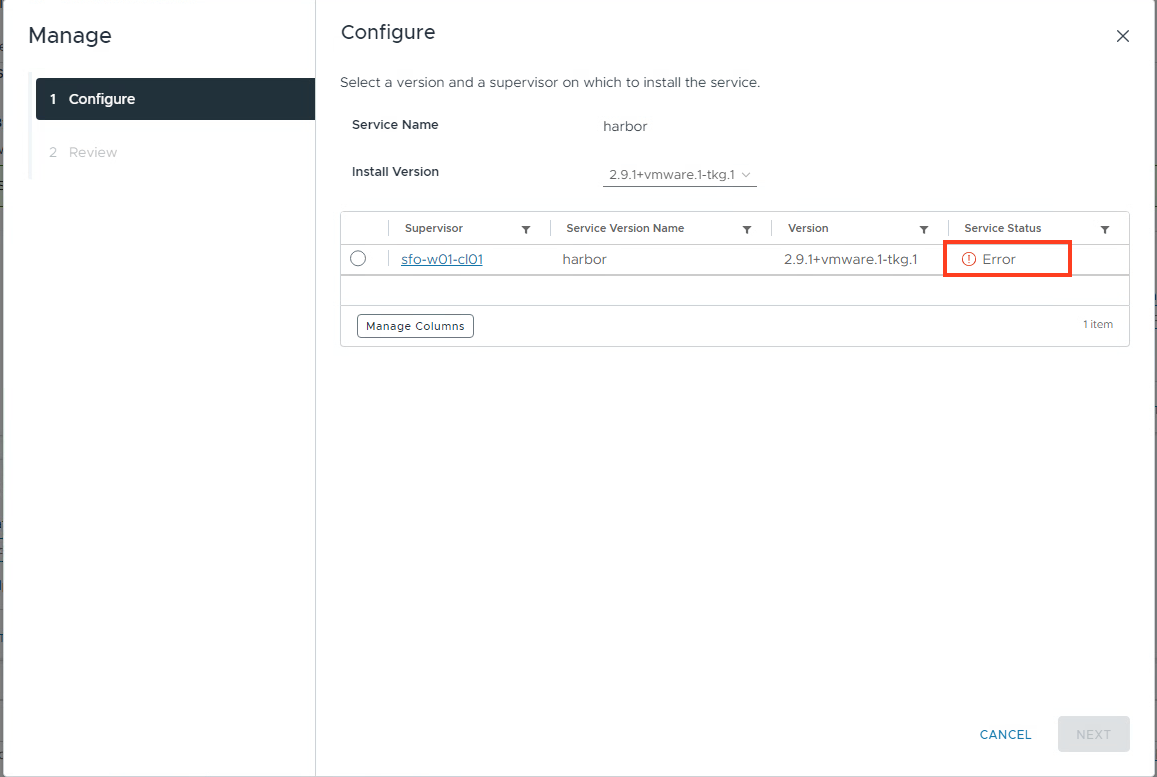
Press finish. Harbor will now install.

The installation will fail because the harbor-cert secret does not exist yet.
2. Creating the certificates
I am using Microsoft AD as CA. I have chosen MS CA, because sddc mananager can use MS CA as certificate manager.
Create CSR
Create a CSR. Important note here, you should use SAN
I am using OpenSSL to create the CSR.
My OpenSSL config file
[ req ]
default_bits       = 2048
distinguished_name = req_distinguished_name
req_extensions     = req_ext
[ req_distinguished_name ]
countryName                = Country Name (NL)
stateOrProvinceName        = State or Province Name (ZH)
localityName               = Locality Name (FQ)
organizationName           = Organization Name (FQDN)
commonName                 = Common Name (e.g. server FQDN)
[ req_ext ]
subjectAltName = @alt_names
[alt_names]
DNS.1   = harbor.sfo.rainpole.io
Run the following command. Openssl will create the file CSR.csr and the key file tls.key
openssl req -out CSR.csr -new -newkey rsa:2048 -nodes -keyout tls.key -config config
<snip>
-----
Country Name (NL) []:NL
State or Province Name (ZH) []:ZH
Locality Name (FQ) []:FQ
Organization Name (FQDN) []:FQDN
Common Name (e.g. server FQDN) []:harbor.sfo.rainpole.io
Request the certificate
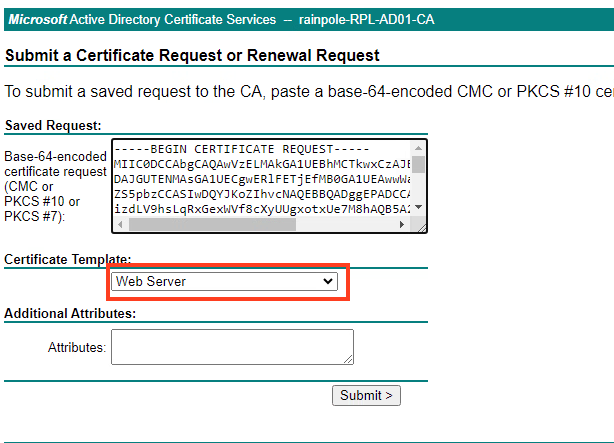
Go to the URL of your certsrv
In my setup it is https://rpl-ad01.rainpole.io/certsrv
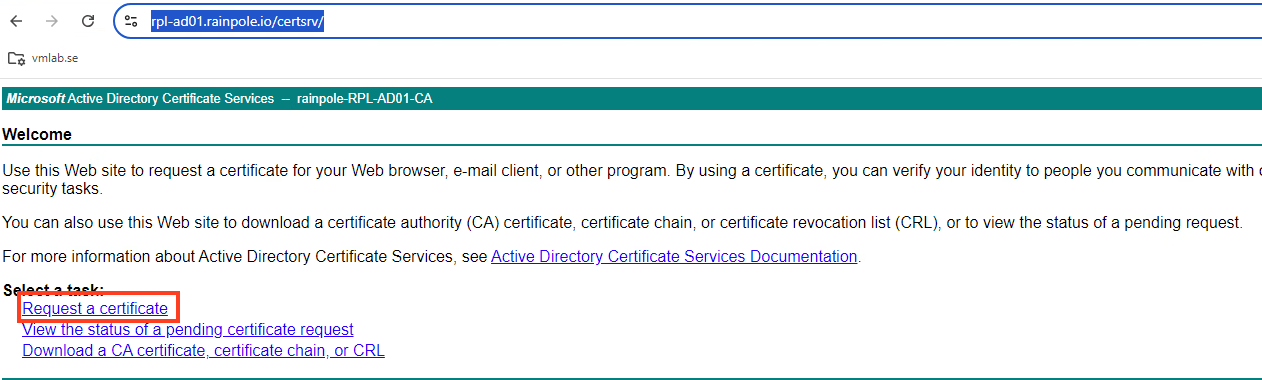
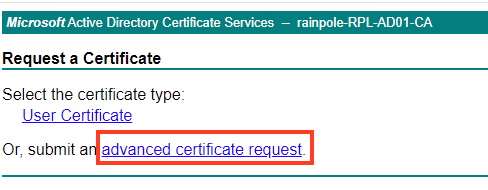
Paste the CSR you have created and select Web Server. Press Submit
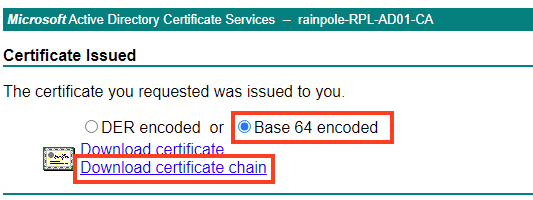
Select Base64 encoded.
Press Download certificate chain. This will download the file certnew.p7b
Extract the certificate and CA cert.
openssl pkcs7 -inform PEM -outform PEM -in certnew.p7b -print_certs > certificate_bundle
Then copy the certificate from the file certificate_bundle to tls.crt and ca.crt (only between —–BEGIN CERTIFICATE—– and —–END CERTIFICATE—–)
You should now have 3 files:
ca.crt
tls.crt
tls.key
#Change to the harbor context
kubectl config use-context svc-harbor-domain-c9

#Create the harbor-cert secret
kubectl create secret generic harbor-cert --from-file=ca.crt=ca.crt --from-file=tls.crt=tls.crt --from-file=tls.key=tls.key  --dry-run=client -o yaml | kubectl apply -f -
secret/harbor-cert created
Now you need to go back to the Service configuration. You do not need to change anything.
Click next and then Finish.
Now Harbor will configure correctly. (If not. Retry the Service configuration again.)
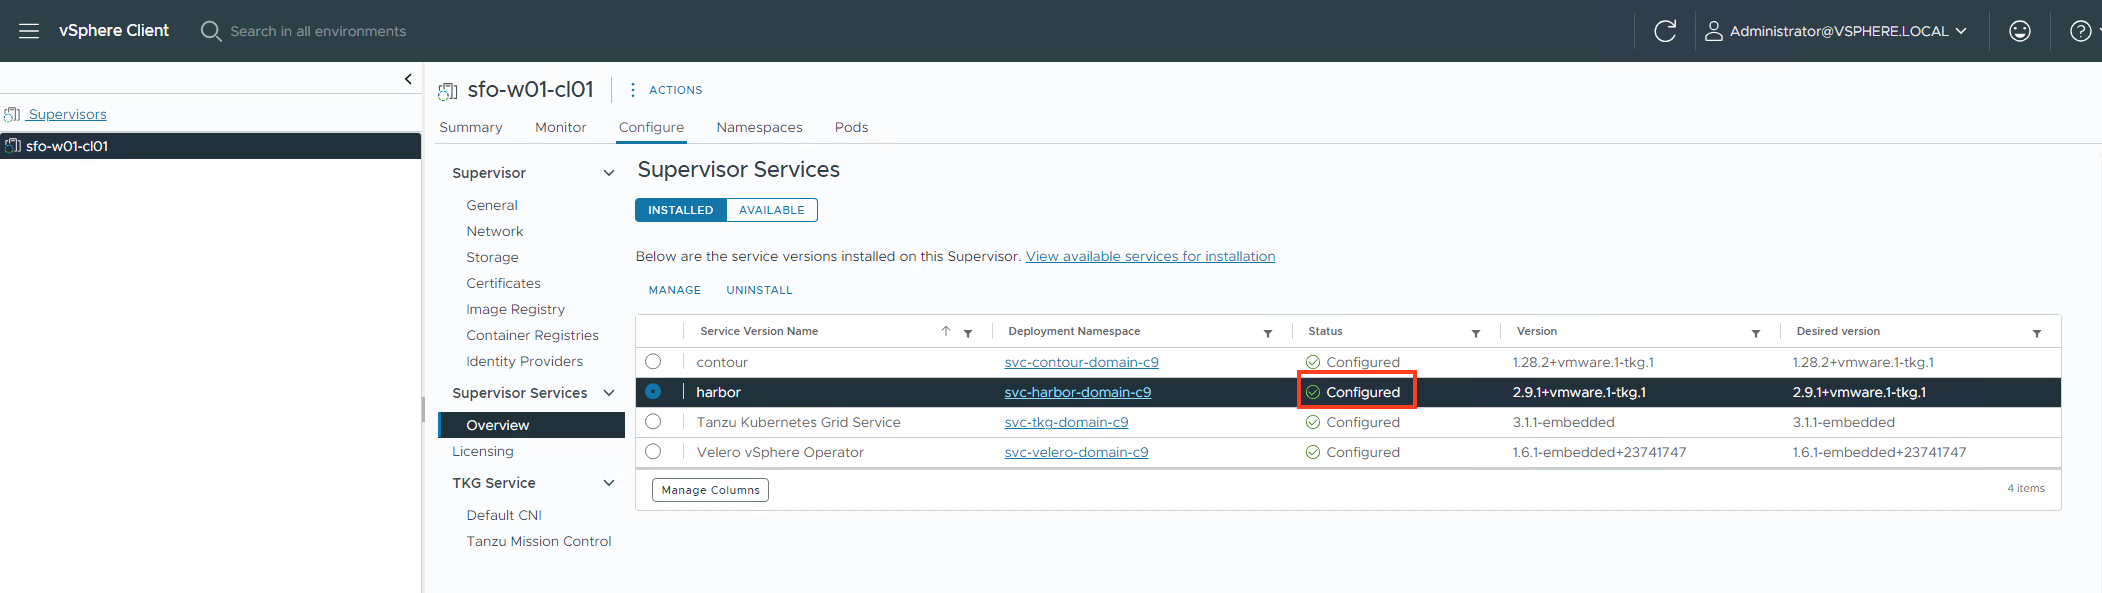
3. Testing Harbor
Time to test if Harbor is working.
You can find the IP address here. (Add this to the DNS. In my case, it is harbor.sfo.rainpole.io A 192.168.21.3.) The IP address in the browser will not work because of how Contour is configured.
You can find the correct ip here:
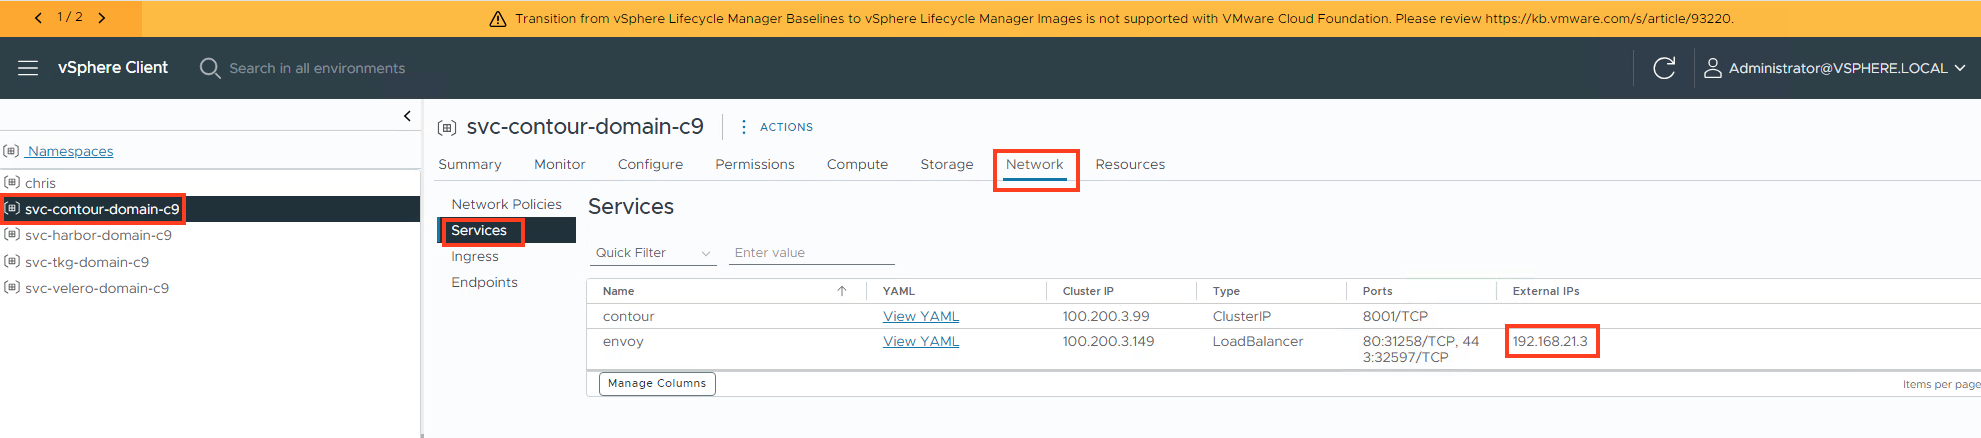
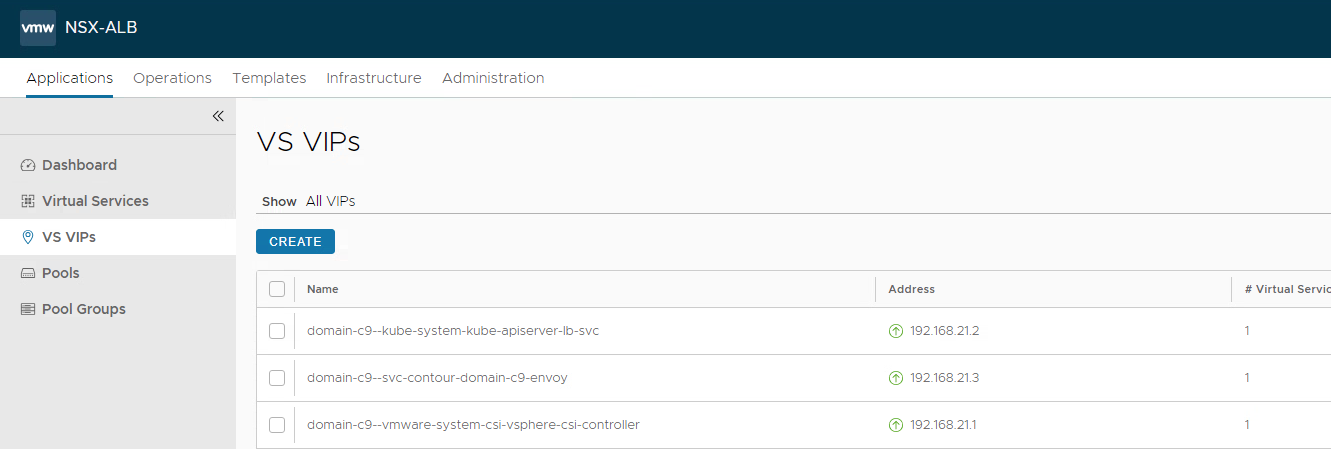
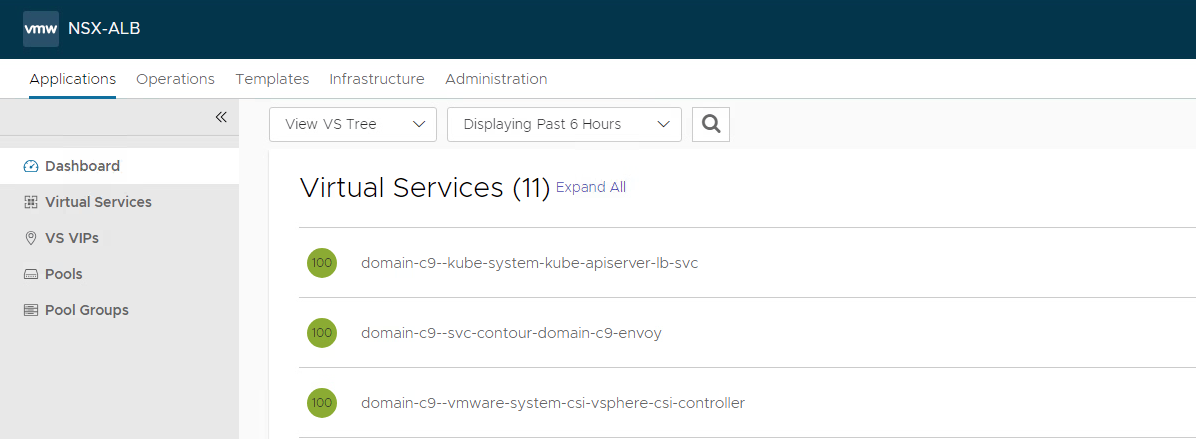
Or get the IP from Avi if you are using that:
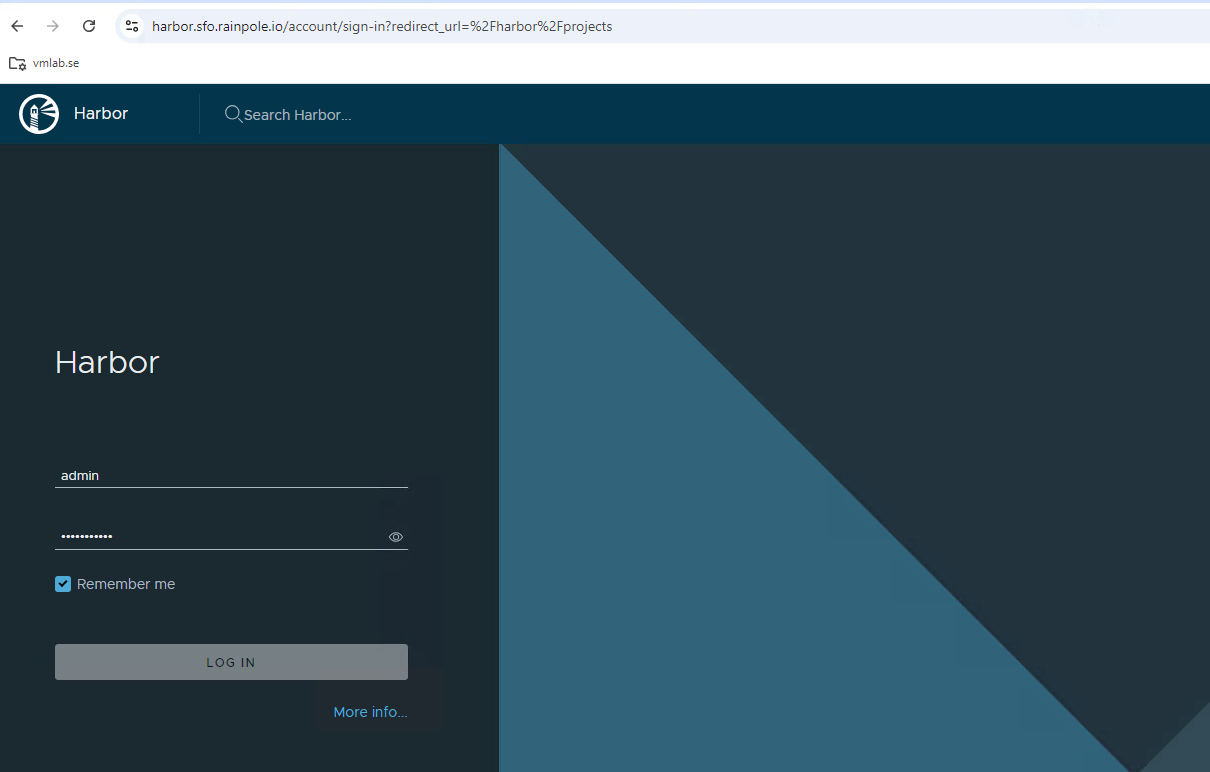
Go to the Url.
As you can see, I do not have a certificate warning.
Please note: You might have to add your CA to the trust on the machine you are using your browser on.
See at the end of this blog under Additional: trust certificates
4. Add CA certificate to Tanzu workload cluster
Now for the next step.
You might notice you will get an error when pulling from Harbor.
The solution is adding the CA certificate to the Tanzu cluster.
Link to the documentation: here
Warning Failed 10s kubelet Failed to pull image "harbor.sfo.rainpole.io:443/ako/ako-gateway-api:1.12.1": failed to pull and unpack image "harbor.sfo.rainpole.io:443/ako/ako-gateway-api:1.12.1": failed to resolve reference "harbor.sfo.rainpole.io:443/ako/ako-gateway-api:1.12.1": failed to do request: Head "https://harbor.sfo.rainpole.io:443/v2/ako/ako-gateway-api/manifests/1.12.1": tls: failed to verify certificate: x509: certificate signed by unknown authorityTe following needs to be added to your cluster config file.
- name: trust
  value:
    additionalTrustedCAs:
    - name: additional-ca-1
Here is my cluster config file as an example. Clustername tkgs-cluster01 in namespace chris
tkgs-cluster01.yaml
apiVersion: cluster.x-k8s.io/v1beta1
kind: Cluster
metadata:
  name: tkgs-cluster01
  namespace: chris
spec:
  clusterNetwork:
    services:
      cidrBlocks: ["10.6.64.0/22"]
    pods:
      cidrBlocks: ["10.6.68.0/22"]
    serviceDomain: "cluster.local"
  topology:
    class: tanzukubernetescluster
    version: v1.30.1---vmware.1-fips-tkg.5
    controlPlane:
      replicas: 1
      metadata:
        annotations:
          run.tanzu.vmware.com/resolve-os-image: os-name=ubuntu
    workers:
      machineDeployments:
        - class: node-pool
          name: node-pool-01
          replicas: 1
          metadata:
            annotations:
              run.tanzu.vmware.com/resolve-os-image: os-name=ubuntu
    variables:
      - name: vmClass
        value: best-effort-small
      - name: storageClass
        value: vsan-default-storage-policy
      - name: trust
        value:
          additionalTrustedCAs:
          - name: additional-ca-1
We need to create the following secret in the chris namespace.
tkgs-cluster01-user-trusted-ca-secret.yaml
apiVersion: v1
data:
  additional-ca-1: TFMwdEx.....
kind: Secret
metadata:
  name: tkgs-cluster01-user-trusted-ca-secret
  namespace: chris
type: Opaque
The value of the secret’s data map is a user-defined string which is the name for the CA certificate (additional-ca-1 in this example) whose value is the CA certificate in PEM format that is double base64-encoded.
In the metadata section, the secret must be named CLUSTER-NAME-user-trusted-ca-secret, where CLUSTER-NAME is the name of the Cluster. This secret must be created in the same vSphere Namespace as the Cluster.
To double base64-encode the contents of your CA certificate, go to the directory where you created the CSR earlier. The output from the following command needs to be added in the additional-ca-1 field.
base64 -w 0 ca.crt | base64 -w 0
TFMwdEx...

#change to the correct context
kubectl config use-context chris
kubectl apply -f tkgs-cluster01-user-trusted-ca-secret.yaml

#create the cluster
kubectl apply -f tkgs-cluster01.yaml
Warning: If you add additionalTrustedCAs to an already running cluster, Tanzu will create new master and worker nodes and delete the old ones. Please keep that in mind!
When we look back now to the pulling of the images for the pods, you can see it has no errors anymore.
  Normal  Pulled              2m31s                  kubelet                              Successfully pulled image "projects.registry.vmware.com/ako/ako:1.12.1" in 16.551s (31.568s including waiting). Image size: 61150904 bytes.
  Normal  ValidatedUserInput  2m27s (x2 over 2m28s)  avi-kubernetes-operator              User input validation completed.
  Normal  Pulled              2m11s                  kubelet                              Successfully pulled image "harbor.sfo.rainpole.io:443/ako/ako-gateway-api:1.12.1" in 5.689s (20.088s including waiting). Image size: 61592133 bytes.
Additional: trust certificates
To trust the certificates, you might need to ad the CA cert to the trust of your OS.
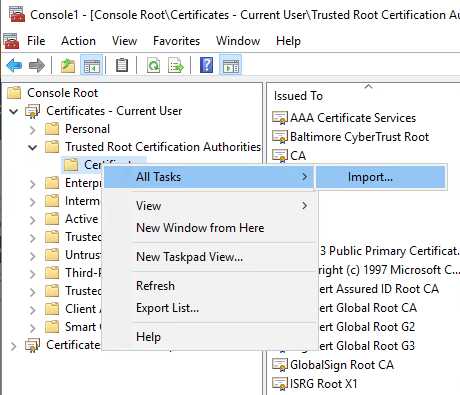
Windows:
1. Launch MMC (mmc.exe).
2. Choose File > Add/Remove Snap-ins.
3. Choose Certificates, then choose Add.
4. Choose My user account.
If you want the cert to be available for all users, choose local computer
5. Import the ca.crt file.
If you want the cert to be available for all users
Ubuntu:
sudo apt-get install -y ca-certificates
sudo cp ca.crt /usr/local/share/ca-certificates/rainpole.crt
sudo update-ca-certificates
Final words
It would be great if rotation of the certificates in Harbor could be done from the SDDC manager.
Maybe it is possible with cert-manager. I have briefly looked at it, but i am struggling with cert-manager using MS CA.
I you have any question or comment or ideas, let me know.