Introduction
VMware Avi LoadBalancer is a 100% software-defined multi-cloud application services platform with Software Load Balancers, Intelligent WAF (iWAF), and Container Ingress.
All modern applications use load balancing nowadays. Load balancing is the process of distributing network traffic across multiple servers.
The goal of this blog
The purpose of this blog is to explain how to install and configure Avi Kubernetes Operator (AKO) to utilize VPC in VCF9 with VKS. I will not cover the installation of Avi, VCF, or the Supervisor itself.
This blog is very technical. It is important that you are already familiar with Avi, Supervisor and Kubernetes.
What I am using
For my setup, I am using the following:
VCF 9.0
vCenter 9.0
NSX 9.0
ESXi 9.0
Avi 31.1.1 / AKO 1.13.3
Getting started
Before we get started, have the following already installed:
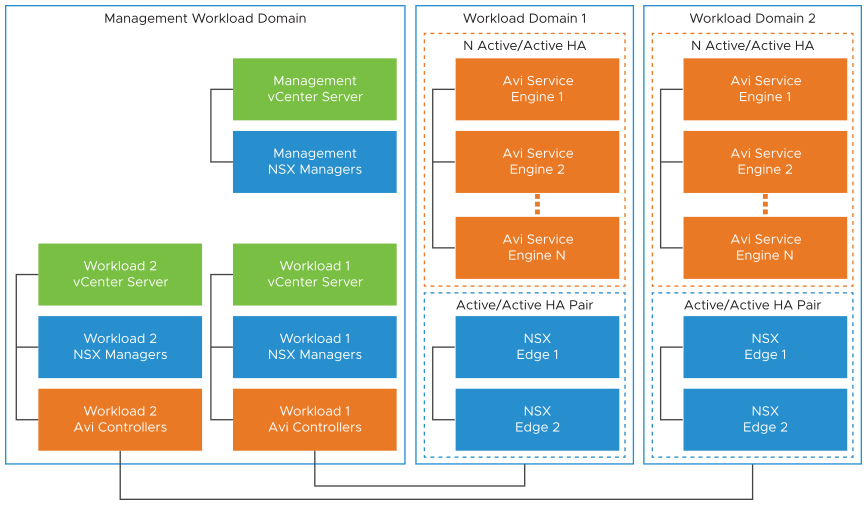
1. VCF 9.0 deployed. You can choose any deployment type (e.g., management domain only).
For production environments, it is recommended to separate the management domain from the workload domain.
2. Avi controller deployed and on-boarded to NSX manager (see documentation) and have the NSX cloud setup (with VPC enabled)
3. vSphere Supervisor services with VPC enabled. (see documentation)
4. VCF Automation (VCF-A) installed and Provider portal configured with All Apps ready to use.
Important Note: All naming conventions (including organization names in VCF-A, project names, and namespace names) must comply with DNS standards.
I am using the following CIDRS
10.100.0.0/23 – External subnet (Used for the VSvip IP adresses)
10.200.20.0/23 – Private subnet (Used as private IPs within the VPC)
All the configuration and yaml files can be found on my github.
Configure AVI to use VPC.
Important note: Avi controller needs to be onboarded to NSX manager. Please refer to Getting Started section.
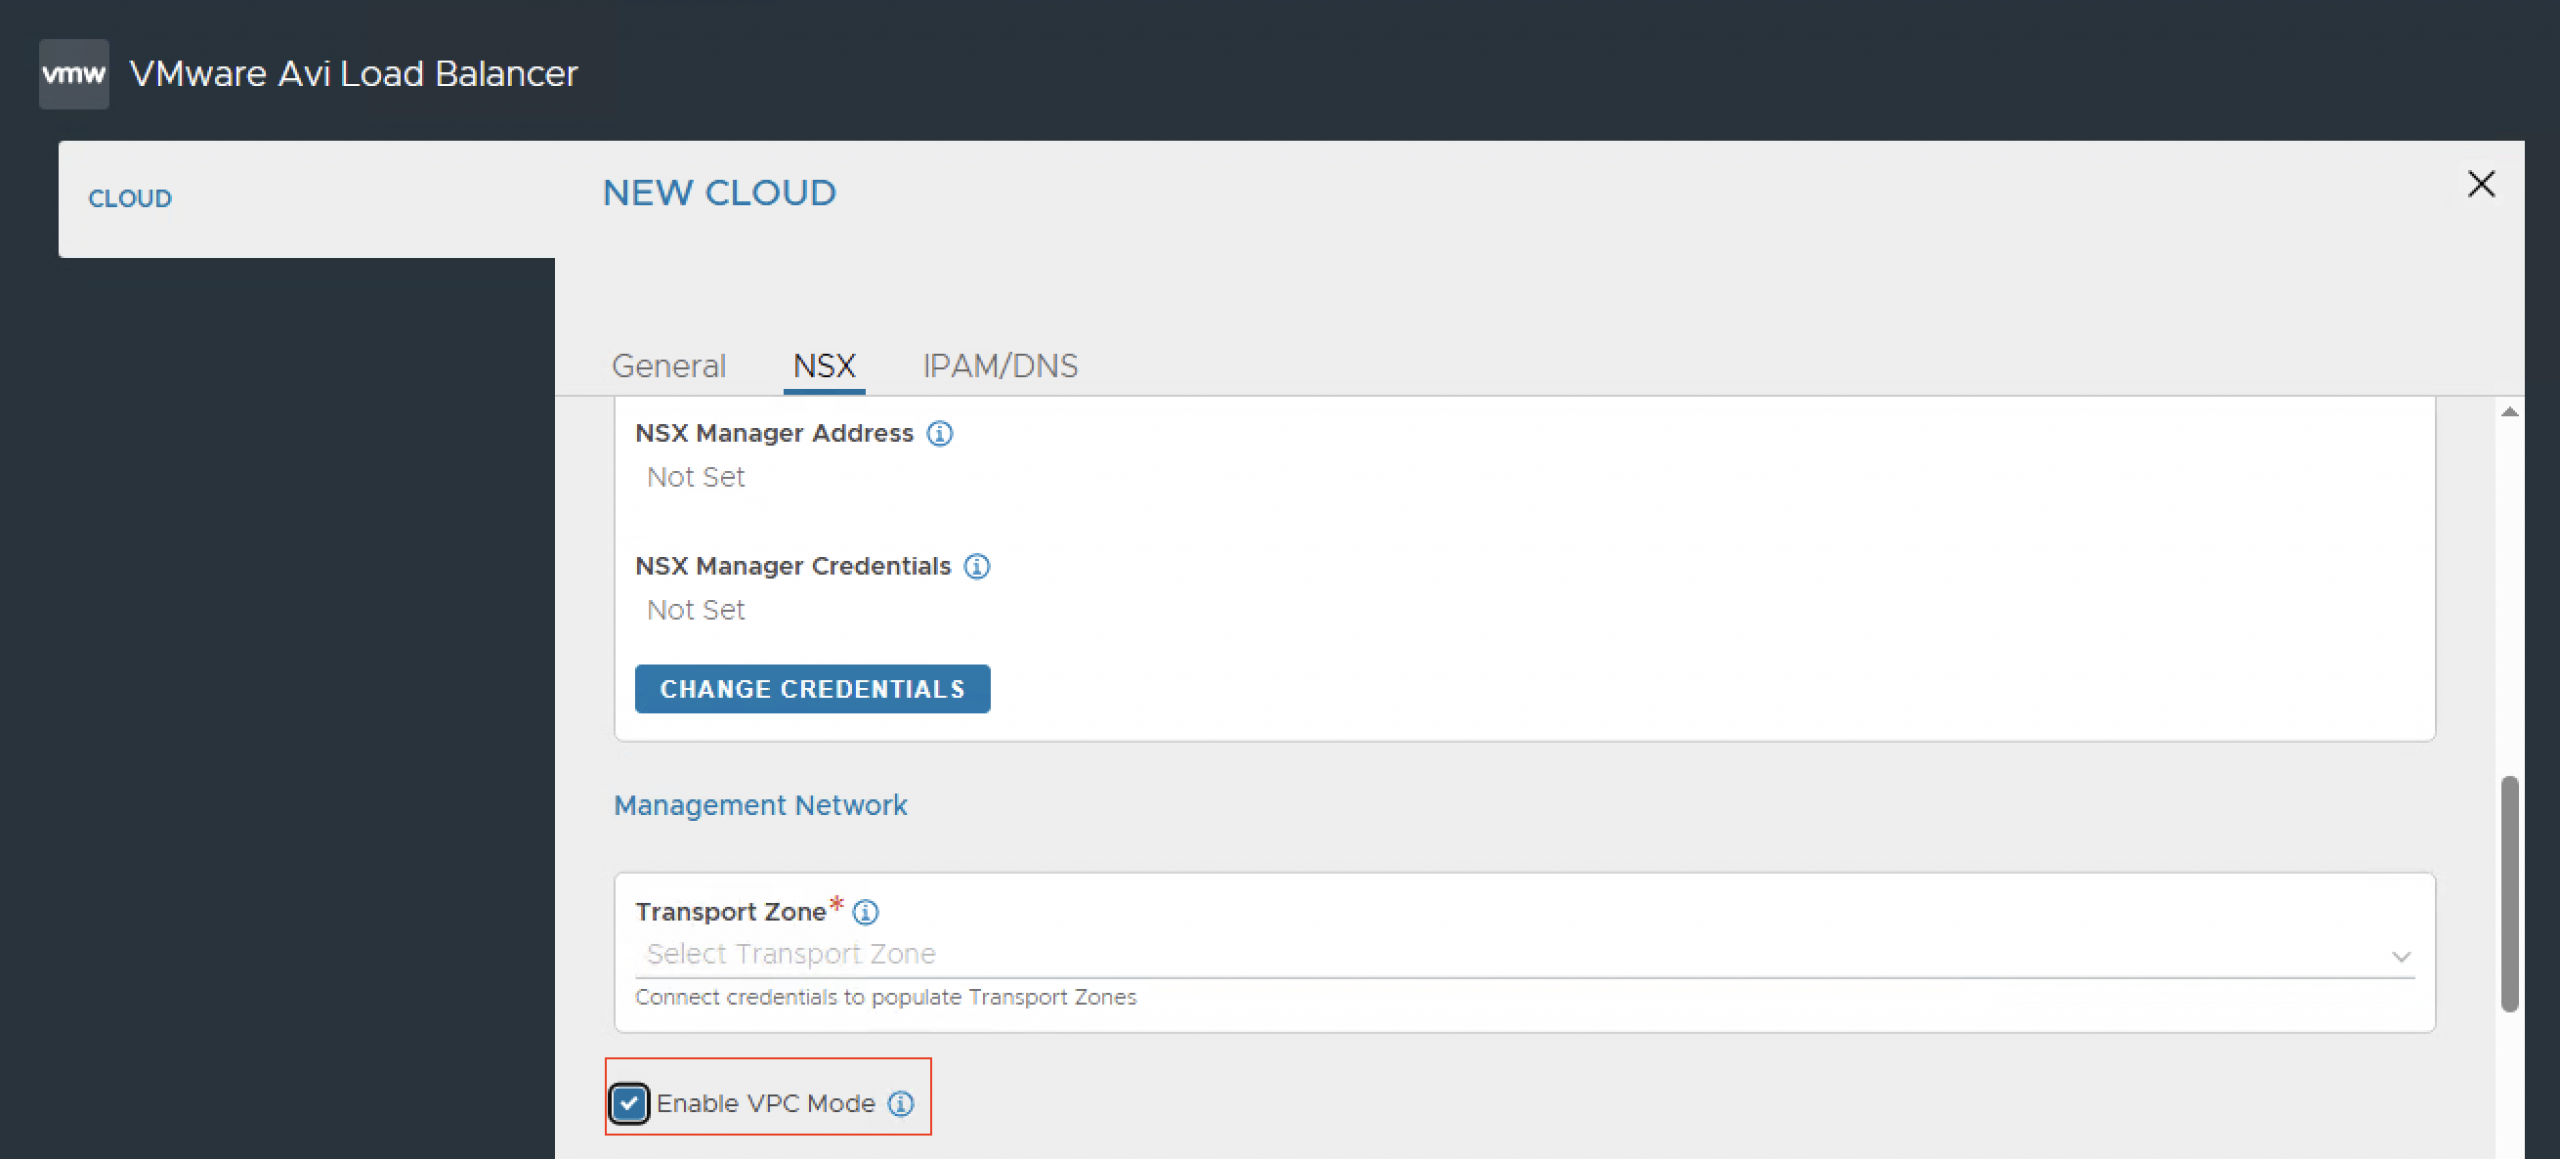
To use Avi with VPC, ensure you are on version 31.1.x. Configure an NSX cloud as you normally would and select the option to enable VPC mode.
For more information on creating an NSX cloud, follow this link.
Configure an NSX cloud as you would normally do. Select Enable VPC Mode
For more information on how to create an NSX cloud, follow this link
Using VCF-A to create VPC
VCF-A (VCF Automation) should be used to create new projects and VPCs.
The IP block I am using (10.100.0.0/23) is used for the external connectivity (i.e VIP ip address)

For the purpose of this blog I am creating a new organization. If you already created an organization, you could use that one, as long as it is All Apps.
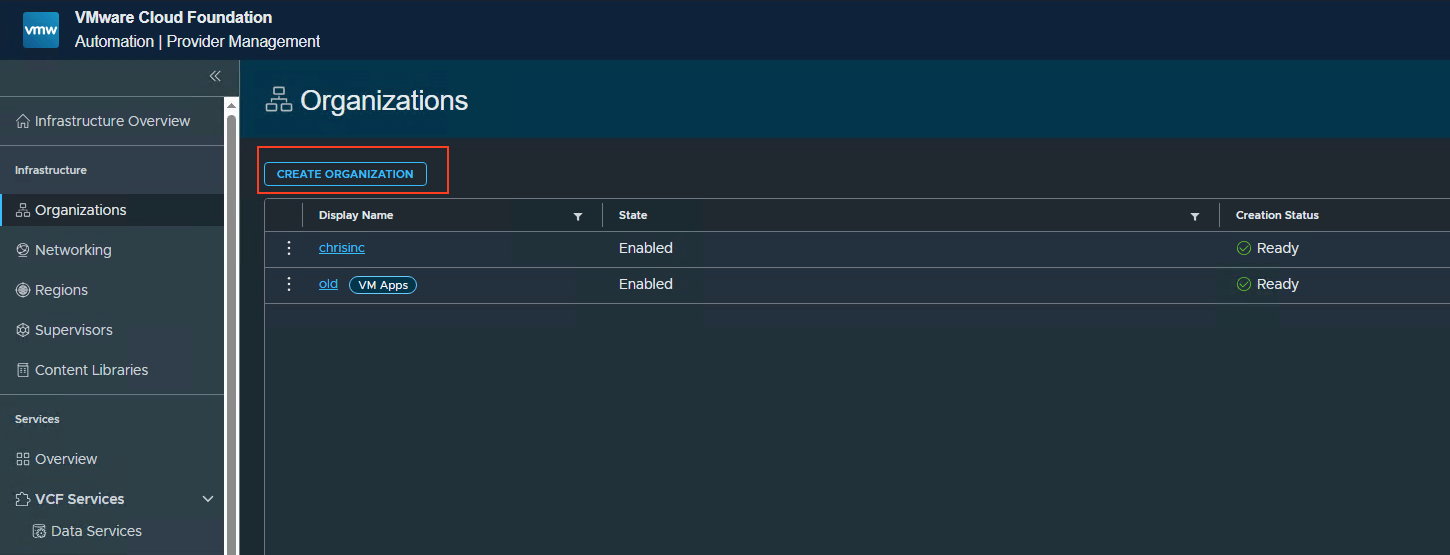
Login to VCF-A go to Organizations and press Create Organization.
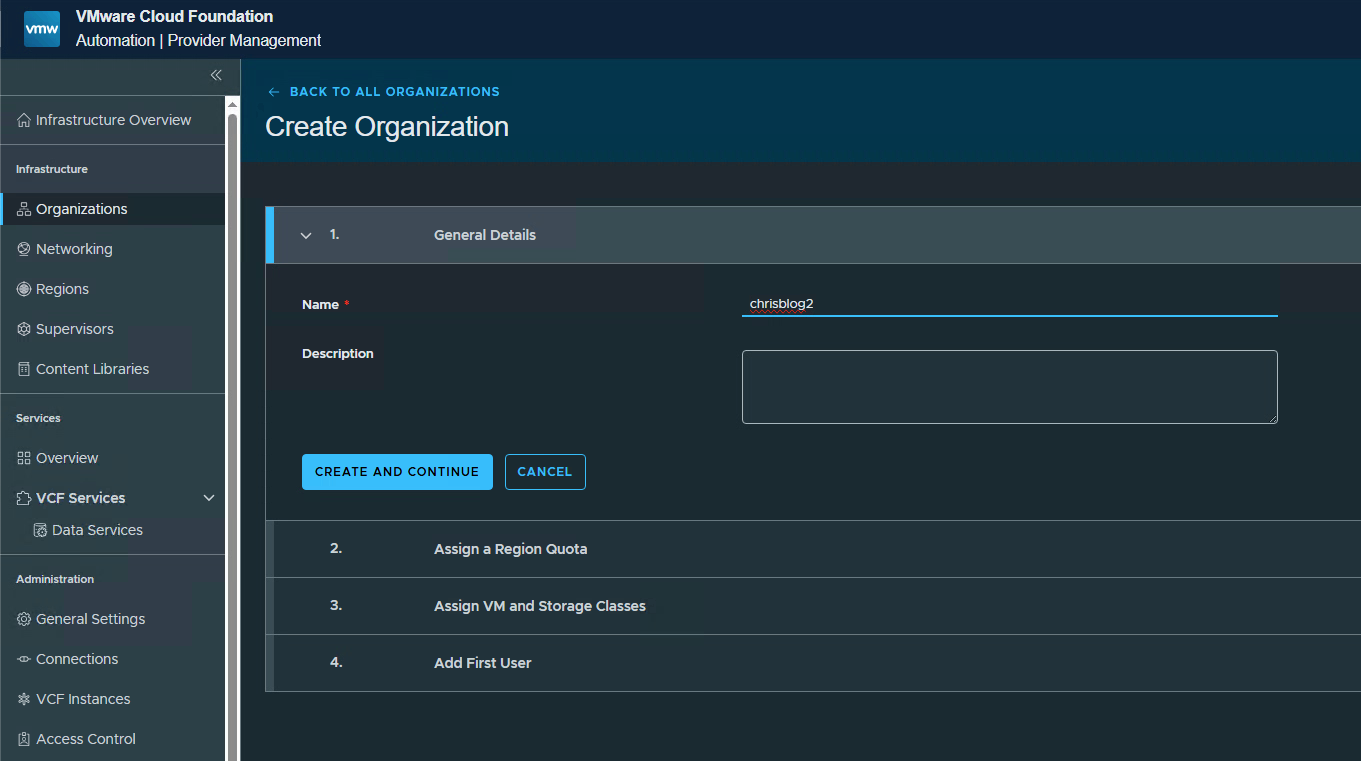
1. Create Organization
Give the organization and name and press Create and Continue
Select the Region, Supervisor and zone. Press Assign and Continue

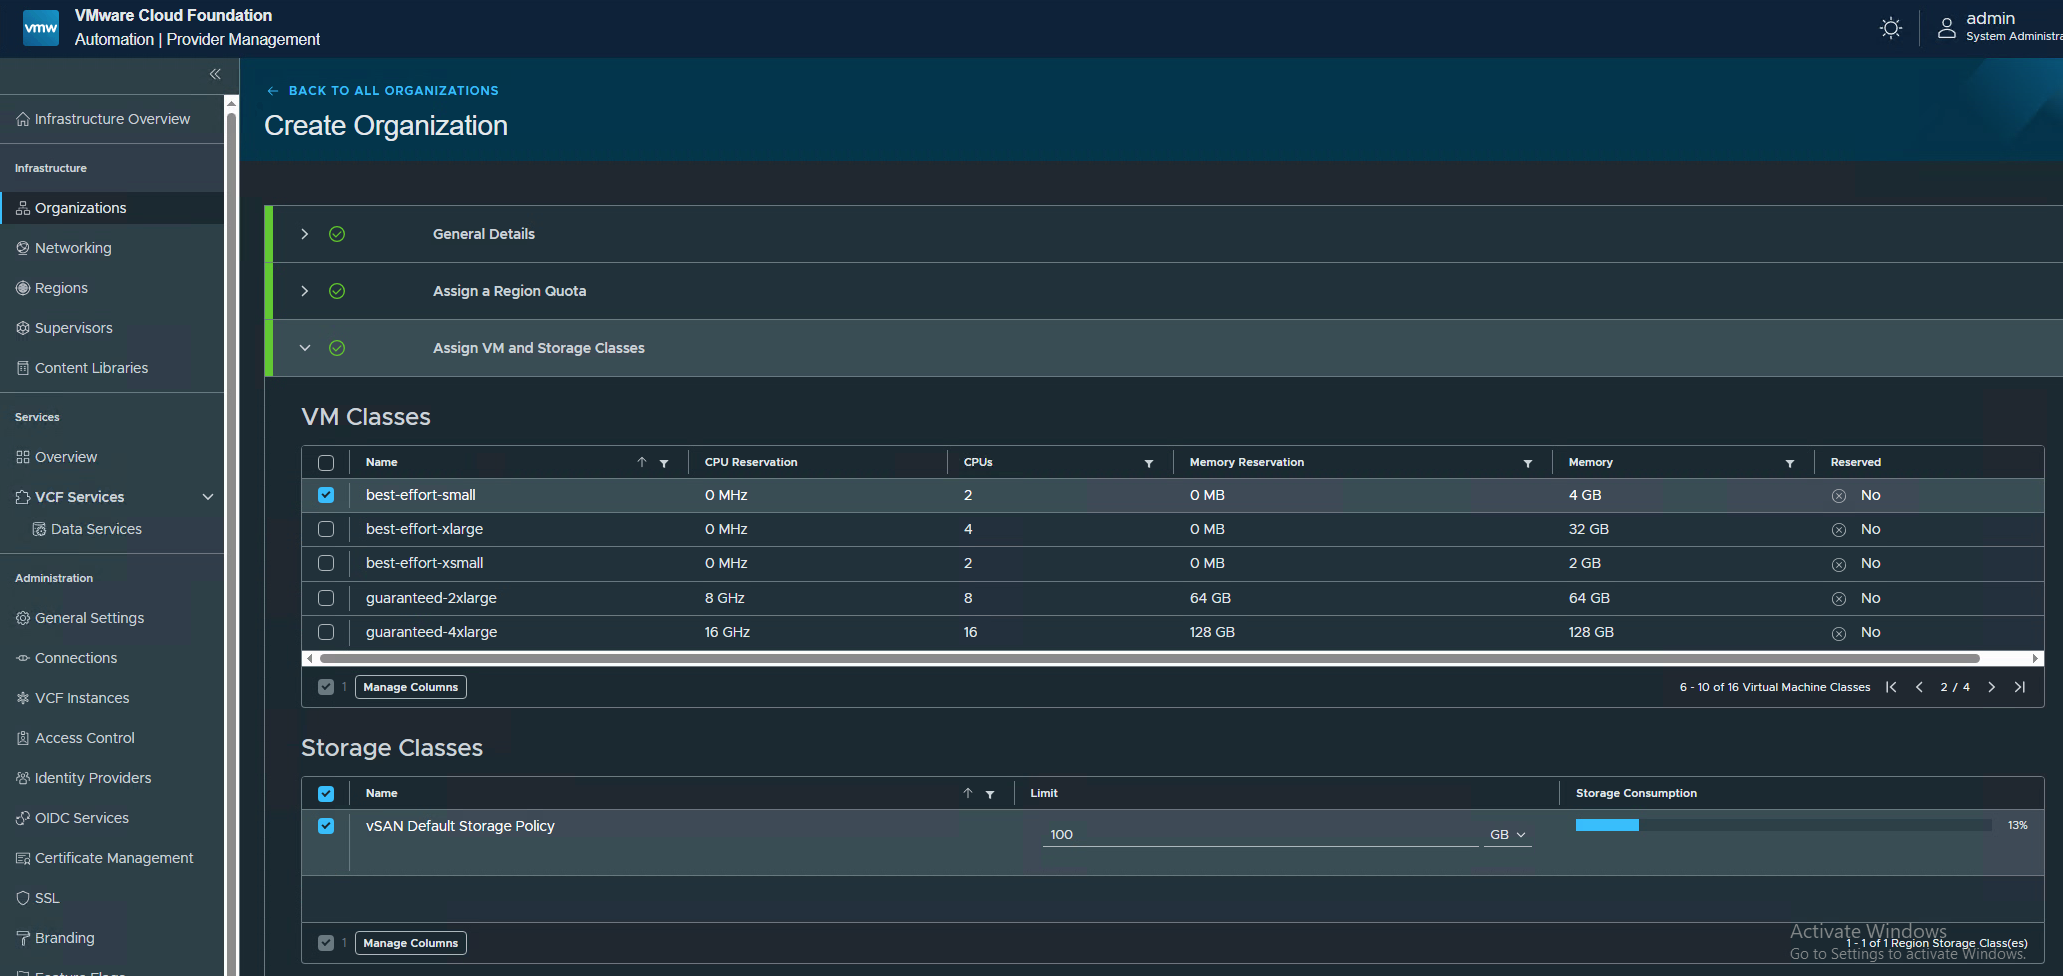
Select the VMclass and Storage Class you want to use. I am only using best-effort-small as a VMclass.
Create a user and assign a Role. Press Add user and finish.

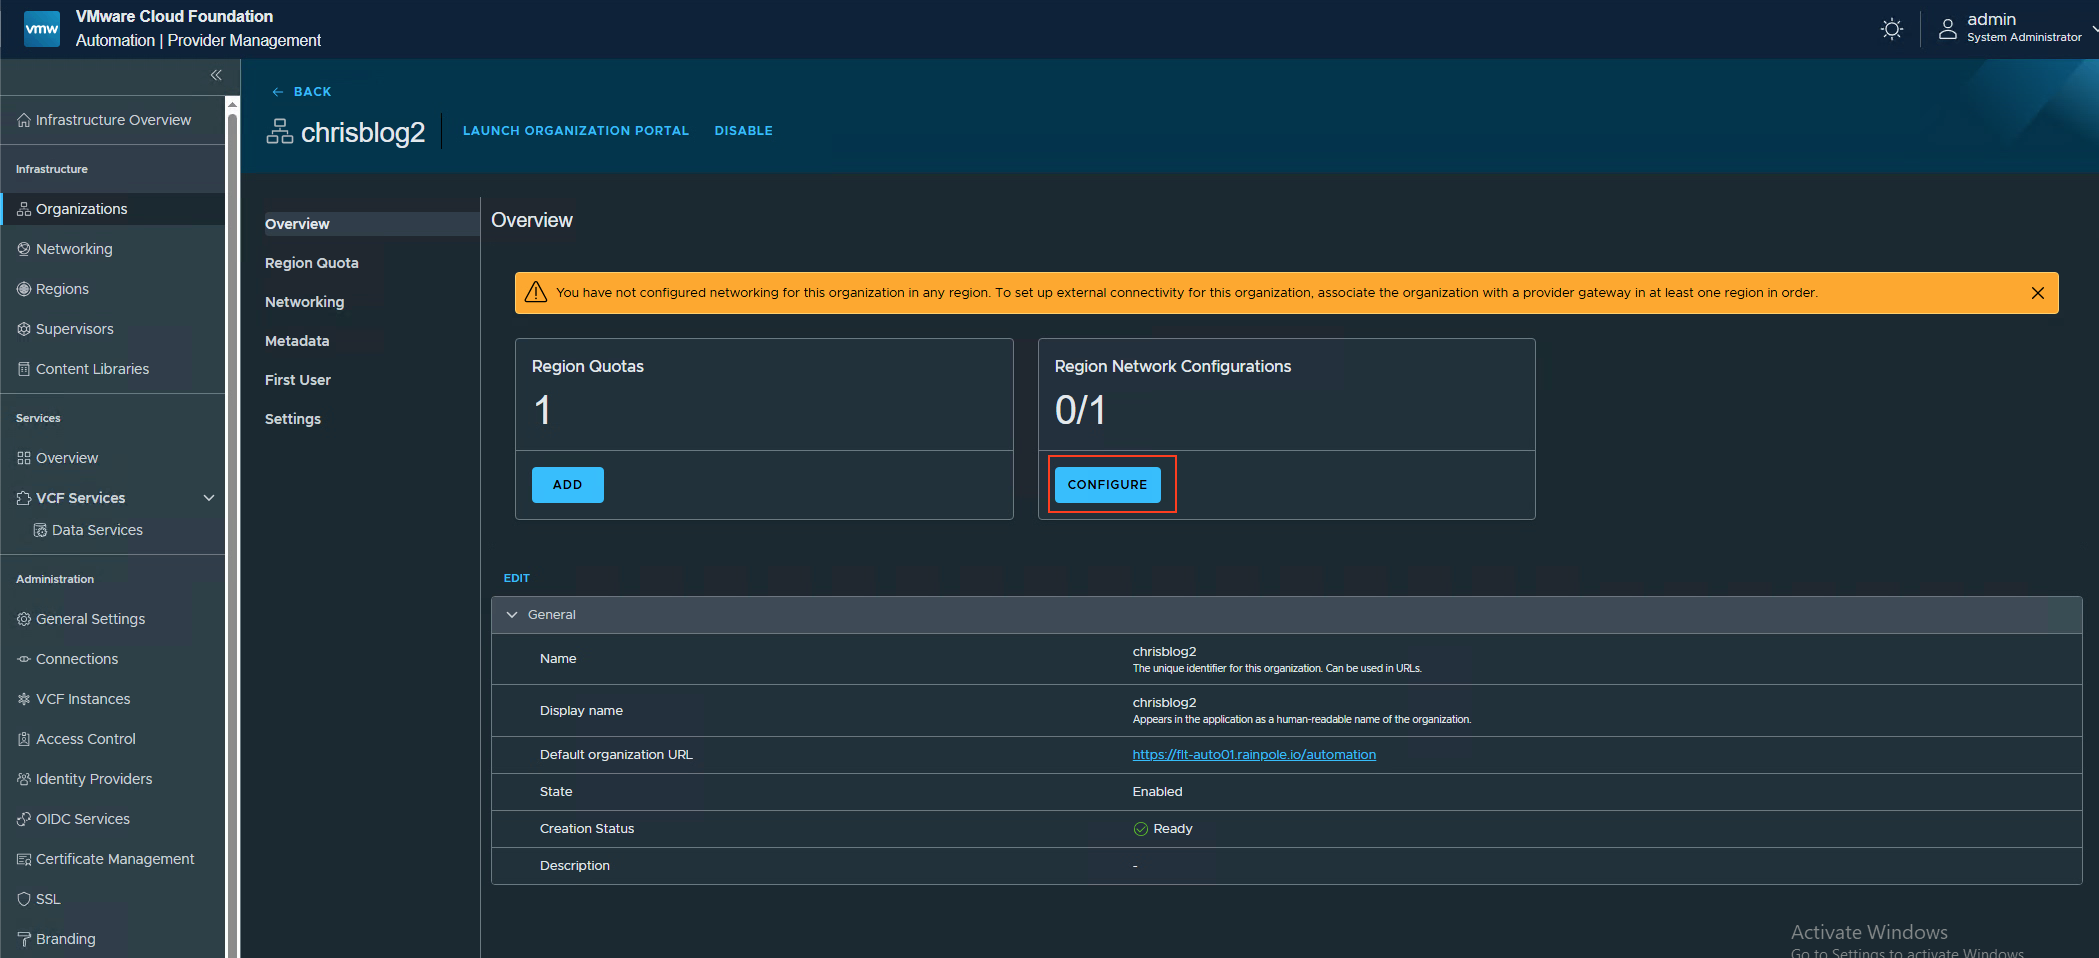
2. Configure networking
Press configure.
Press edit and give a logname.
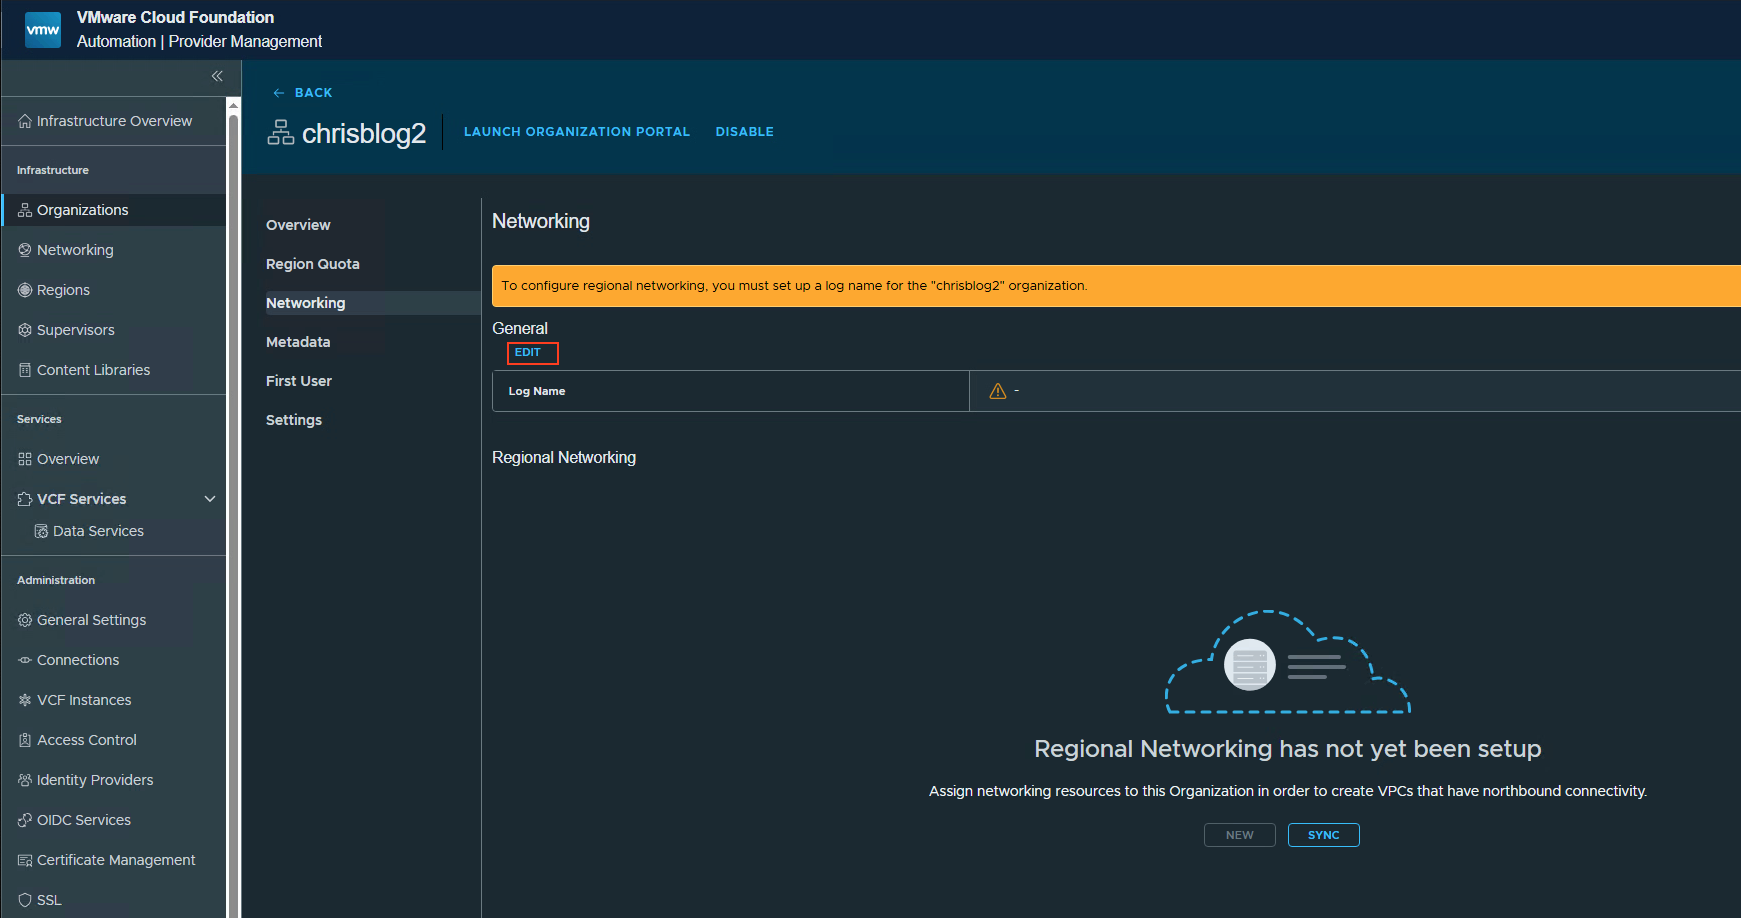
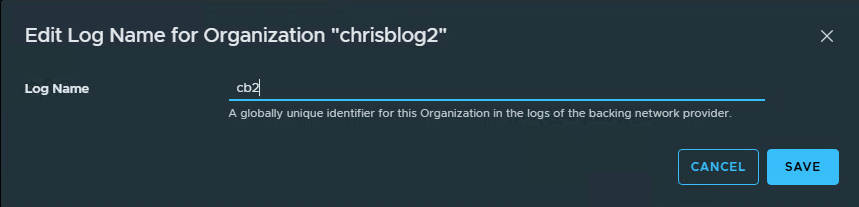
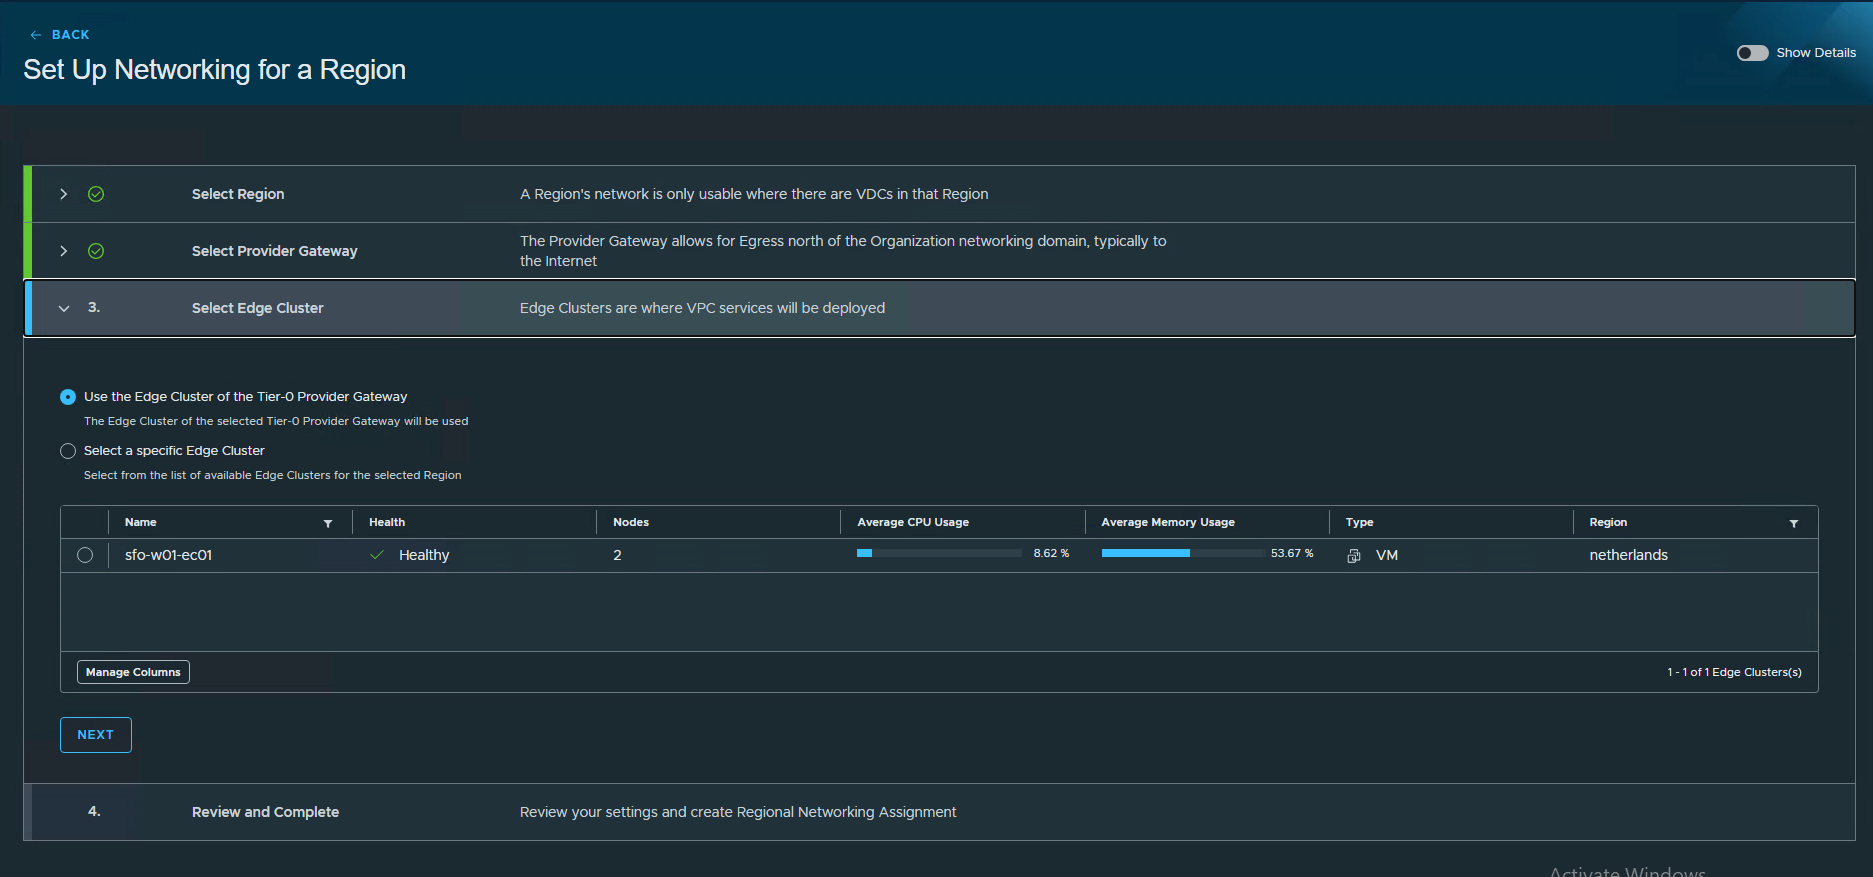
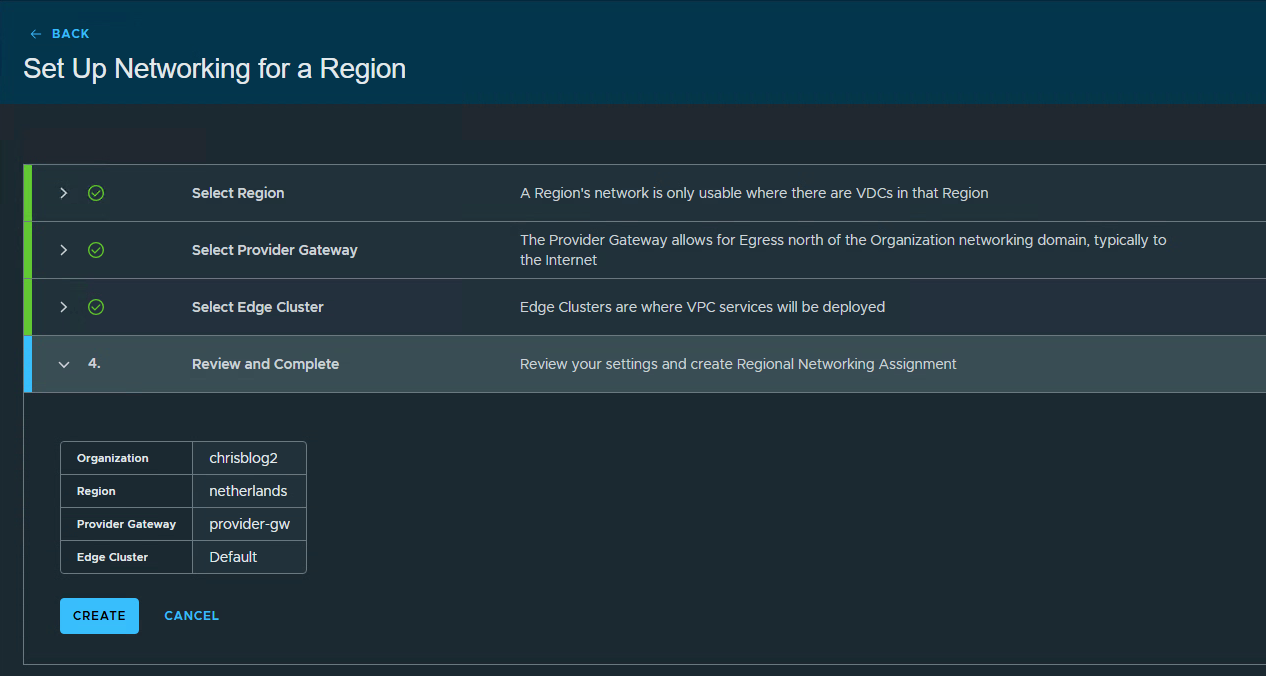
Press new. This will start the configuration for the networking for the organization.
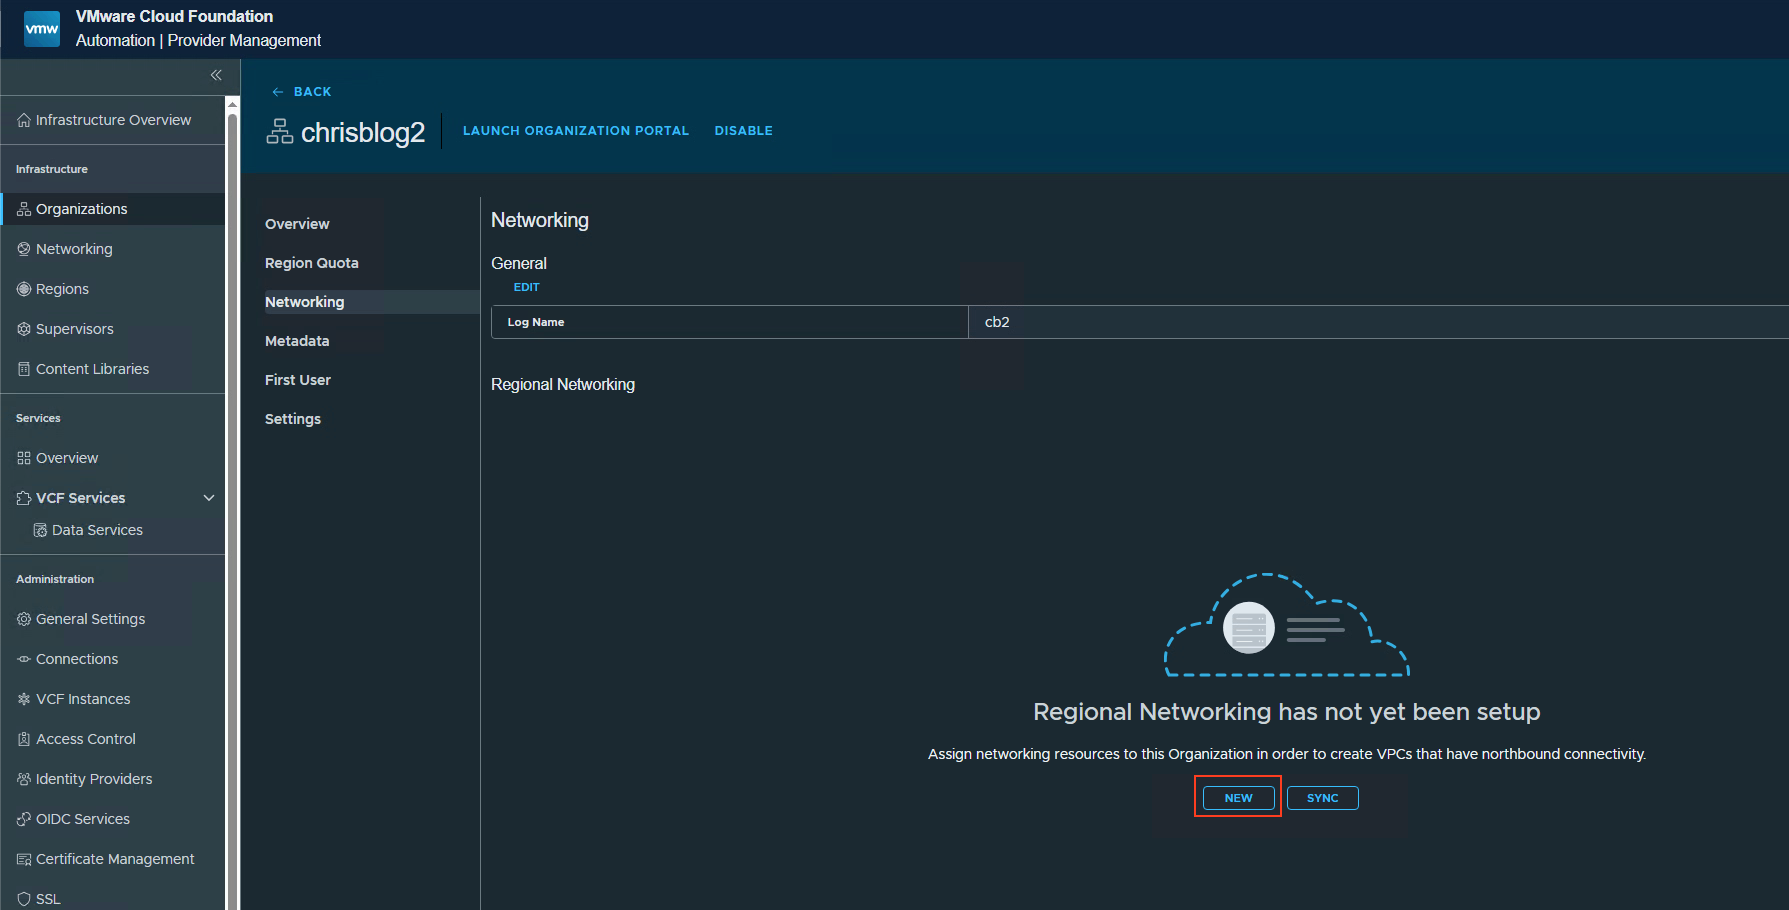
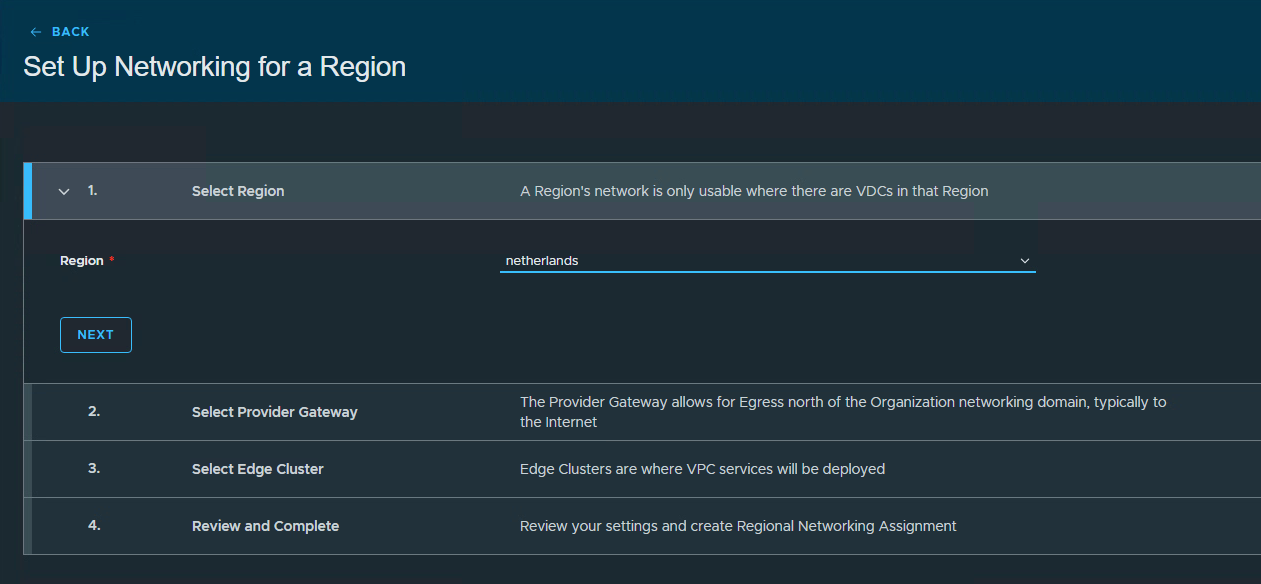
Select the region, provider gateway, edge cluster and press create.
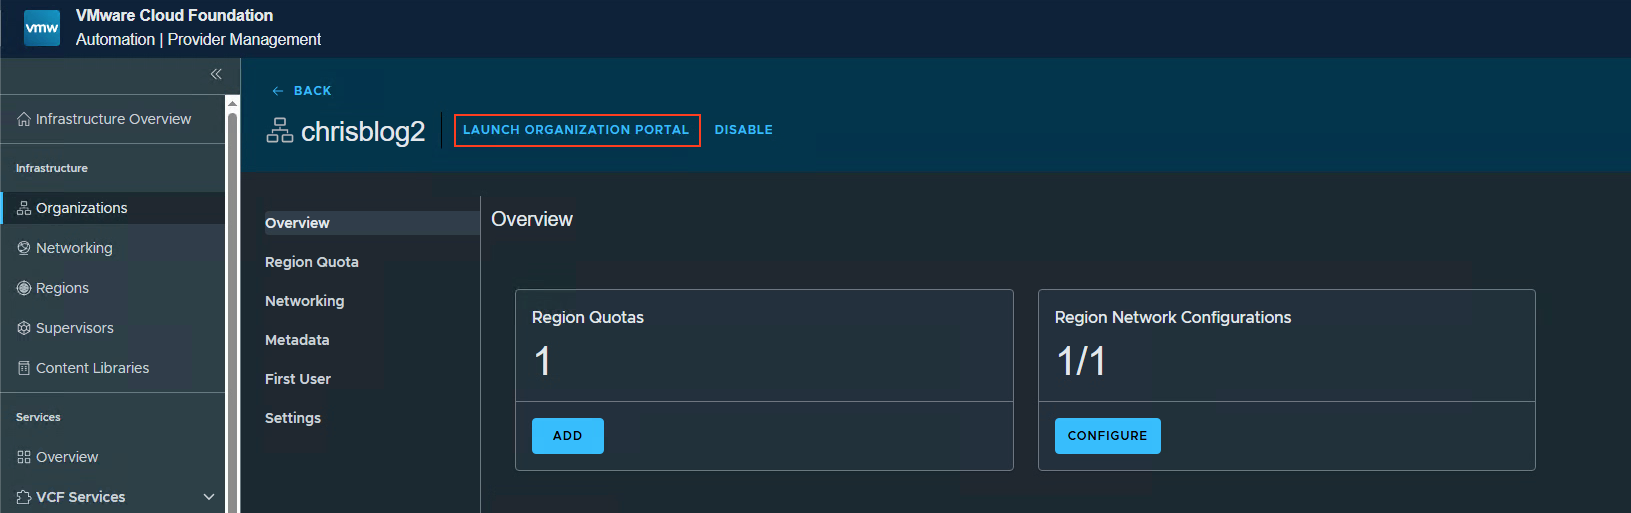
3. Create a project
Go to your newly created organization and press Launch Organization Portal
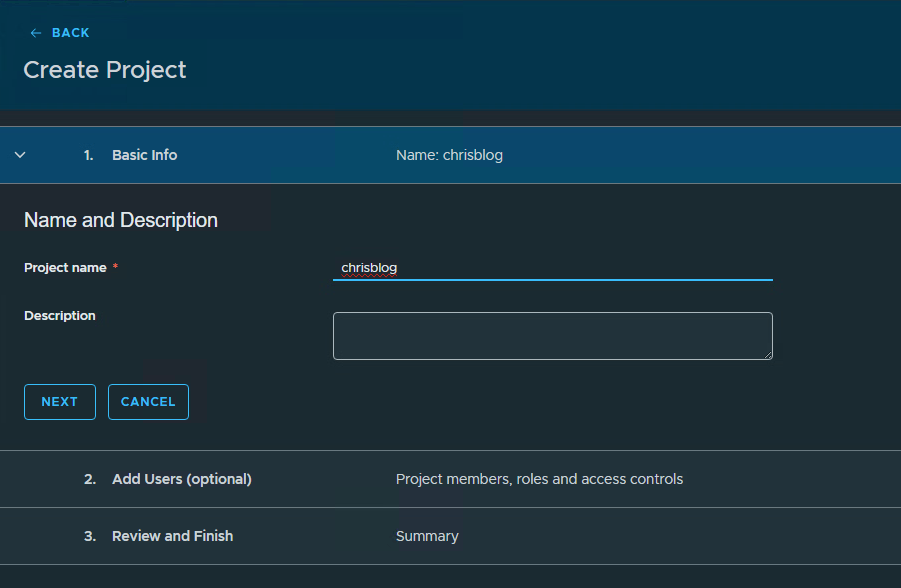
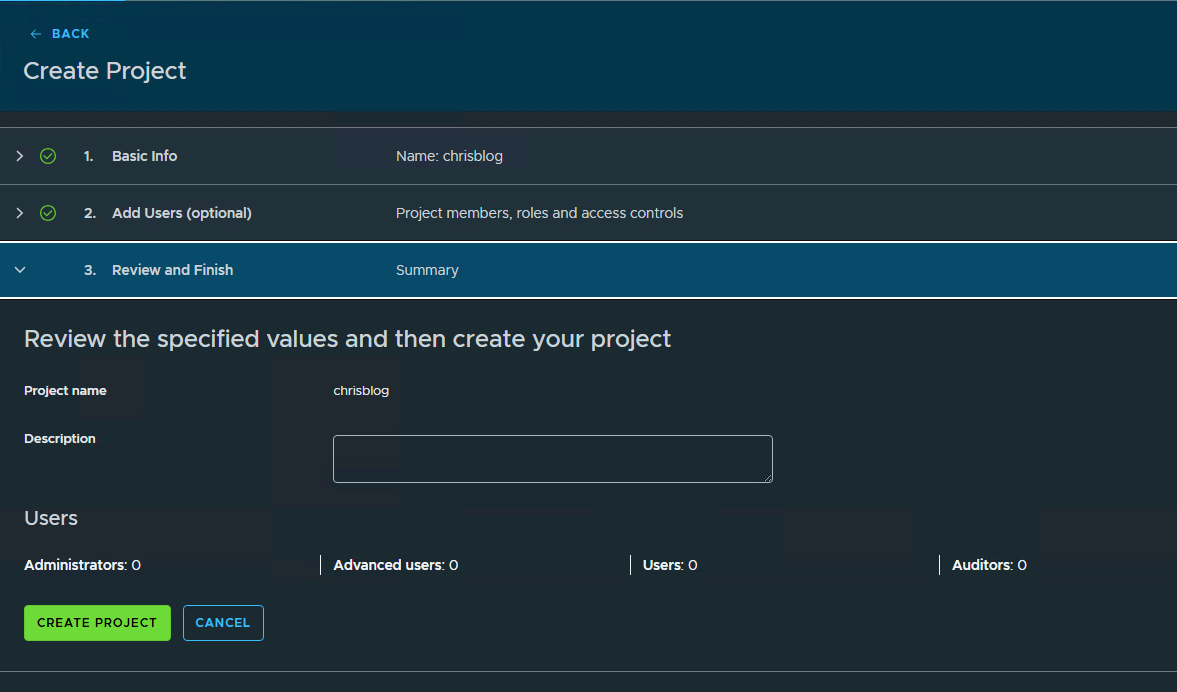
Go to Manage & Govern, Projects and press new.
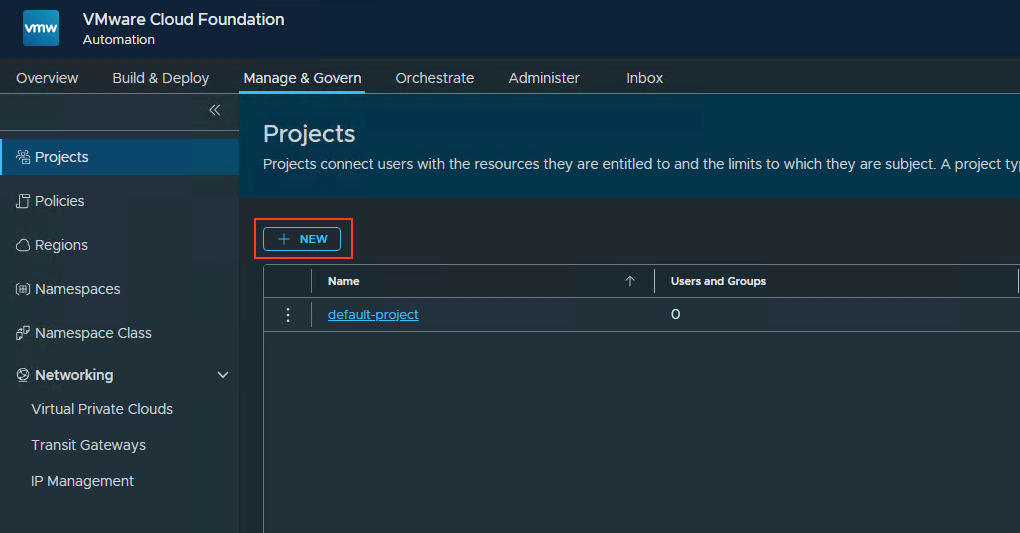
Give the project a name, press next and press create project.
4. Create a VPC
Go to Virtual Private Cloud and press new vpc.
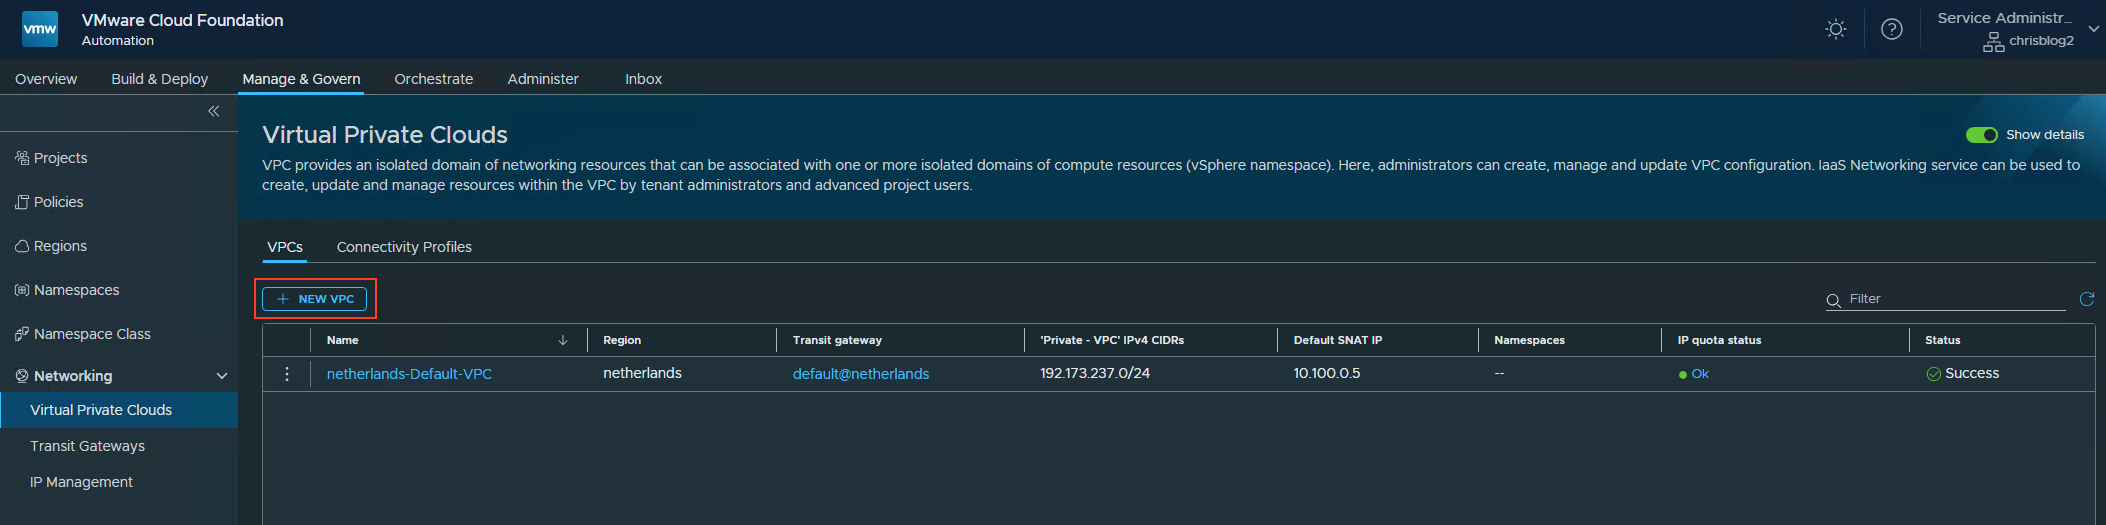
Give the VPC a name (By default it will already populate with a random name)
Select the region and connectivity profile.
Add a private VPC CIDR. I am using 10.200.20.0/23 as private IP range.
Press create

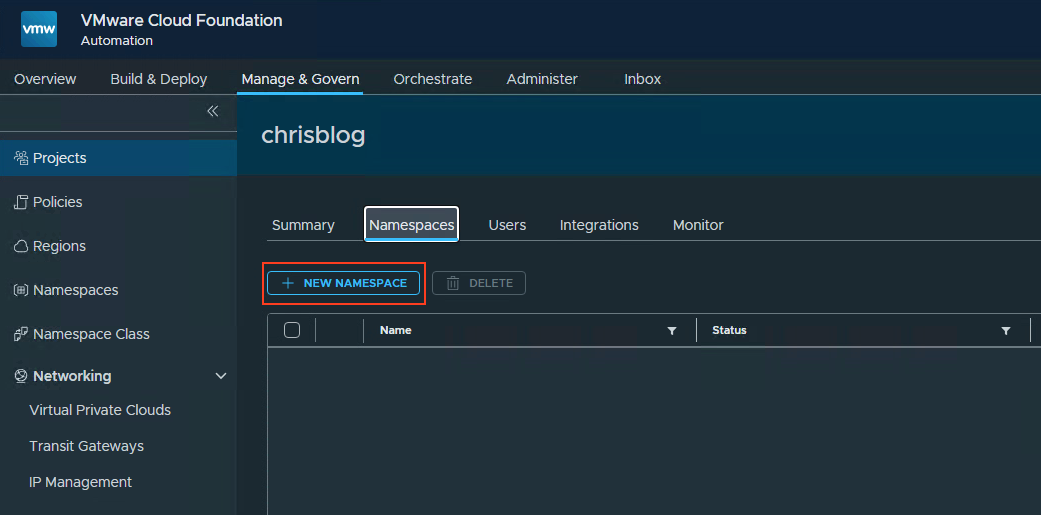
5. Create a namespace
Go to Manage & Govern, Projects, select your created project, Namespace and press new namespace.
Give your namespace a name.
Select the Namespace Class.
Select the Region
Select the VPC you have created.
Select the Zones.
Press create.
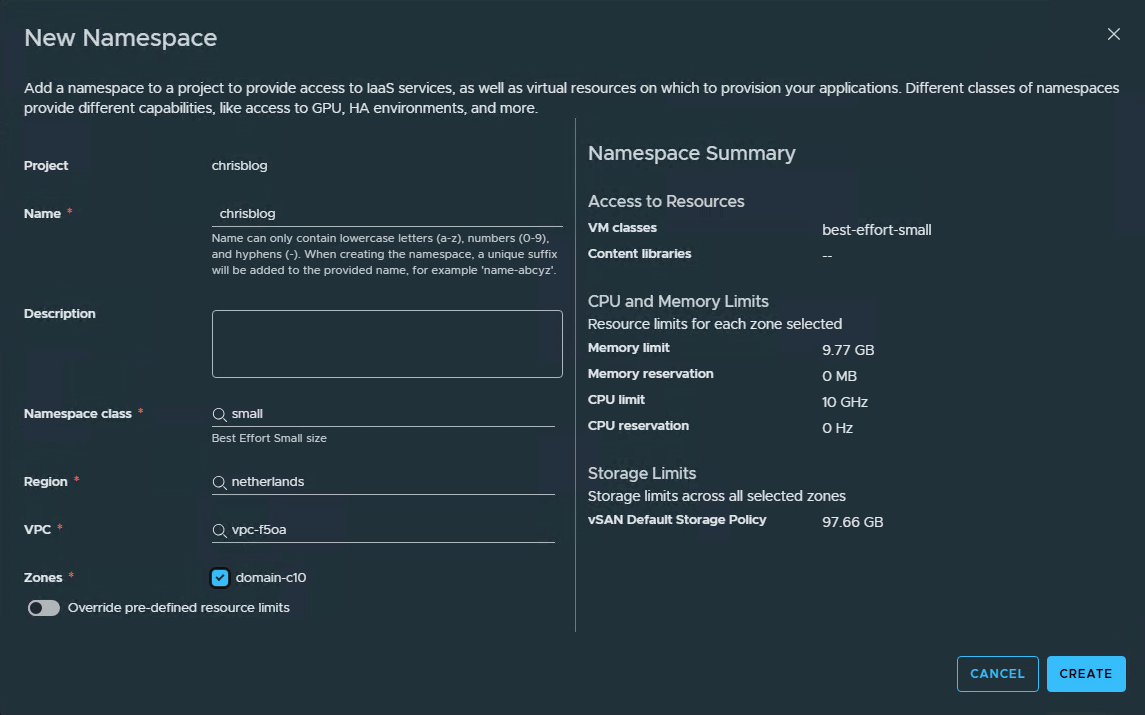
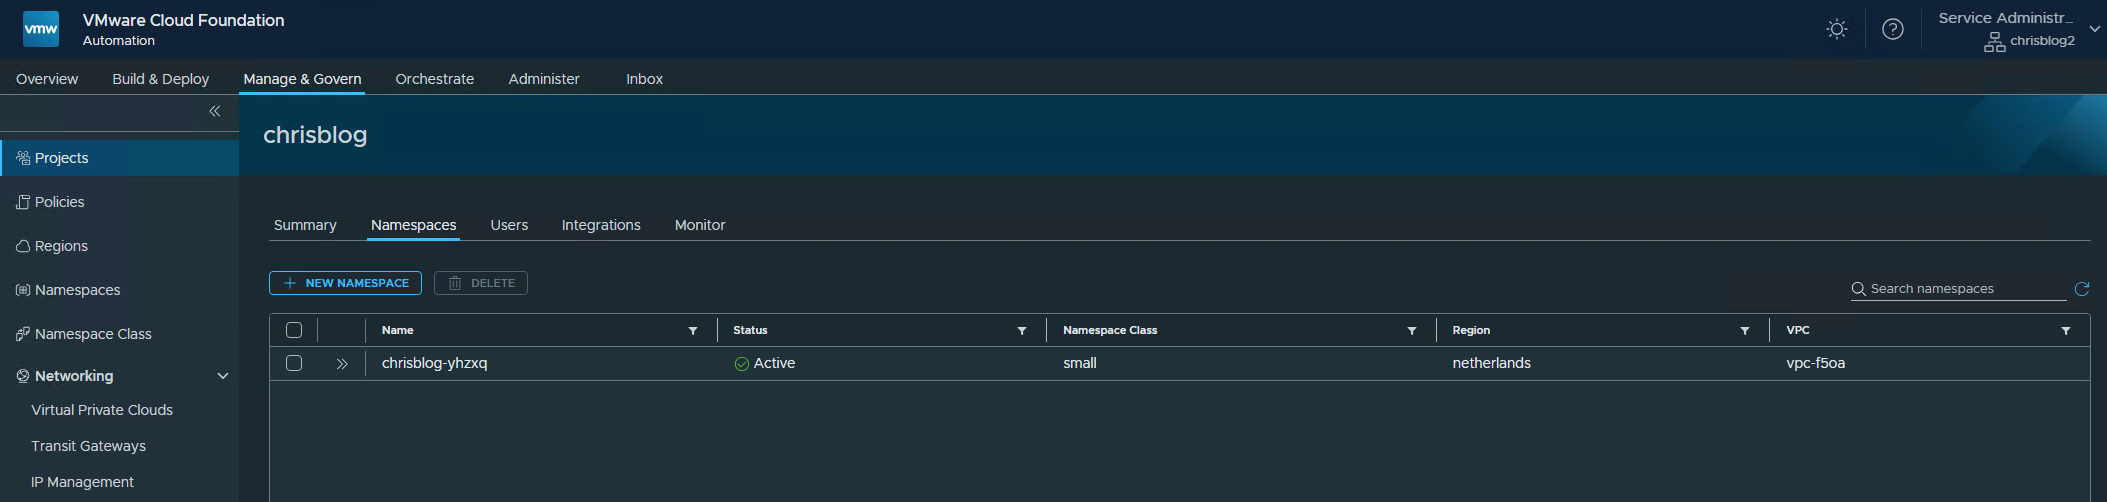
This will create the namespace. When everything is created, it will show up as Active.
Creating a VKS cluster
You can either use VCF-A or yaml files to deploy the cluster. In this blog i am using yaml files.
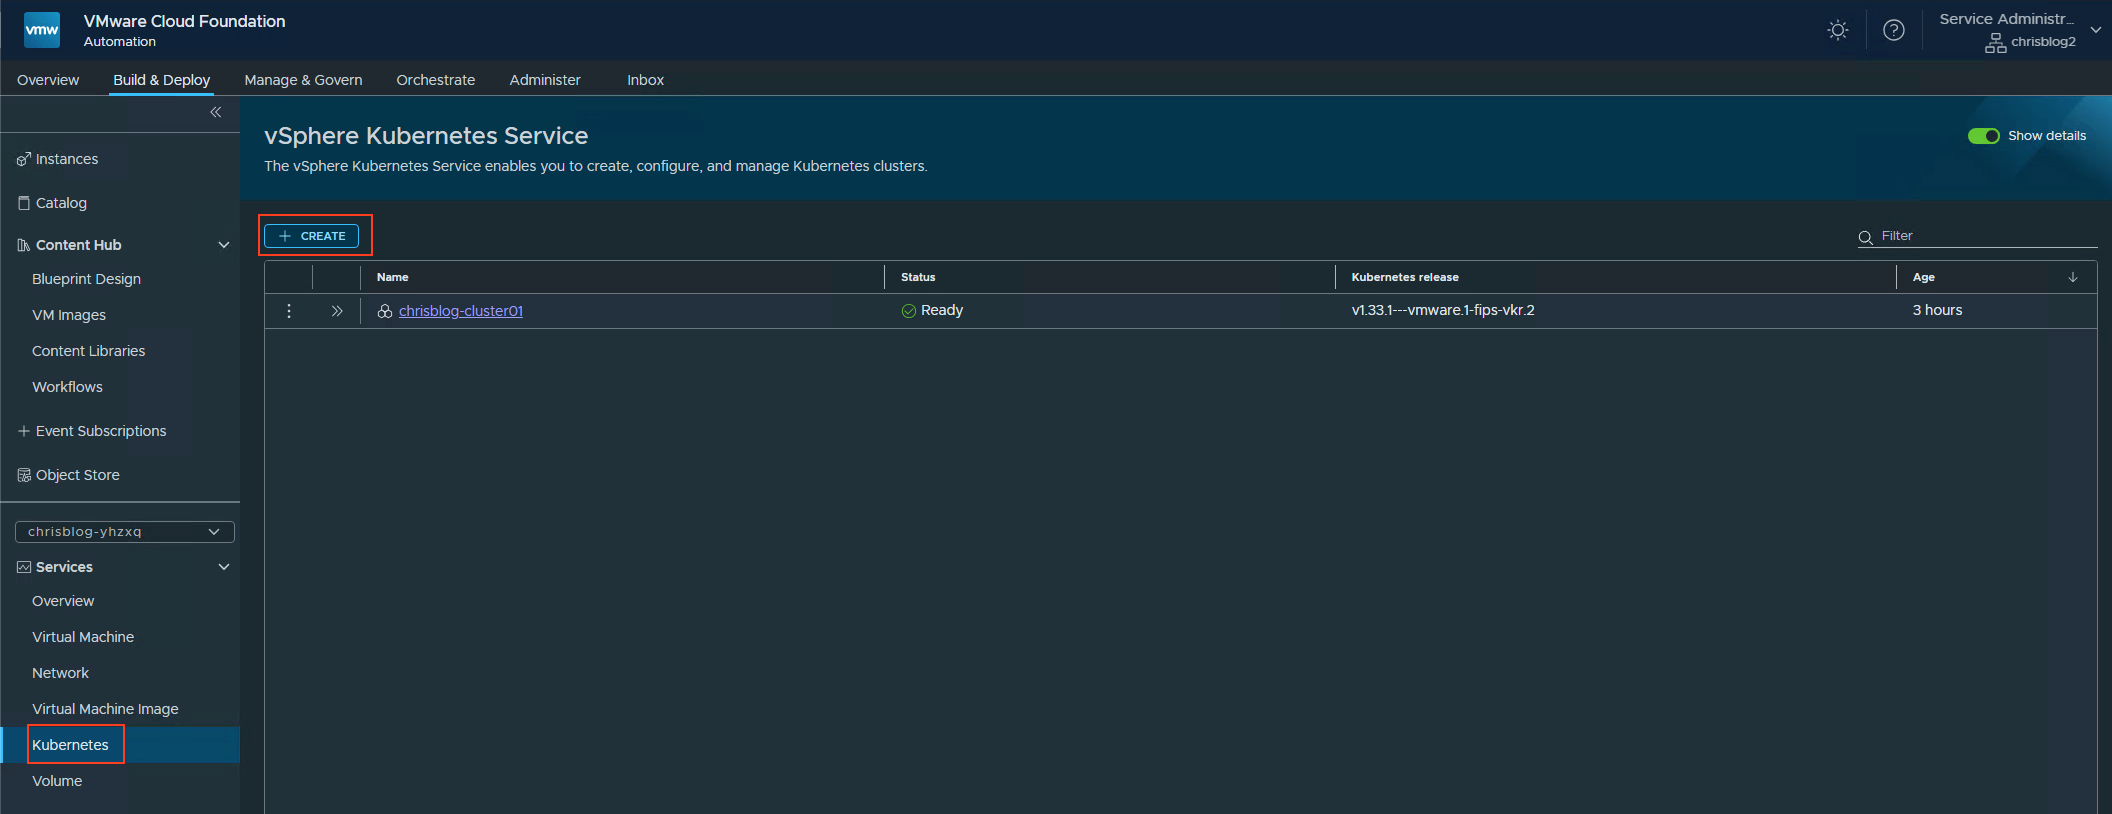
a. Building the cluster with VCF-A
If you want to use VCF-A: go to VCF-A, go to the organization portal, Build&Deploy, Kubernetes and press Create.
You will presented with the wizard for creating a Kubernetes cluster.
b. Building the cluster from yaml files.
The namespace that has been created in VCF-A is chrisblog-yhzxq
Let’s create the VKS cluster. First, log in to the supervisor. Once logged in, the created namespace will appear. Then, change the context using: kubectl config use-context chrisblog-yhzxq.
# kubectl vsphere login -u administrator@sfo-w01.local --server=10.10.20.5 --insecure-skip-tls-verify
Password:
Logged in successfully.

You have access to the following contexts:
   10.10.20.5
   chrisblog-yhzxq
   demo02-vbqb5
   svc-cci-ns-domain-c10
   svc-harbor-domain-c10
   svc-tkg-domain-c10
   svc-velero-domain-c10

If the context you wish to use is not in this list, you may need to try
logging in again later, or contact your cluster administrator.

To change context, use `kubectl config use-context <workload name>`

# kubectl config use-context chrisblog-yhzxq
Switched to context "chrisblog-yhzxq".
In the cluster configuration, you can specify the content library where the VKS image is located. Use the following command to obtain the necessary information:
# kubectl get cclib
NAME                   VSPHERENAME                          TYPE         STORAGETYPE   AGE
cl-ba847d465f368bb3d   Kubernetes Service Content Library   Subscribed   Datastore     18d
cl-d877fc9b6e88d6e31   vm-images                            Local        Datastore     18d
The following YAML code is for creating the cluster. Please note the following points: (You can download the cluster.yaml file I am using here.)
– storageClass: Update this to reflect the storage class you have configured for the namespace.
– vmClass: Change this to the VM class you have set up for the namespace.
– Additional Trusted CAs: I am using this section to add my CA certificate to the cluster. If you do not have a private CA, you can skip this.
apiVersion: cluster.x-k8s.io/v1beta1
kind: Cluster
metadata:
  name: chrisblog-cluster01
  namespace: chrisblog-yhzxq
spec:
  clusterNetwork:
    pods:
      cidrBlocks:
        - 192.168.156.0/20
    services:
      cidrBlocks:
        - 10.96.0.0/12
    serviceDomain: cluster.local
  topology:
    class: builtin-generic-v3.4.0
    version: v1.33.1---vmware.1-fips-vkr.2
    variables:
      - name: vsphereOptions
        value:
          persistentVolumes:
            availableStorageClasses:
              - vsan-default-storage-policy
            defaultStorageClass: vsan-default-storage-policy
      - name: kubernetes
        value:
          certificateRotation:
            enabled: true
            renewalDaysBeforeExpiry: 90
      - name: vmClass
        value: best-effort-small
      - name: storageClass
        value: vsan-default-storage-policy
      - name: osConfiguration
        value:
          trust:
            additionalTrustedCAs:
              - caCert:
            # Plain text CA cert can be added using the `content` key
                  content: |-
                    -----BEGIN CERTIFICATE-----
                    MIIDdTCCAl2gAwIBAgIQXkq4sP/FtJlHLLSVIVuXWzANBgkqhkiG9w0BAQsFADBN
                    MRIwEAYKCZImiZPyLGQBGRYCaW8xGDAWBgoJkiaJk/IsZAEZFghyYWlucG9sZTEd
                    MBsGA1UEAxMUcmFpbnBvbGUtUlBMLUFEMDEtQ0EwHhcNMjUwNDA2MTU1OTU4WhcN
                    MzAwNDA2MTYwOTU4WjBNMRIwEAYKCZImiZPyLGQBGRYCaW8xGDAWBgoJkiaJk/Is
                    ZAEZFghyYWlucG9sZTEdMBsGA1UEAxMUcmFpbnBvbGUtUlBMLUFEMDEtQ0EwggEi
                    MA0GCSqGSIb3DQEBAQUAA4IBDwAwggEKAoIBAQC4v3upcDvJtNlNw9XiD0rDg/bt
                    XIyMCDISHSNeSAPR1Y3pQW1ekT7ZX82aRtwH5tKFyFL2KL8YHNgk+UXmFY170L0b
                    5mq4t2sbx1NUY9CflKiSdcJEWTWjVxvkBvSUPIfDJnvZ5VjpPkOvo030yy9zyJXB
                    zUj1Sl2uPJ8t+Ggg65cJ6g79DQyZkBe1gKj/5yrqDt1ycUP3Ky0GDODGOFFUoTkB
                    Mqw8T7cpOOYG1DXlwoCUw4kV5o2KolPtJFk2SlJ5uh2P83XP7dVwbLxQhrxMOkpQ
                    r4br/j6hKvelwtiBfmdFX/3+txUJensv5b8lUrKWA/BvIsPkjFRniyR7S/0xAgMB
                    AAGjUTBPMAsGA1UdDwQEAwIBhjAPBgNVHRMBAf8EBTADAQH/MB0GA1UdDgQWBBRT
                    E3ThTFPkMJmTAwg6c3ncW9DqKzAQBgkrBgEEAYI3FQEEAwIBADANBgkqhkiG9w0B
                    AQsFAAOCAQEAbZgYU/TEyNZdu2JuTa7lUuy8FaYIibRLPIeb38mGtu1Y+8IbkMf5
                    R9gr0621Z2CWLqsQpzI9V4EFFM5SGkyeZoDLFNu7yXY72i/CQcyAlLV+PDGdF5VP
                    LdlpNiF1gJfjjtzNXe0sQxVovwJe0h0sVGo3bLyBRHjwdZrbJinXMzJ8v+r2apnL
                    zGt/1YKJL2MFJrS6Dttpw7OJ6dZNUZpUlfVAJEnNqm67pJjEmWFiEoS5jY5wueSI
                    rZ2Jp5IcYryzeWuQpDNISEXZtKrvAVVET/6XAIRwqcZcNQHJzlCd7HHtOLpOoVwS
                    pGHSVdBB1GdEYDJ/mesIyEQcPlDeJeKatg==
                    -----END CERTIFICATE-----
    controlPlane:
      replicas: 1
      metadata:
        annotations:
          run.tanzu.vmware.com/resolve-os-image: os-name=photon, content-library=cl-ba847d465f368bb3d
    workers:
      machineDeployments:
        - class: node-pool
          name: kubernetes-cluster-ak3e-nodepool-ddpq
          replicas: 2
          metadata:
            annotations:
              run.tanzu.vmware.com/resolve-os-image: os-name=photon, content-library=cl-ba847d465f368bb3d
Once the configuration is complete, you can apply it to the namespace.
# kubectl apply -f cluster.yaml
cluster.cluster.x-k8s.io/chrisblog-cluster01 created
# kubectl get cluster
NAME CLUSTERCLASS PHASE AGE VERSION
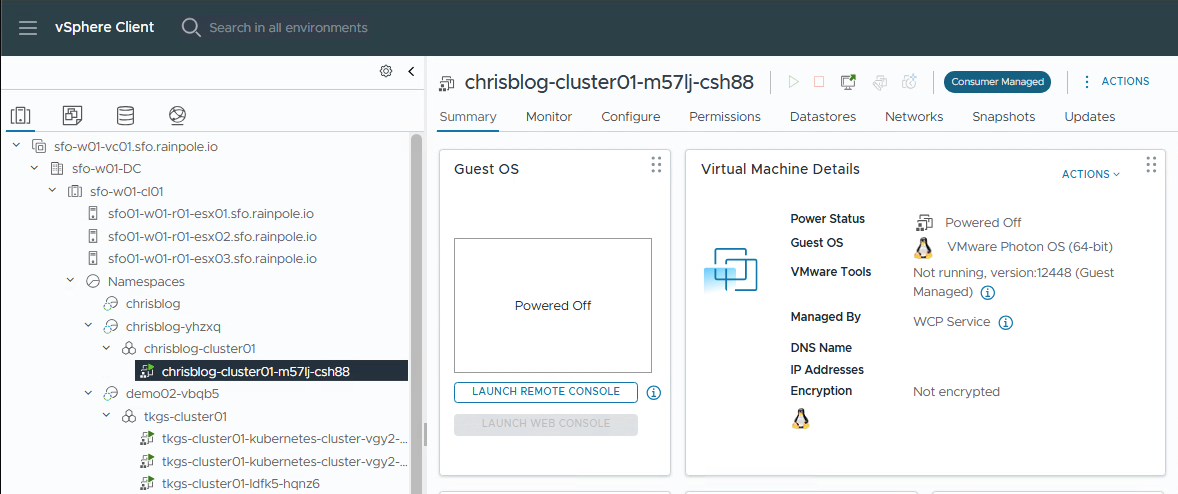
chrisblog-cluster01 builtin-generic-v3.4.0 Provisioning 9s v1.33.1+vmware.1-fipsYou can observe the creation of the cluster occurring in vCenter.
Once the creation process is finished, you can log in to your cluster.
# kubectl vsphere login -u administrator@sfo-w01.local --server=10.10.20.5 --insecure-skip-tls-verify --tanzu-kubernetes-cluster-namespace chrisblog-yhzxq --tanzu-kubernetes-cluster-name chrisblog-cluster01

Password:
Logged in successfully.

# kubectl config use-context chrisblog-cluster01
Switched to context "chrisblog-cluster01".

# kubectl get nodes
NAME                                                              STATUS   ROLES           AGE     VERSION
chrisblog-cluster01-58976-66dhh                                   Ready    control-plane   7m53s   v1.33.1+vmware.1-fips
chrisblog-cluster01-kubernetes-cluster-ak3e-nodepool-ddpq-b69bp   Ready    <none>          64s     v1.33.1+vmware.1-fips
chrisblog-cluster01-kubernetes-cluster-ak3e-nodepool-ddpq-jbljx   Ready    <none>          49s     v1.33.1+vmware.1-fips
Installing AKO
For prerequisites and details on how the Ako Helm installation works, please refer to this link.
You can download the values.yaml file I am using here.
There are 4 options you need to take a look at to have Ako working with VPC.
vpcMode: true
nsxtT1LR: '/orgs/default/projects/a9f773a7-f822-4f88-b7b0-bcd409fe28d5/vpcs/vpc-f5oa'
tenantName: a9f773a7-f822-4f88-b7b0-bcd409fe28d5
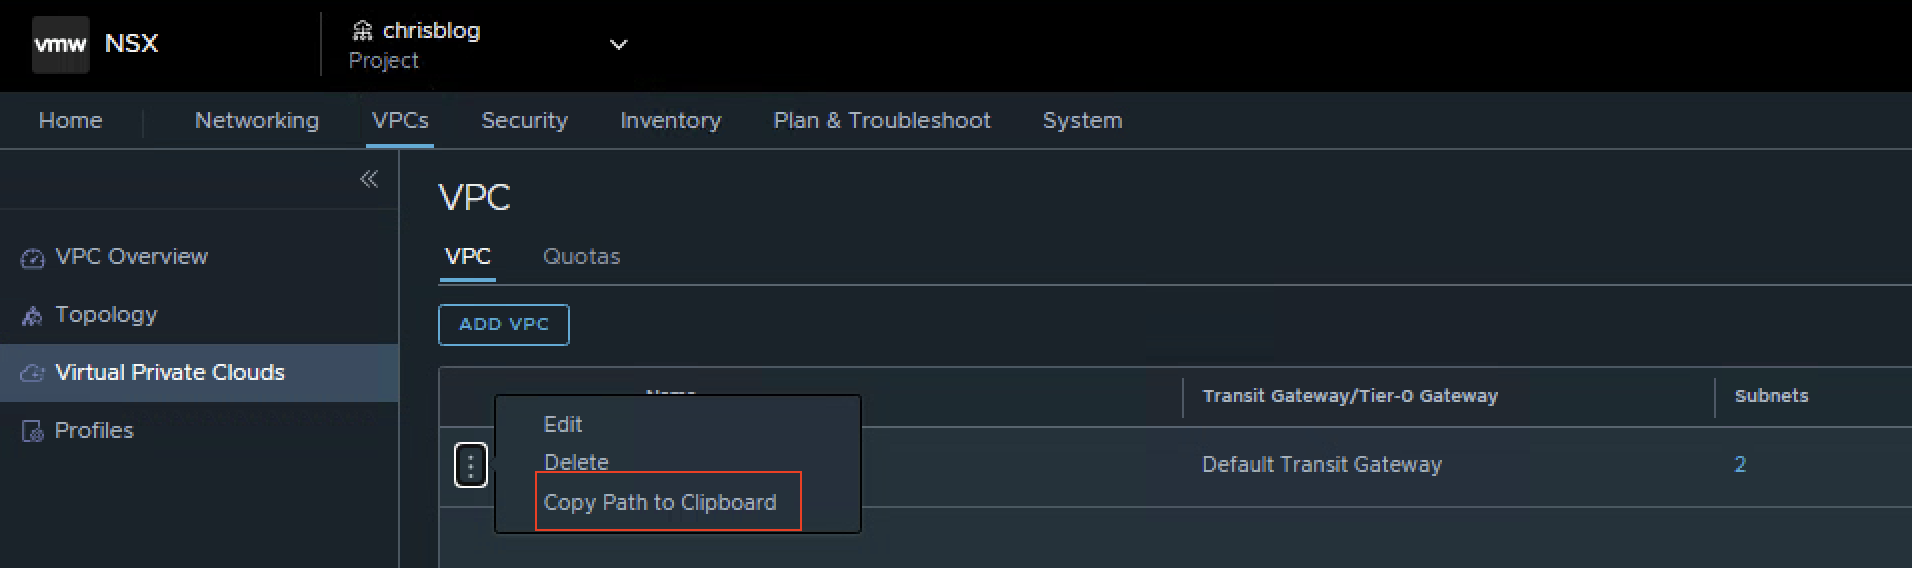
serviceType: NodePortLocalTo get the full path to the VPC needed for nsxT1LR, go to the NSX manager, select the project and goto VPC. Copy Path to Clipboard.
Install AKO with helm. Please read the AKO helm install guide. (i.e you need to create a namespace before you can do the install)
helm install --generate-name oci://projects.packages.broadcom.com/ako/helm-charts/ako --version 1.13.3 -f values.yaml --set ControllerSettings.controllerHost=10.11.10.151 --set avicredentials.username=admin --set avicredentials.password=VMw@re1\!VMw@re1\! --namespace=avi-systemYou can check if AKO is running by using the following command.
# kubectl get pods -n avi-system
NAME    READY   STATUS    RESTARTS       AGE
ako-0   1/1     Running   11 (35m ago)   27h
Testing the ingress
You can download the deployment.yaml I am using here.
In my yaml, I refer to a certificate (secretName: wildcard-cert)
Please make sure you have already created this secret before doing the deployment.
If you are unsure about creating a TLS secret, please refer to kubernetes documentation.
The ingress has been created with IP 10.100.0.8 This IP comes from the CIDR defined in the VPC profile chris-blog-external-ip managed by the NSX IPAM.
# kubectl apply -f deployment.yaml -n demo# kubectl get ingress -n demo
NAME CLASS HOSTS ADDRESS PORTS AGE
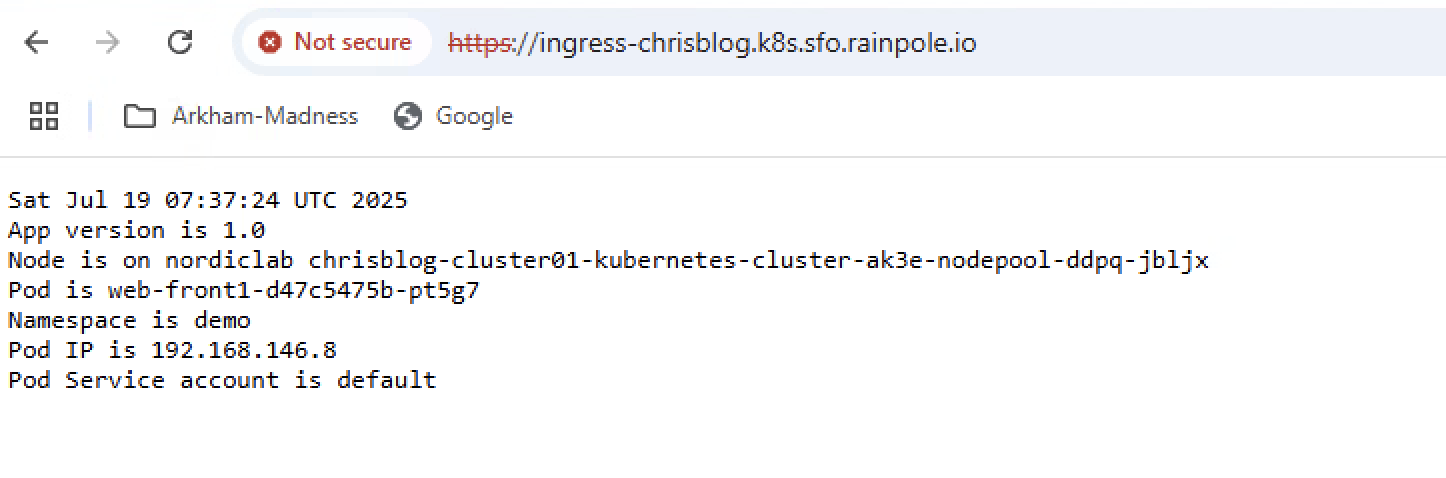
ingress avi-lb ingress-chrisblog.k8s.sfo.rainpole.io 10.100.0.8 80, 443 11sDo not forget to add the hostname and IP address to the dns server. You could also use a DNS profile in Avi.
Using the URL in my browser, results in a working application.
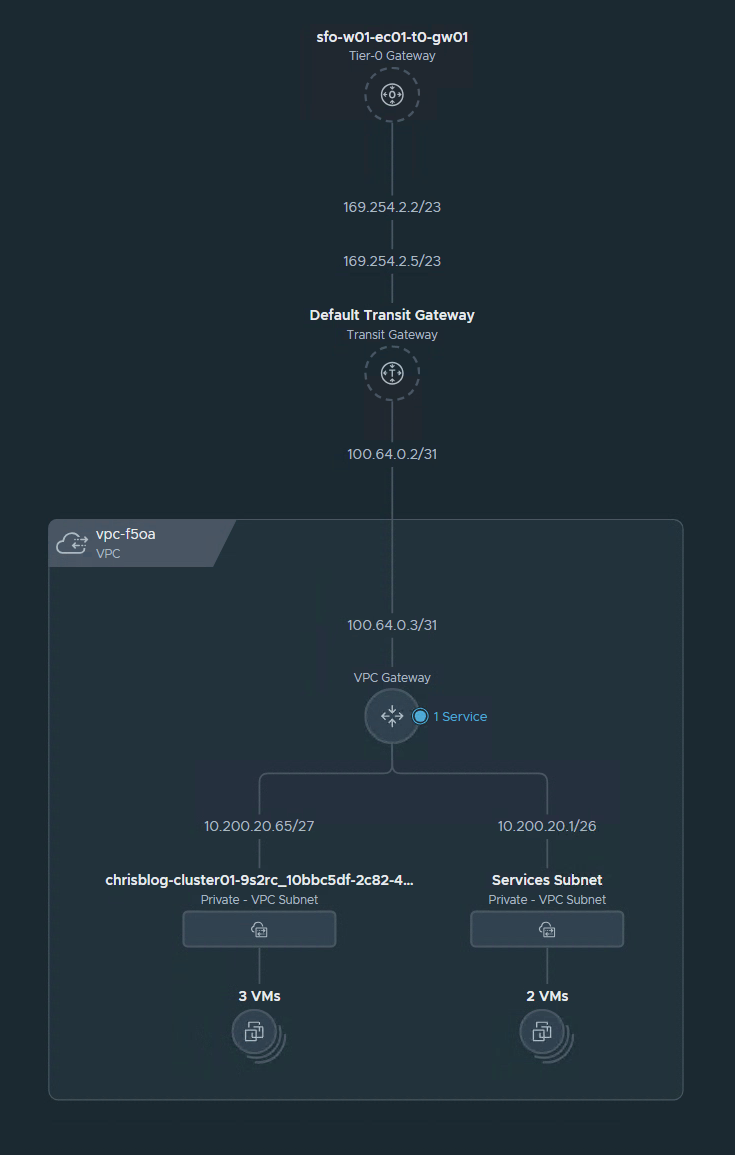
From a NSX perspective, this is what the VPC topology looks like.
Check in Avi if the Virtual Services are created.
Select the tenant in the top right (In my case it is a9f773a7-f822-4f88-b7b0-bcd409fe28d5) and go to Applications, Virtual Services.

Final words
I hope this blog has been helpful. If you have any questions or suggestions, feel free to leave a comment.