Introduction
VMware Cloud Foundation (VCF) is a multi-cloud platform that provides a full-stack hyper-converged infrastructure (HCI) that is made for modernizing data centers and deploying modern container-based applications.
VMware Avi load balancer (Avi) is a 100% software-defined multi-cloud application services platform with Software Load Balancers, Intelligent WAF (iWAF), and Container Ingress.
All modern applications use load balancing nowadays. Load balancing is the process of distributing network traffic across multiple servers.
Starting with VMware Cloud Foundation 5.2, you can use SDDC Manager to deploy Avi Load Balancer as a high-availability cluster of 3 Avi controllers.
The goal of this blog
The goal of this blog is to explain how to install Avi with SDDC manager in a VCF 5.2 deployment.
I will not go over the installation of VCF 5.2 itself.
My lab setup
For my setup, I am using the following:
VCF 5.2. 3 NSX managers per domain.
vCenter 8.0u3b 24262322
NSX 4.2.0.2.0 24278654
ESX 8.0.3 24022510
Avi 22.1.6 (This is the only available Avi version at the time of writing the blog)
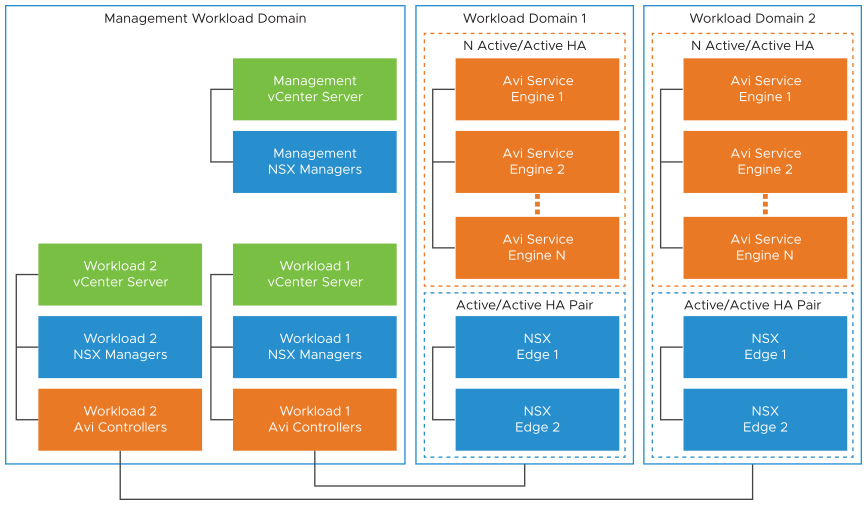
Preparation
Some important prerequisites that make life easier when installing.
1. Check the NSX manager certificates.
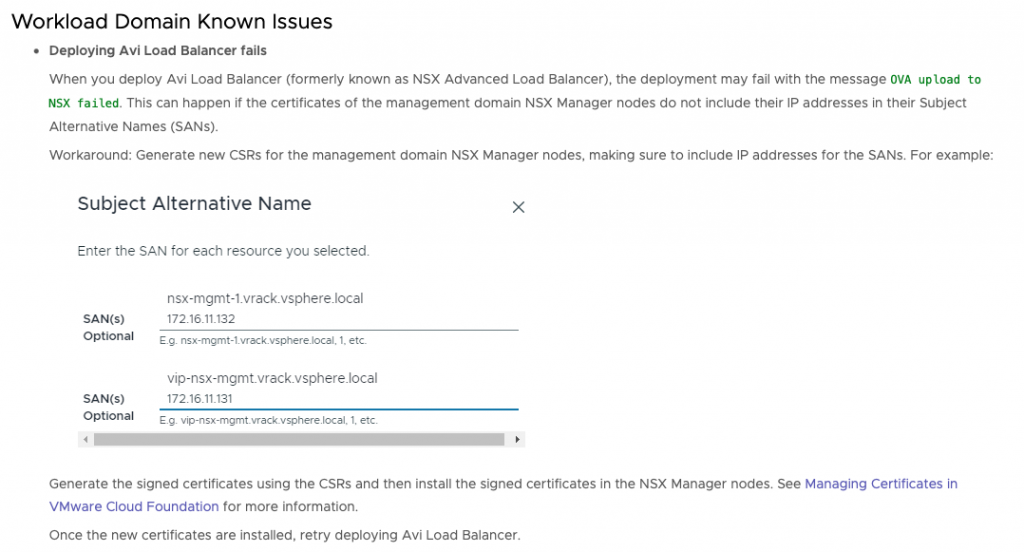
The NSX manager certificates need to contain SAN IP and DNS
I found during the installation of Avi, that a connection was being made to the NSX manager IP address and was giving me a certificate error.
The release notes state the following:
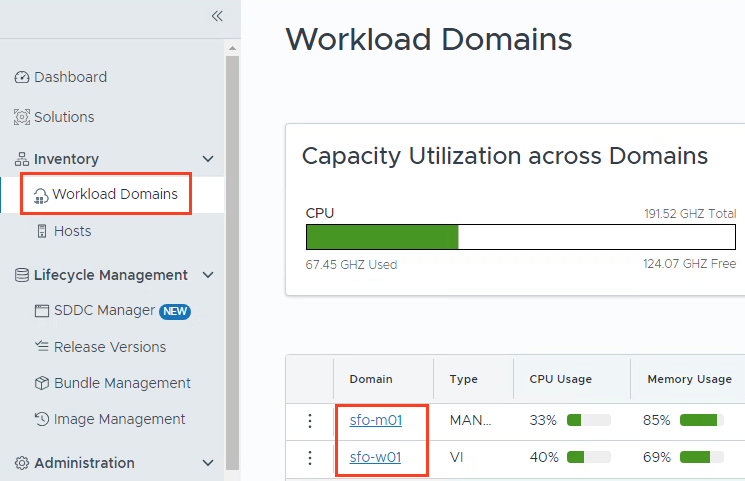
To replace the certificates, go to the SDDC manager->Inventory->Workload Domains. Select the domain and go to Certificates.
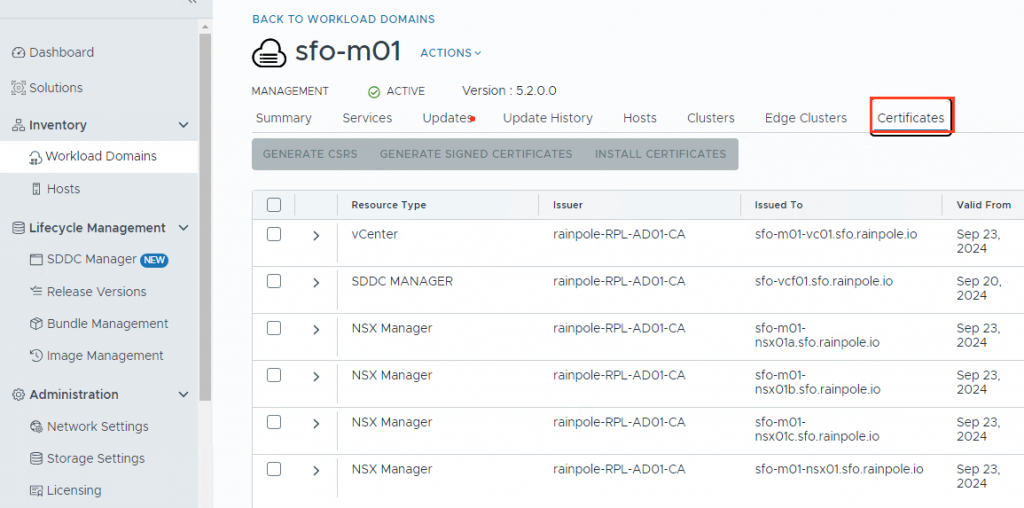

If your certificates do not contain the SAN IP, generate new certificates that do include the SAN IP.
Check the certificates for both management and workload domains NSX managers.
2. Downloading Avi bundle.
Before we can download the bundle, please check the following.
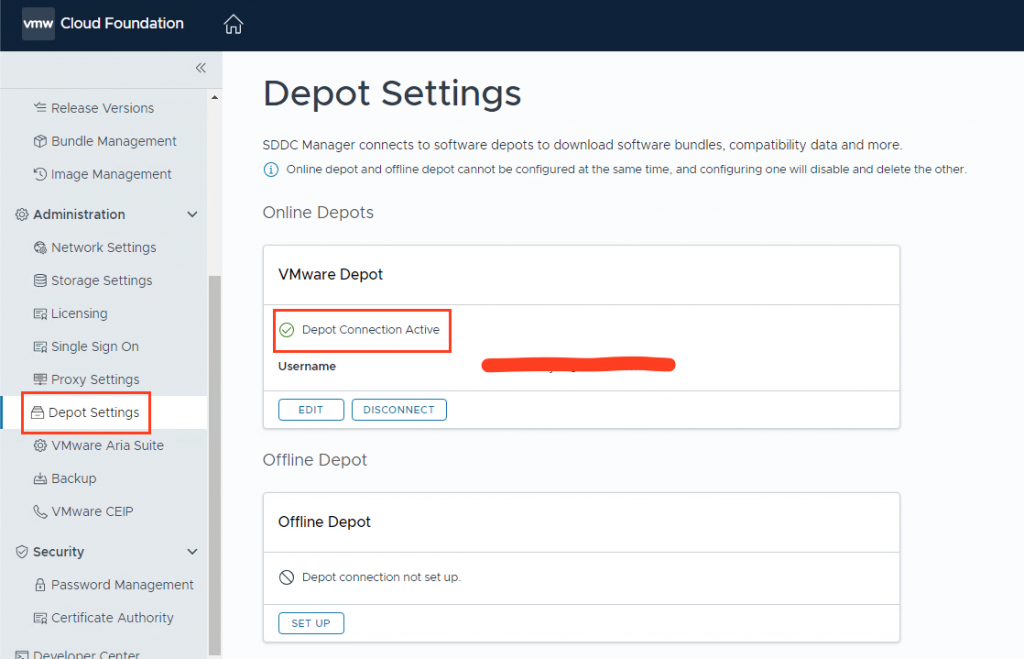
On the SDDC manager go to Administration->Depot Settings and check if the VMware Depot connection is active.
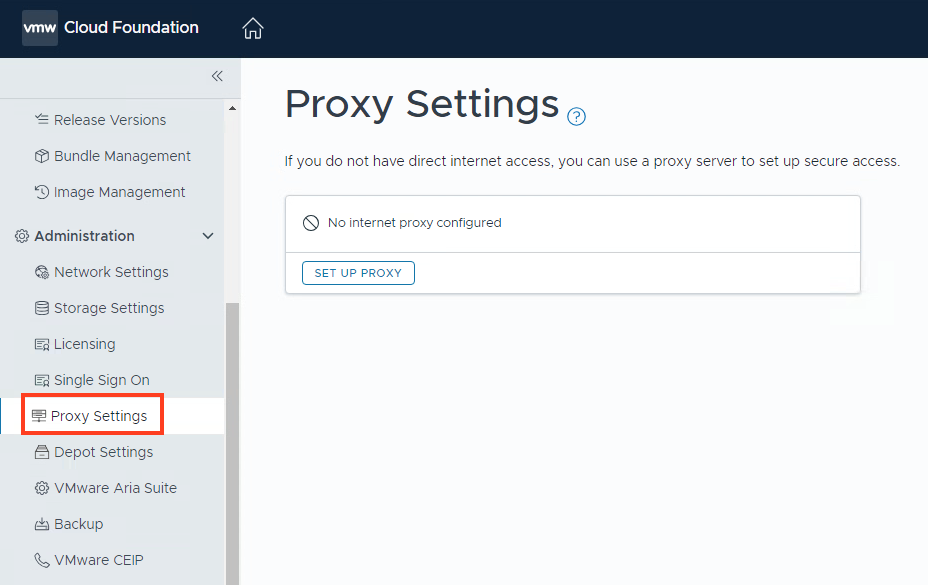
Go to Administration->Proxy Settings.
If you have a proxy enabled, verify that the URLs that are needed for VCF are added to the allowed list.
The list can be found here
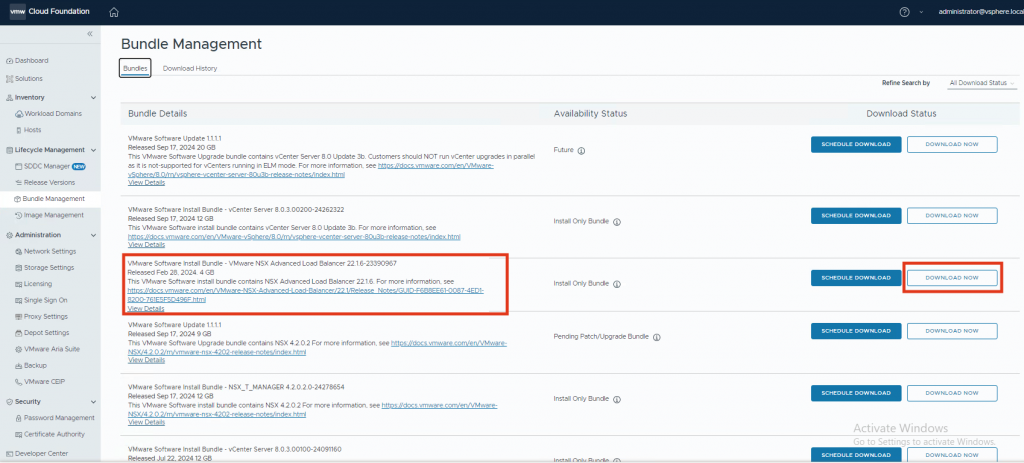
Go to Lifecycle Management->Bundle Management and search for VMware NSX Advanced Loadbalancer. Currently, only 22.1.6 is available.
Press Download Now
After a while, the bundle will be downloaded and we can continue with Deploying Avi.
Deploying Avi on the workload domain.
1. Deploying Avi
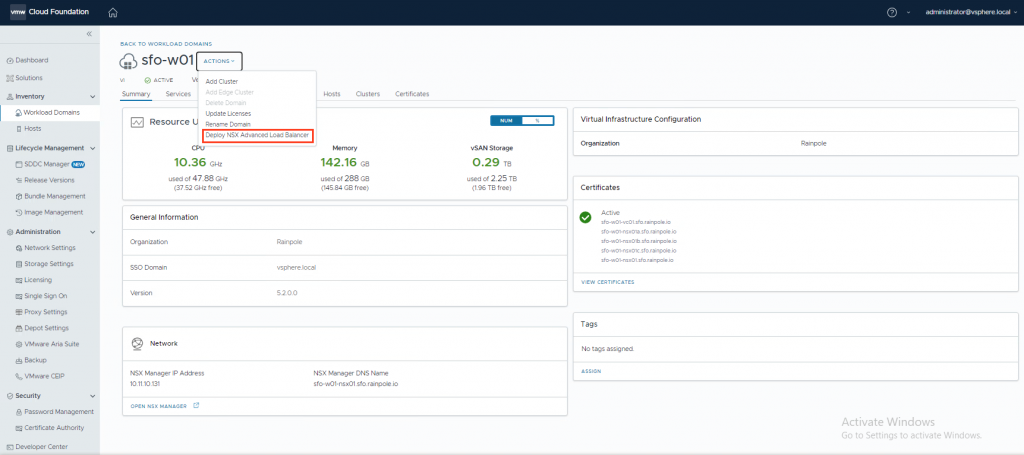
In the SDDC manager go to Workload Domains. Select your workload domain.
Under Actions, select Deploy NSX Advanced Load Balancer.
Follow the next steps.
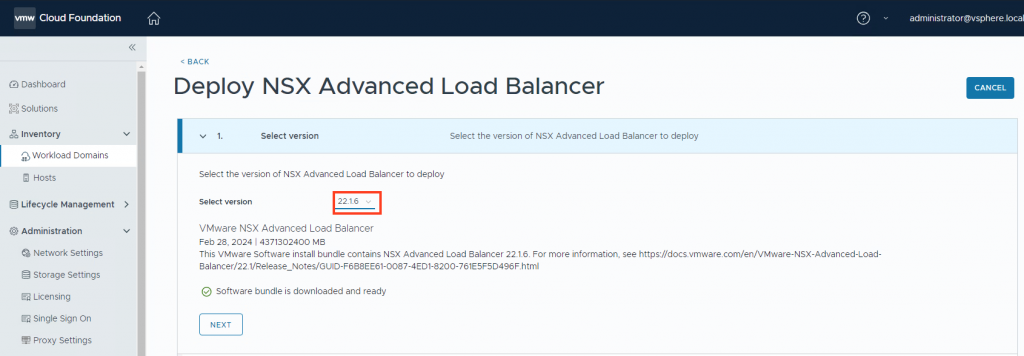
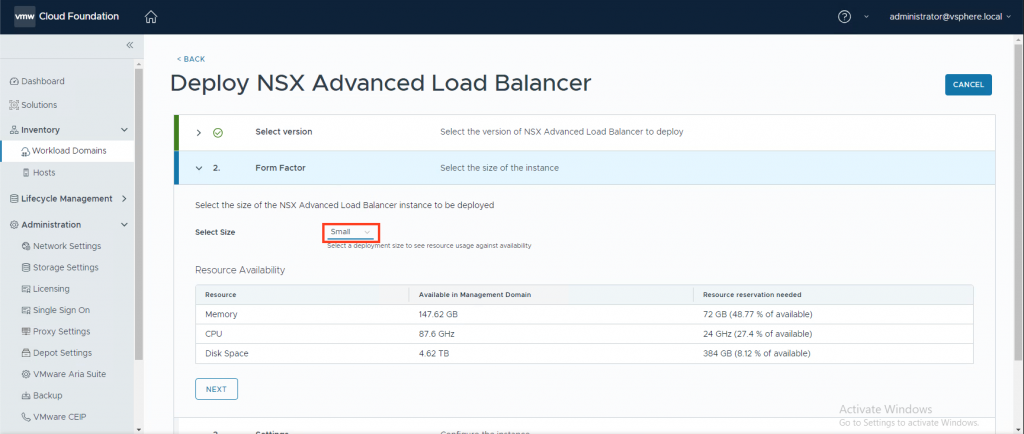
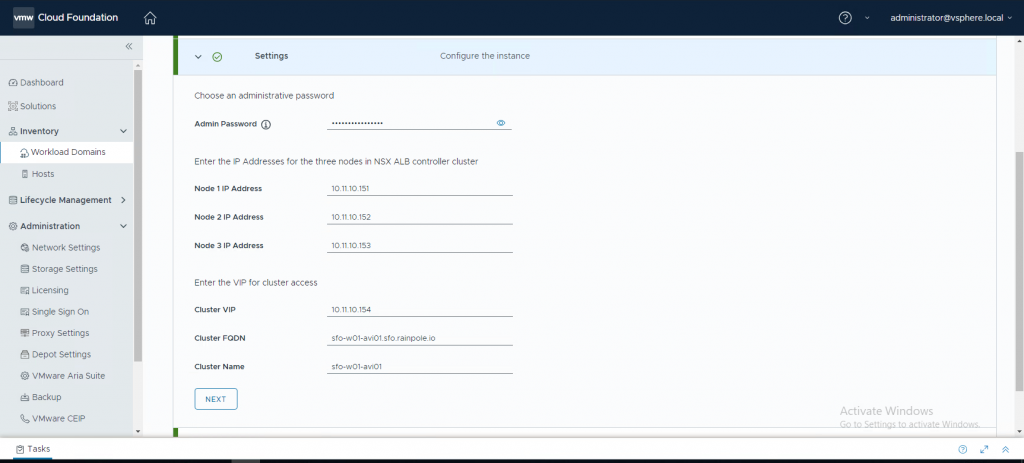
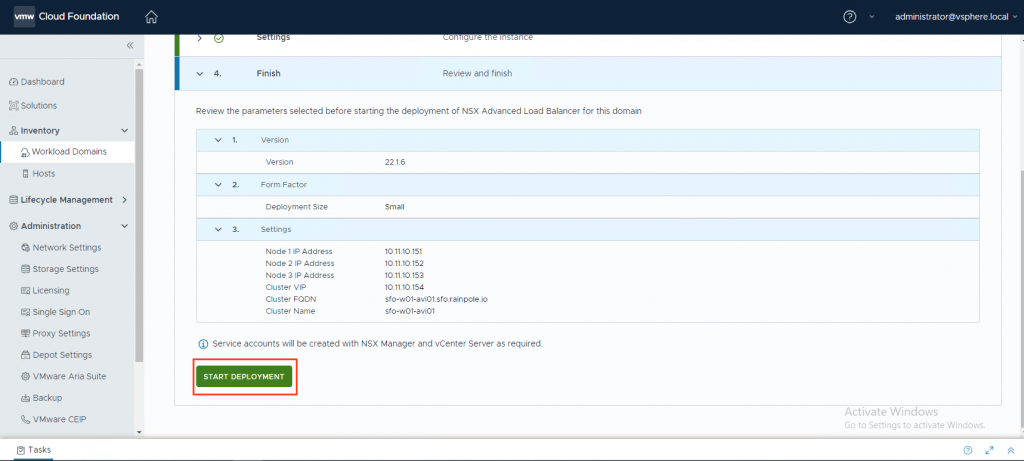
On vCenter you will see the 3 Avi controller vms being deployed.
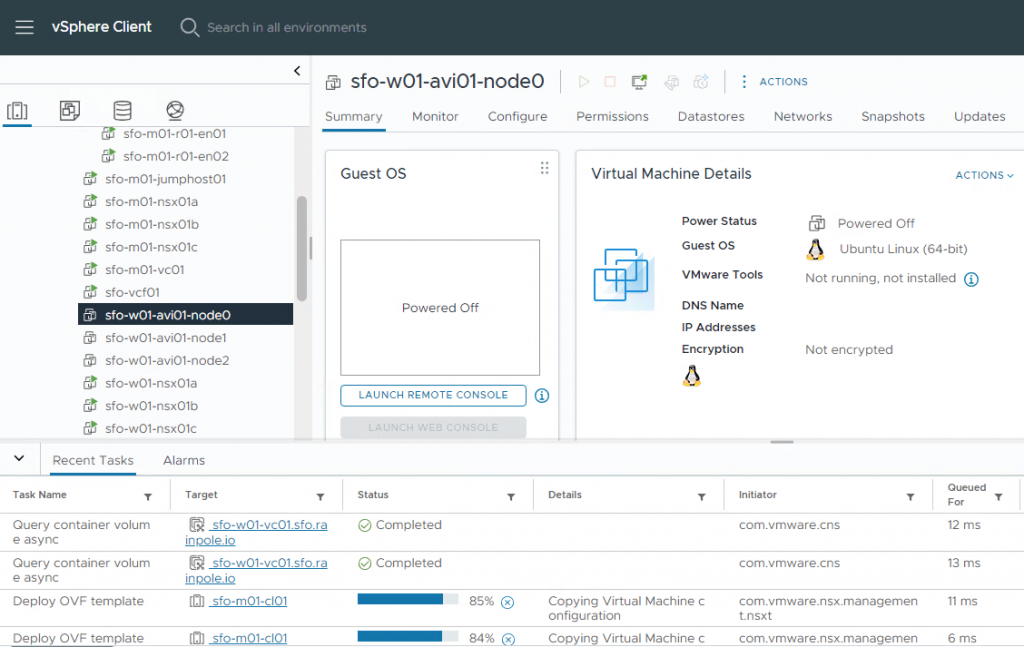
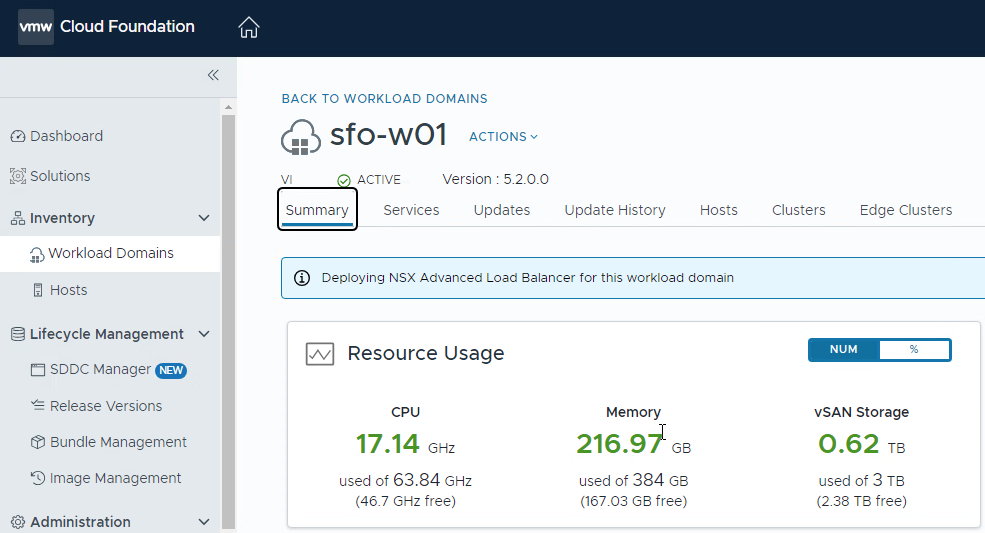
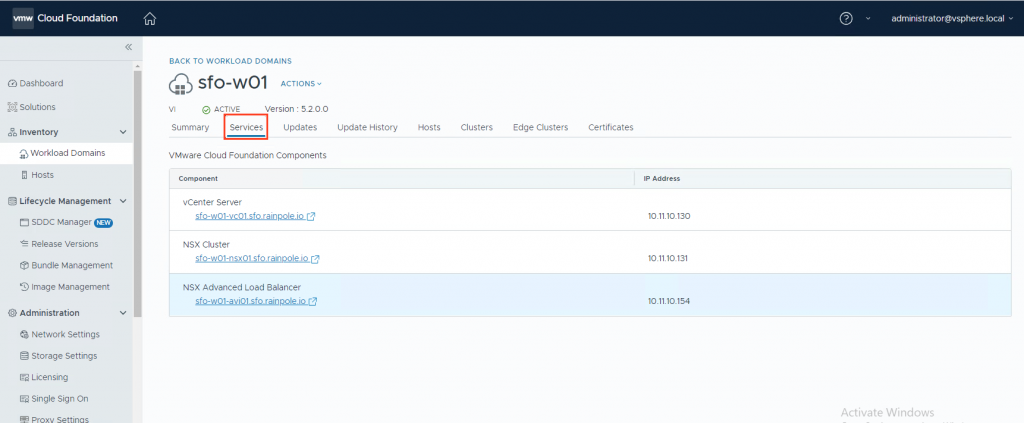
When the installation is complete, you will find the Avi service under the Services tab.
You can follow the link to open the Avi controller UI.
2. Check the Avi installation
You can log in to the Avi controller. (username: admin. password: <the password you entered in step 1>)
On the Avi controller go to Administration->Controller->Nodes. And check if the cluster is active.
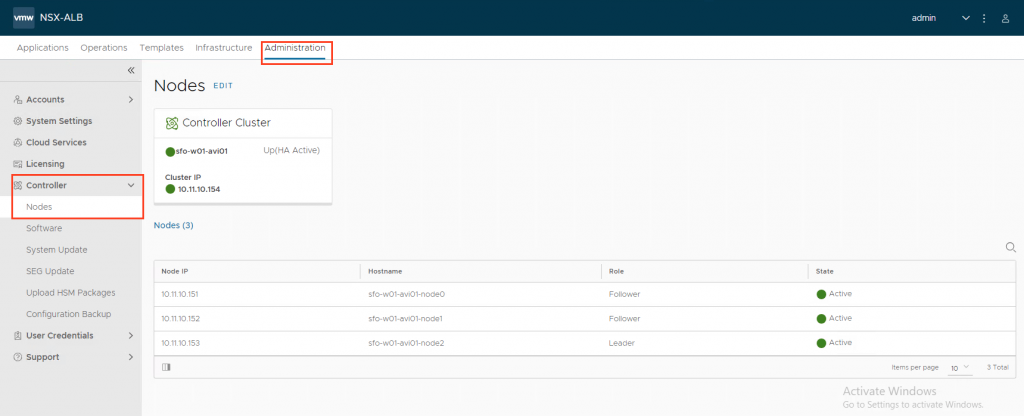
Congratulations! The Avi installation deployment has been successful.
You can now configure Avi.
3. Additional options
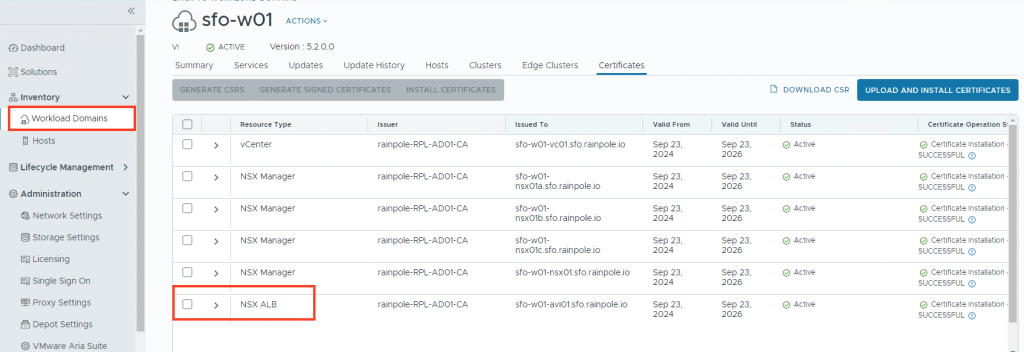
You can manage the certificate for the Avi controllers from the SDDC manager.
On the SDDC manager go to Inventory->Workload Domains. Select your workload domain and go to Certificates. The Avi certificate has been added to the list.
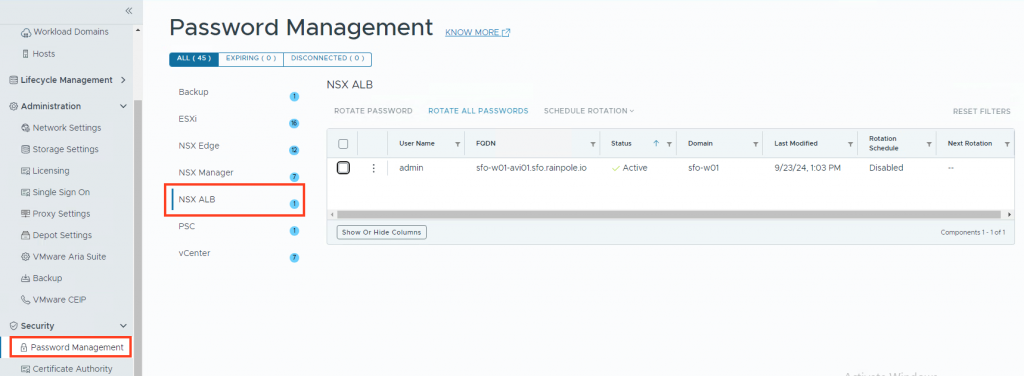
You can also manage the Avi user passwords from the SDDC manager.
On the SDDC manager go to Security->Password Management.
Final words
VCF 5.2 adds a lot of new functionality to SDDC manager for deploying Avi.
Deploying Avi has never been this easy. More functionality is coming in future releases. Stay tuned!
If you like this blog please share it. If you have question, you can leave a comment.
