Introduction
NSX Advanced load balancer (AVI) is a 100% software-defined multi-cloud application services platform with Software Load Balancers, Intelligent WAF (iWAF), and Container Ingress.
All modern applications use load balancing nowadays. Load balancing is the process of distributing network traffic across multiple servers.
Authentication is an essential part of this.
SAML is an acronym used to describe the Security Assertion Markup Language (SAML). Its primary role in online security is that it enables you to access multiple web applications using one set of login credentials. It works by passing authentication information in a particular format between two parties, usually an identity provider (IDP) and a web application.
The goal of this blog
The goal of this blog is to explain how to configure SAML on an ingress/route using AKO.
I will be using Azure as IDP. SAML will be configured on ingress/route in AVI.
I will not explain how to install AVI or how to do the initial configuration of service engines or VirtualServices. SAML support for AKO is introduced in version 1.10.1 (more info)
Important note: The SSORule CRD is supported only for Avi Controller version 22.1.3 and above.
It only supports the configuration of OAuth and SAML SSO protocols currently. Also, the SSORule CRD is only supported for Enhanced Virtual Hosting (EVH). When the shard virtual service size is LARGE, MEDIUM, or SMALL, the OAuth and SAML settings will only be configured on the EVH child virtual services.
What I am using
For my setup, I am using the following.
AVI 22.1.4-2p2
AKO 1.10.3
OpenShift 4.12
Azure
Azure setup
First I will setup Azure.
1. Create an enterprise application
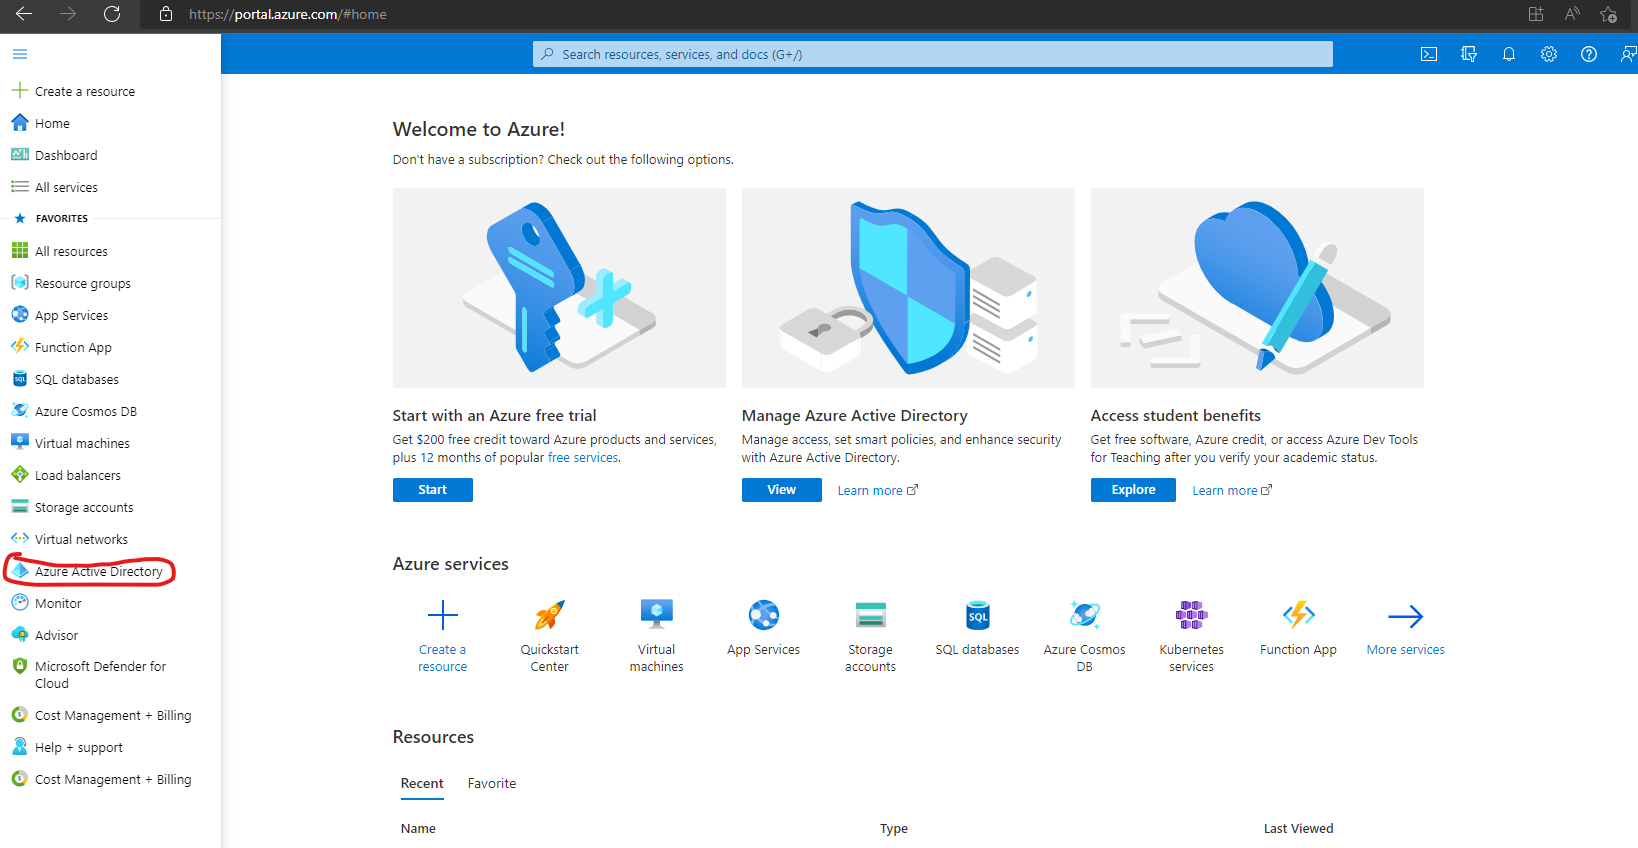
Go to Azure portal->Azure Active Directory
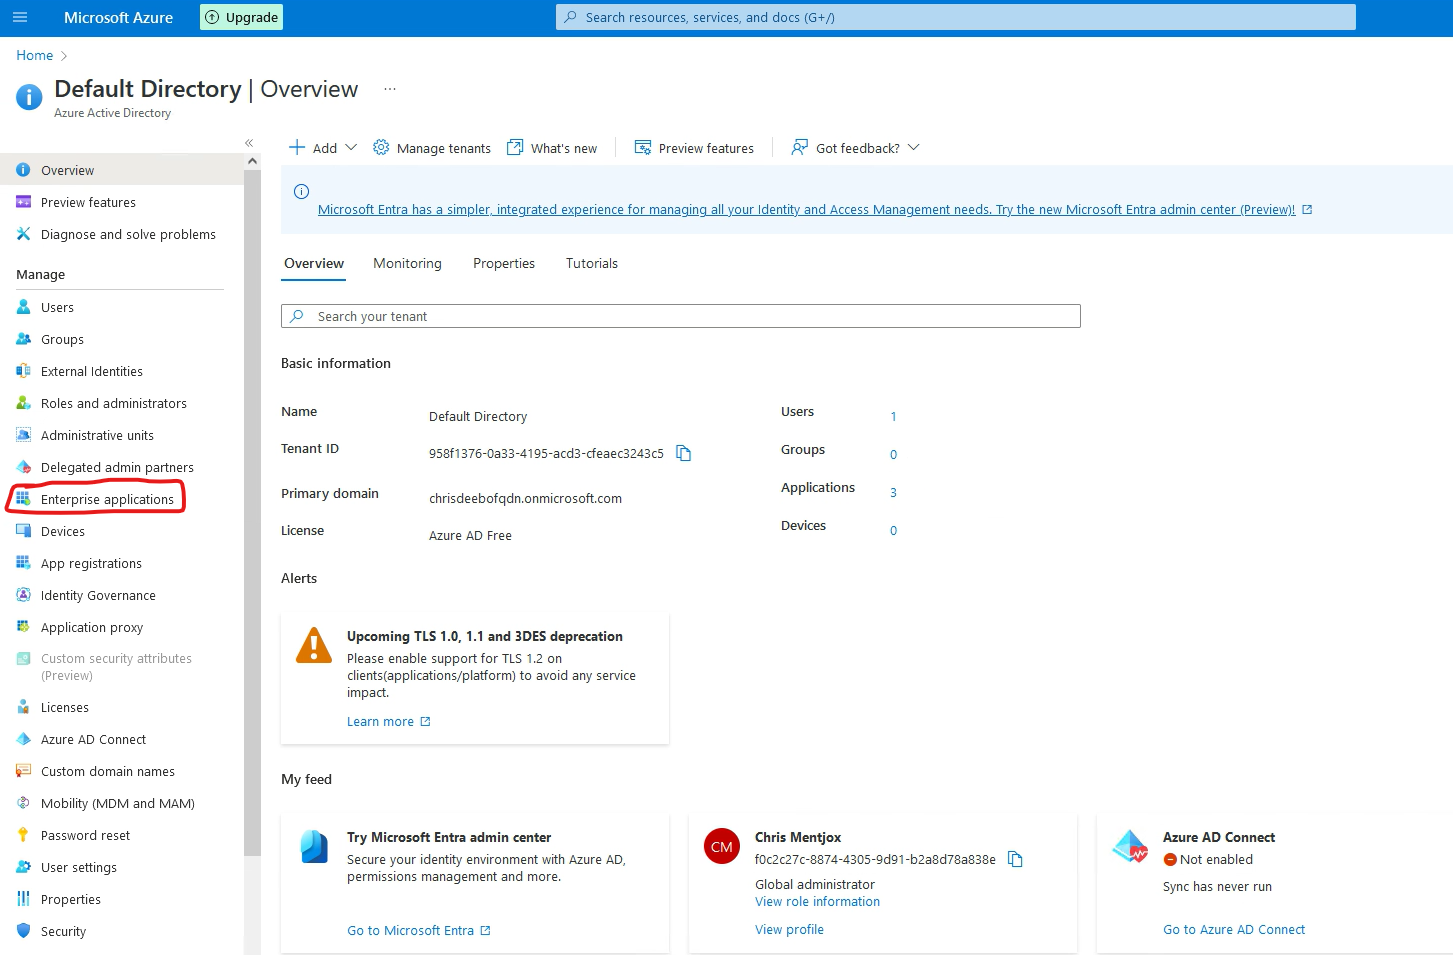
Go to Enterprise application
Go to New application
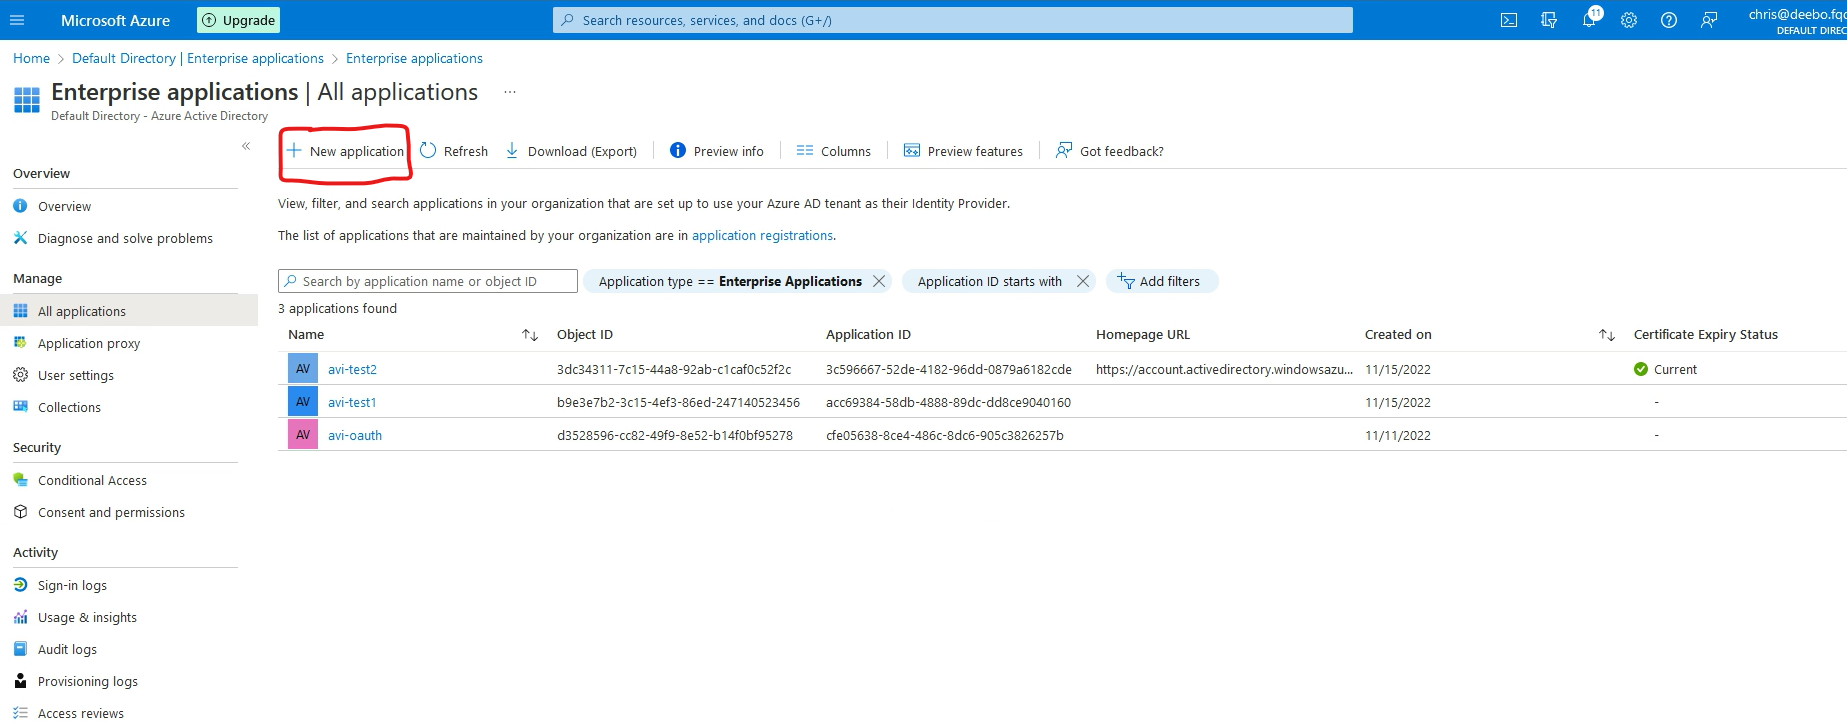
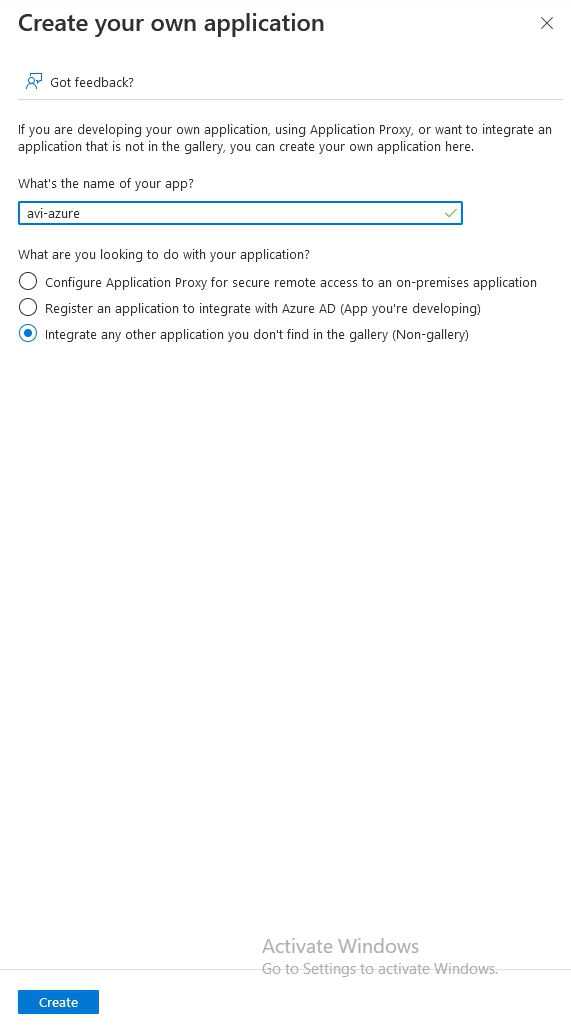
Go to Create your own application

Give the application a name and select Integrate any other application and press Create.
The application will now be created.
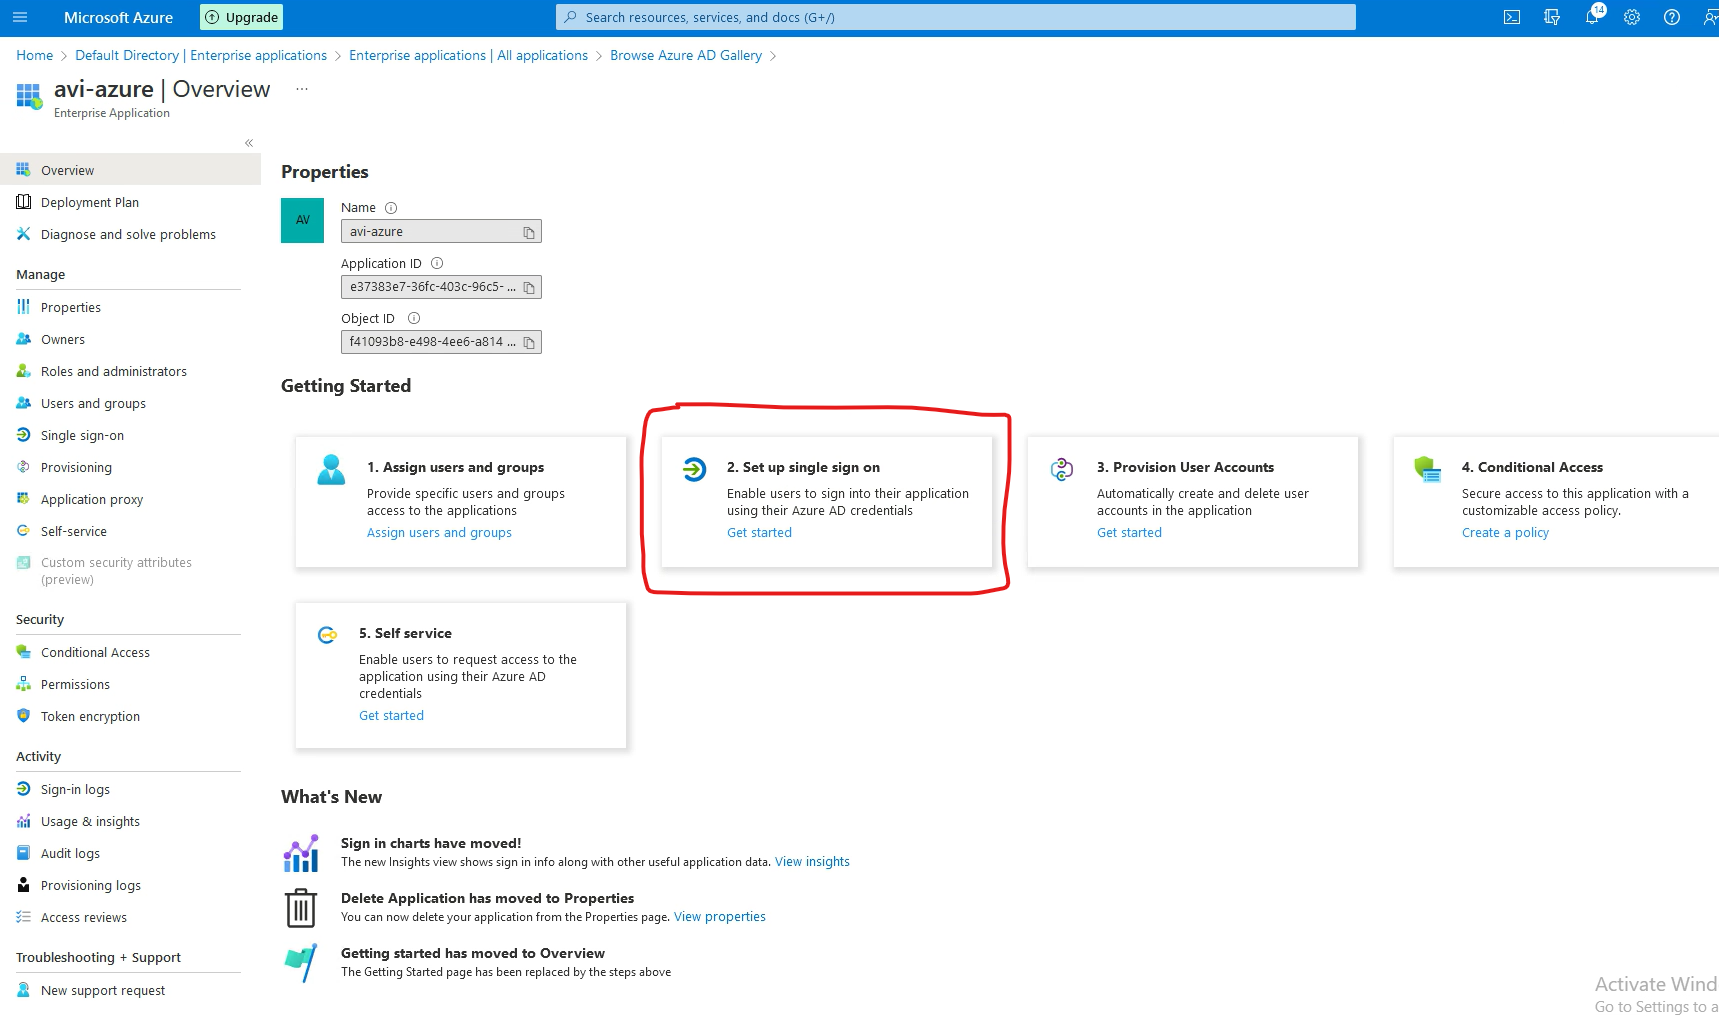
2. Setup single sign-on
Go to 2. Setup single sign on
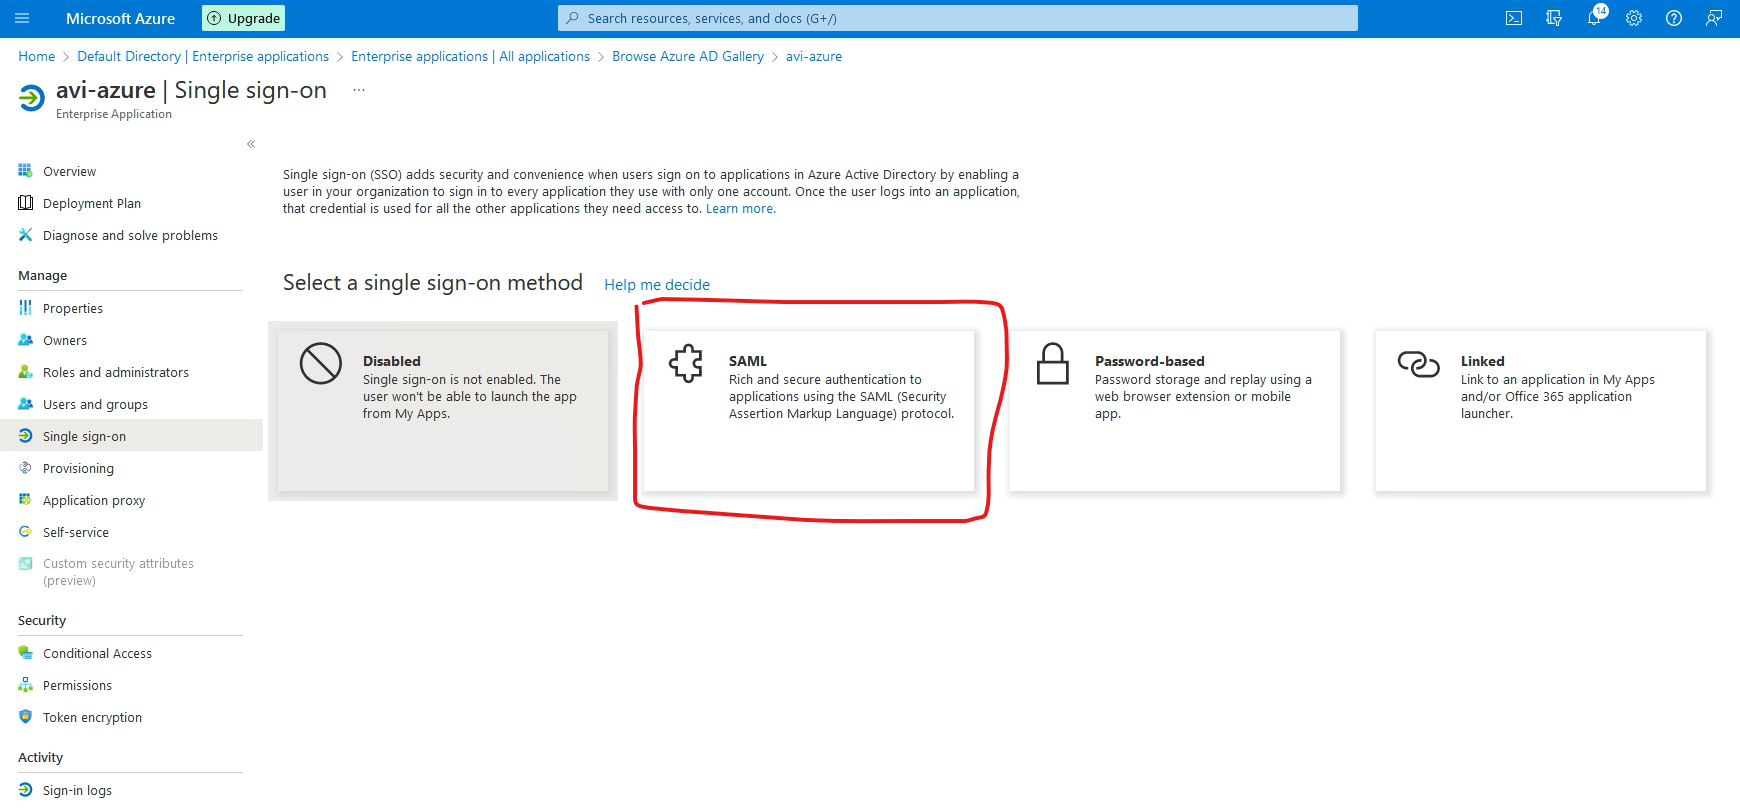
Go to SAML
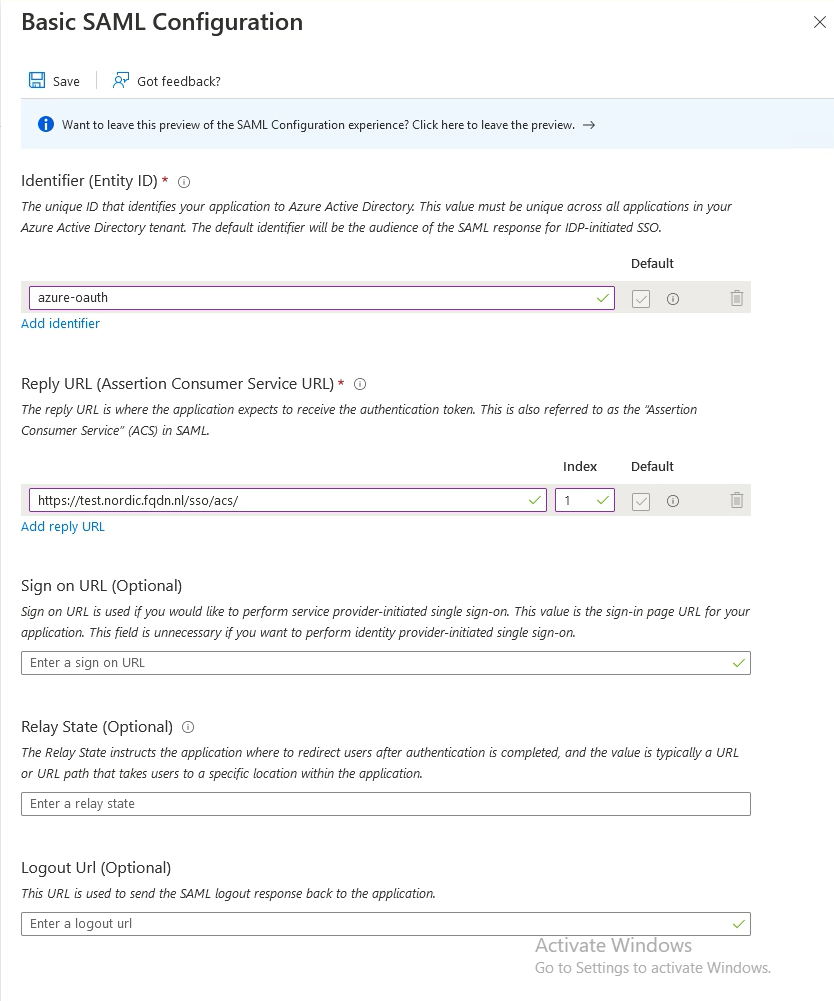
Go to Basic SAML Configuration and press Edit
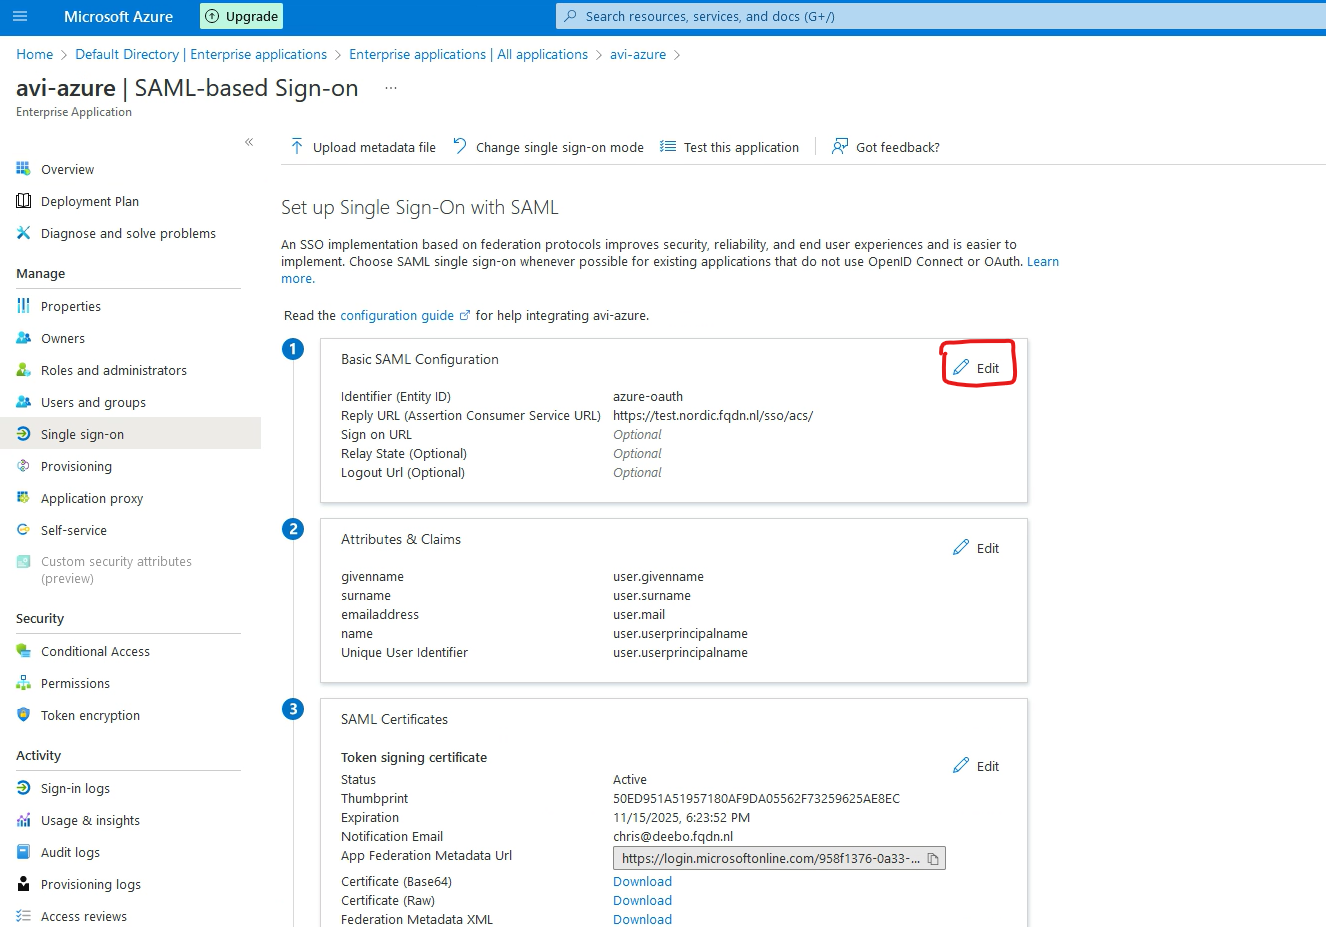
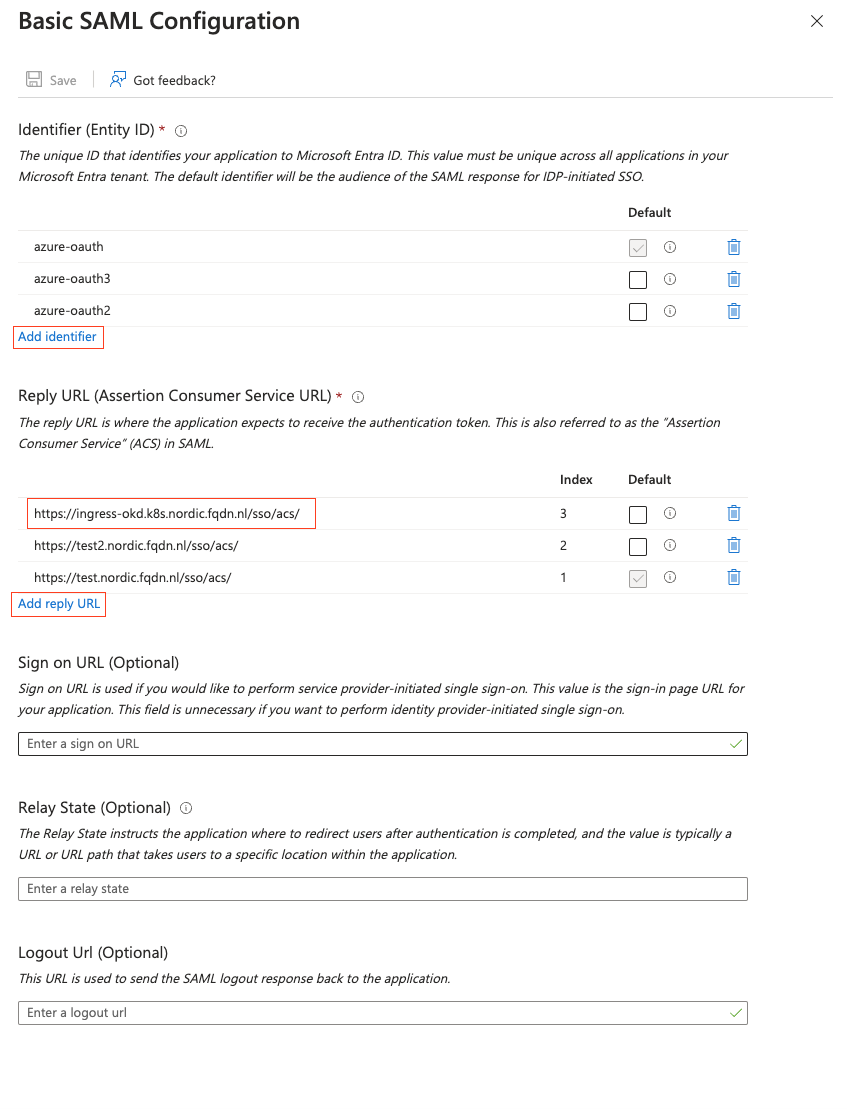
Go to Add identifier. This is the Entity ID, which should match with the config in AKO (See step 2, in the next chapter)
Go to Add reply URL. This is where the authentication token is sent to. This is pointing to my VS.
Add /sso/acs/ to the URL (Please note the trailing / )
Press Save
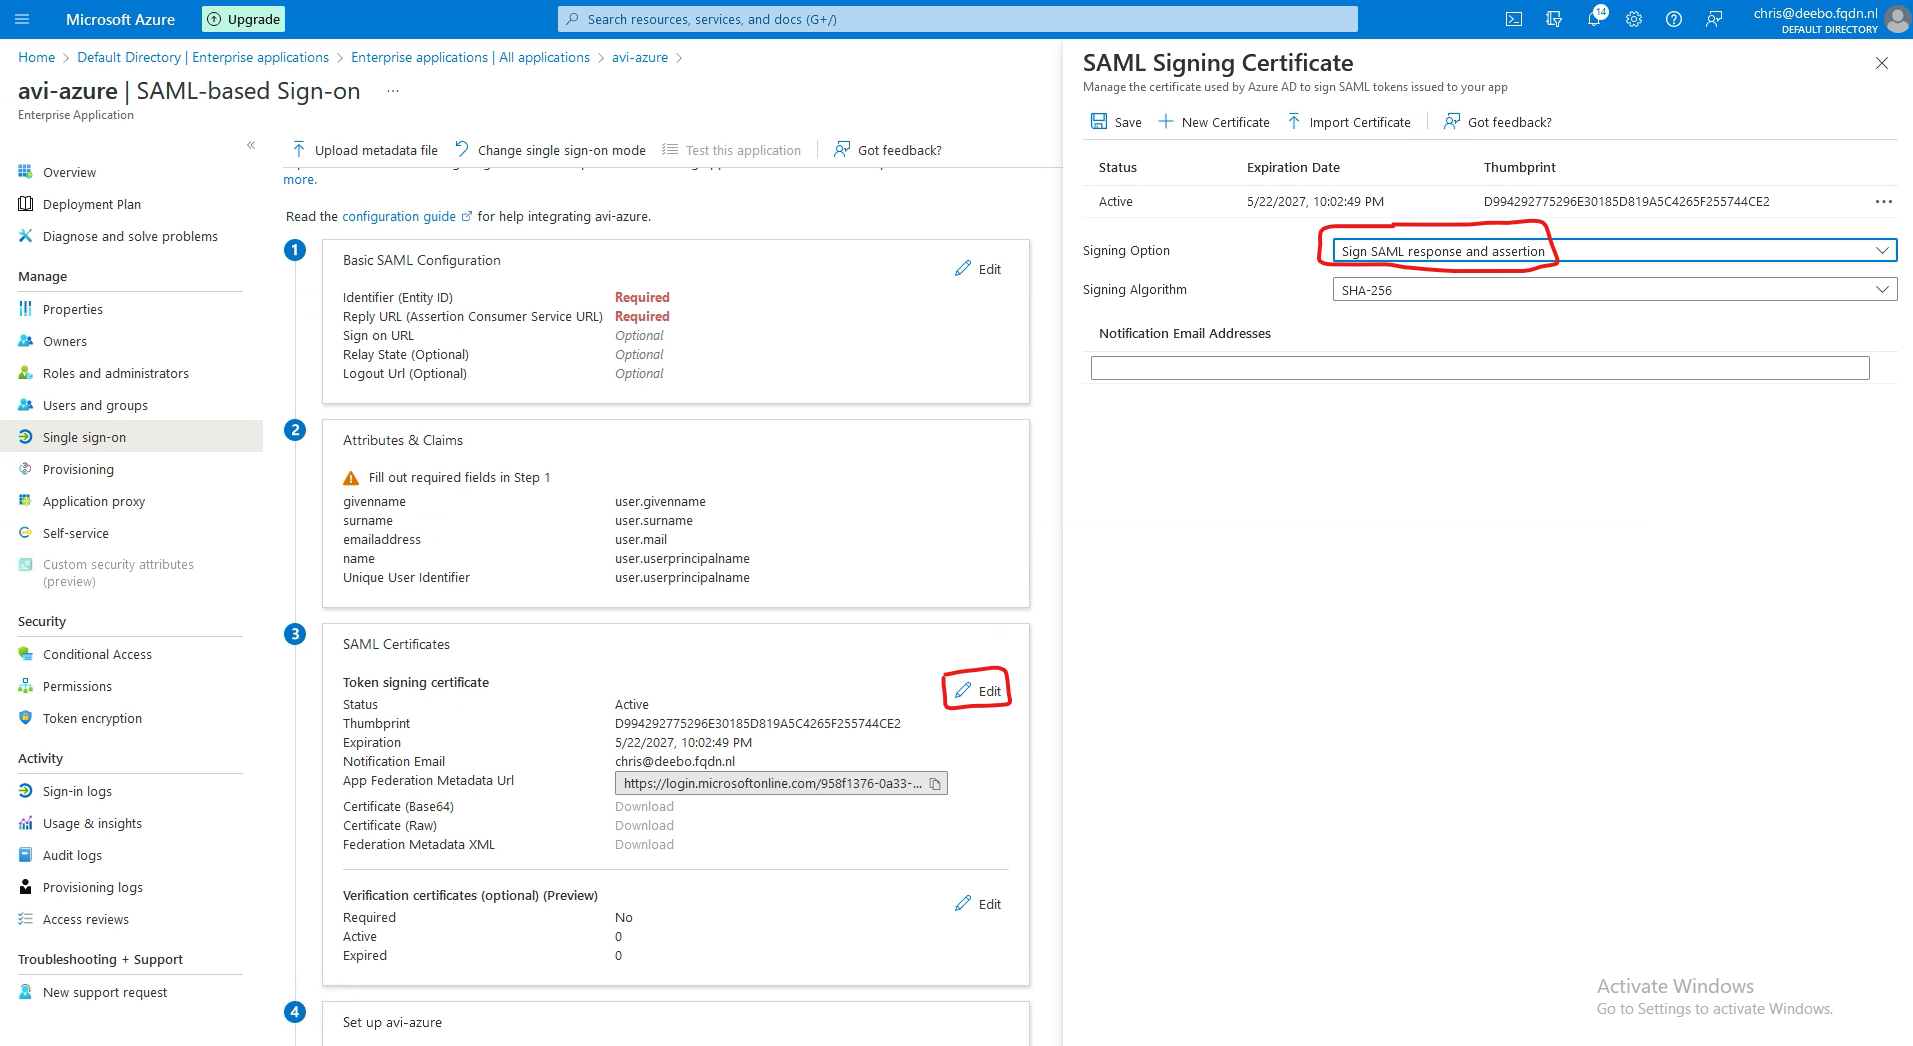
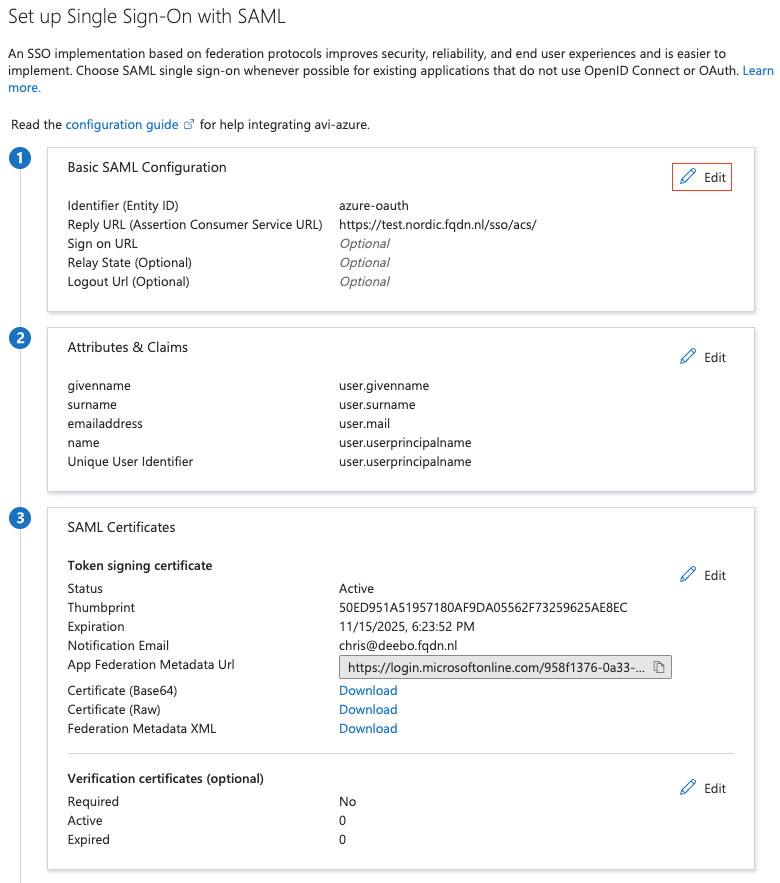
Go to SAML Certificates and press Edit
Change the signing Option to Sign SAML response and assertion
3. Adding users
In Azure go to Home->Azure Active Directory->Enterprise Applications->select your app
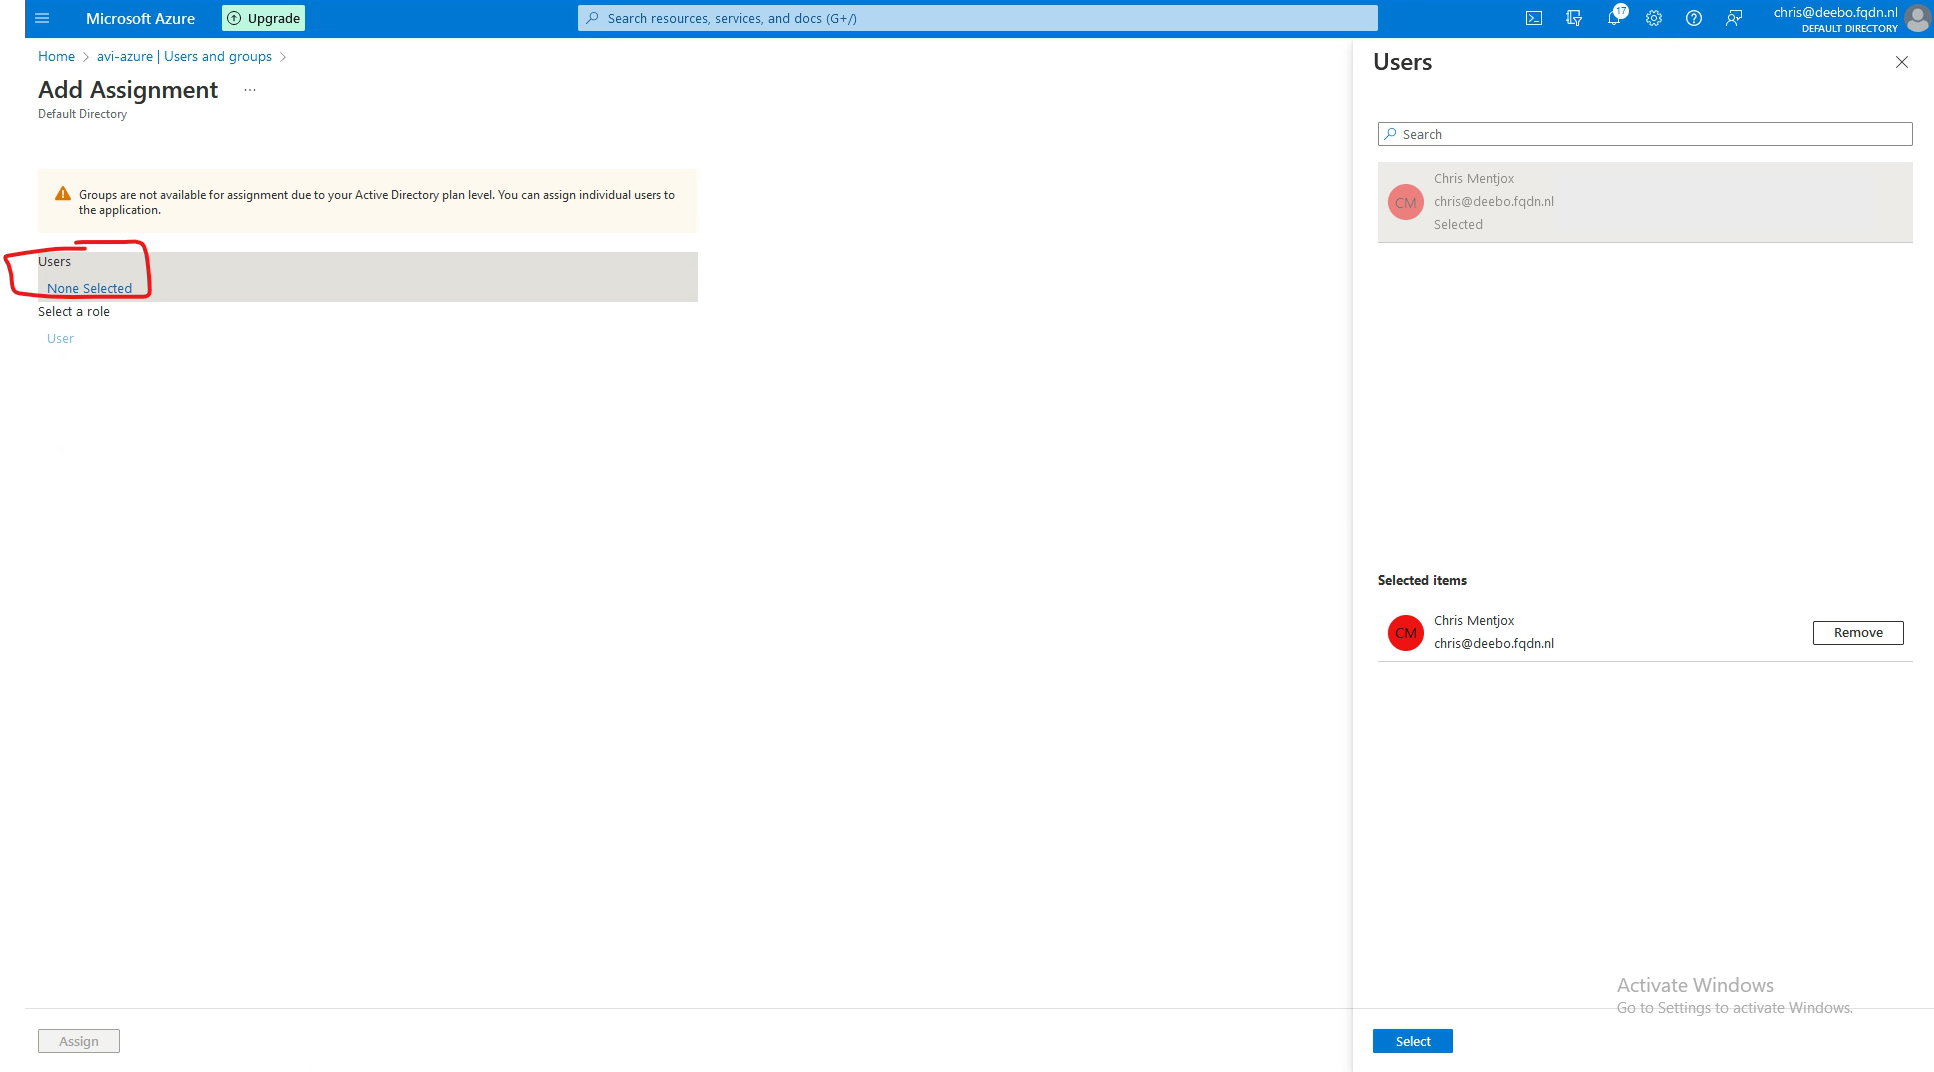
Go to Users and groups
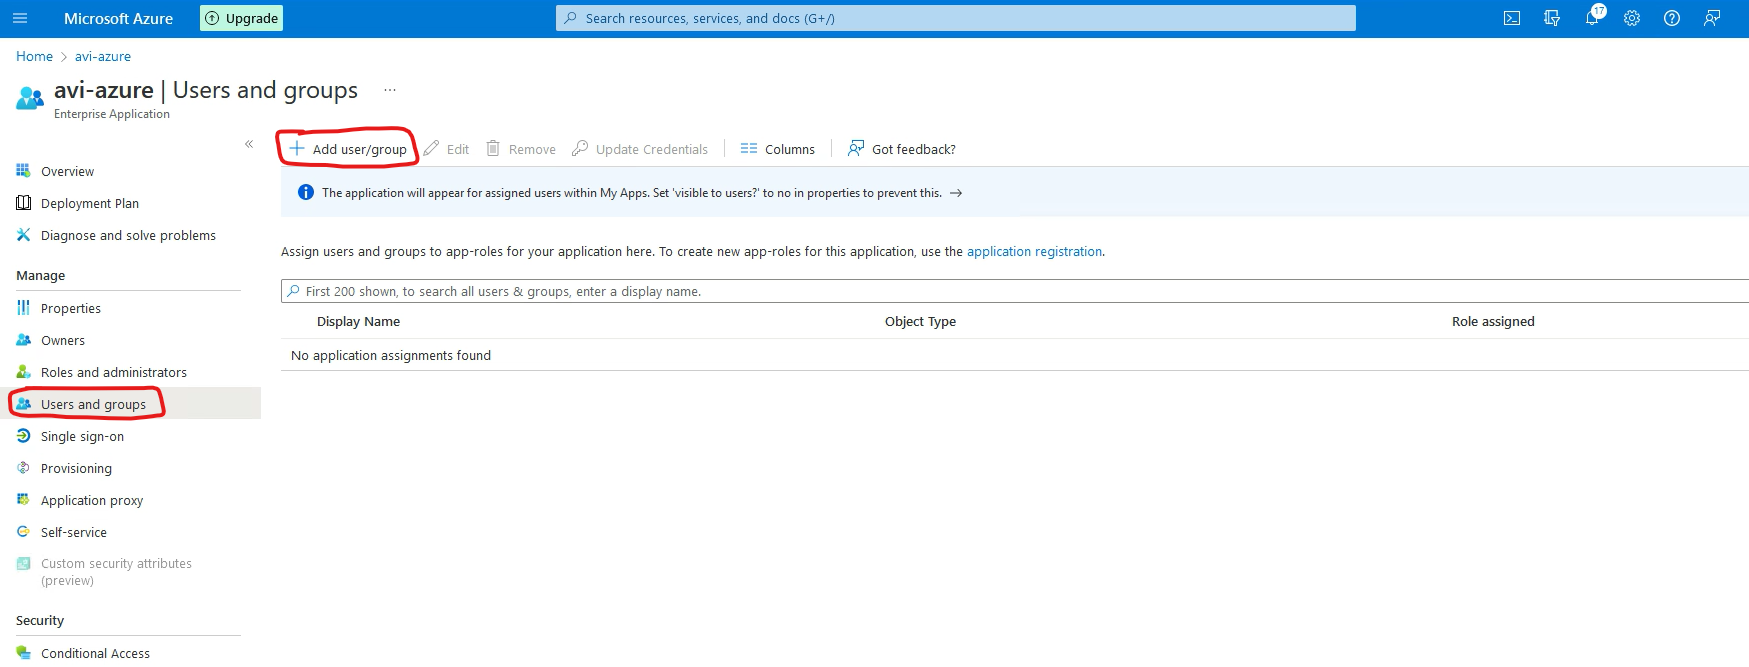
Press none selected and select your user.
AVI setup
1. Create an SSO policy
Go to Templates->Security->Auth Profile and press Create
Type: Select SAML
Service Provider: Select use user-provided entity ID

IDP Metadata: This data needs to be downloaded from Azure.
In Azure go to Home->Azure Active Directory->Enterprise Applications->select your app->Single sign-on
Under SAML Certificates select download next to Federation Metadata XML.
Paste this XML in IDP Metadata. And press Save.

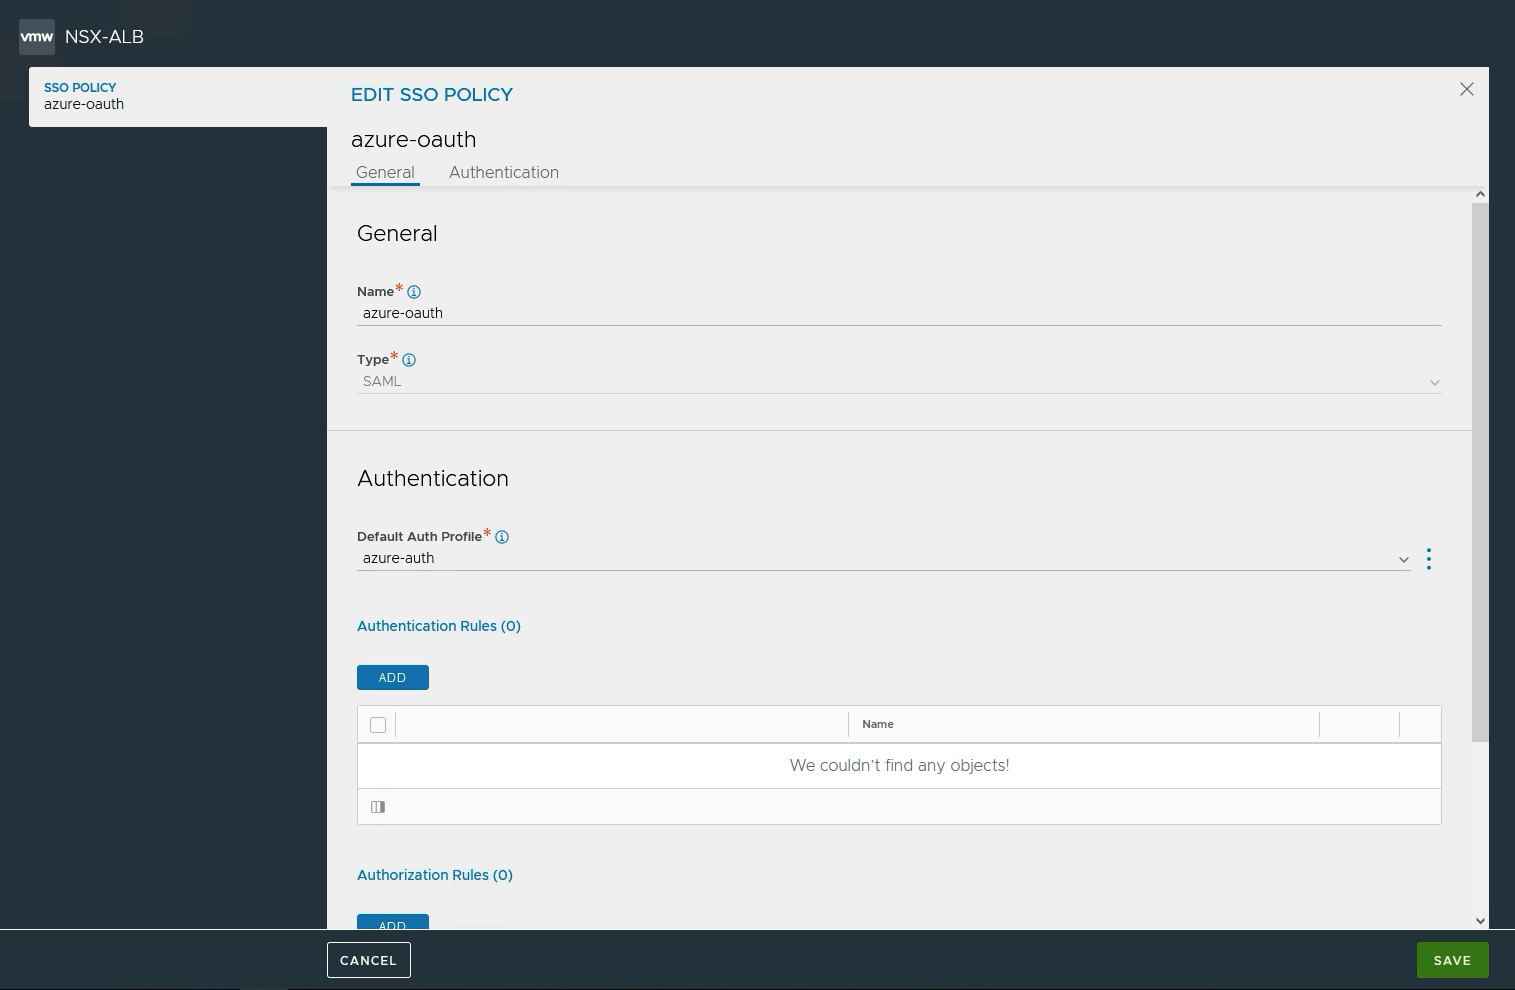
Go to Templates->Security->SSO policy and press Create
Type: Select SAML
Default Auth Profile: Select your Auth profile.
Support for multiple AssertionConsumerServiceURL
Starting with version 22.1.1 and 21.1.6, AVI supports AssertionConsumerServiceURL (ACS).
Many IDPs allow a single configuration (Relying Party Trust) to support multiple applications through the use of multiple Assertion Consumer URLs. For SP-initiated SSO, the SP can supply the required Assertion Consumer URL to be used for the IDP post-back to the application in the authentication request through either AssertionConsumerServiceURL or AssertionConsumerServiceIndex attributes. The IDP will post back to the requested URL.
I will be using ACS in my setup.
For it to work, I will create a new Entity ID (azure-oauth3)
The SSO URL for this would then be https://ingress-okd.k8s.nordic.fqdn.nl/sso/acs
2. Configure AKO
Please follow the AKO installation instructions, if you have not installed AKO already.
You can find them here
Import to change the values.yaml file, and enable EVH
enableEVH: trueThen install, or upgrade your AKO deployment.
Important note: By default ‘enableEVH’ is false. This means the VirtualServices are created in SNI mode.
This might mean a redeploy of all the VirtualServices.
helm install --generate-name oci://projects.registry.vmware.com/ako/helm-charts/ako --version 1.10.3 -f values.yaml --set ControllerSettings.controllerHost=192.168.11.71 --set avicredentials.username=admin --set avicredentials.password=VMware1\! --namespace=avi-systemDeploy the application in OpenShift
Time for deploying an application and testing out SAML.
I am using a simple application.
Deployment
apiVersion: apps/v1
kind: Deployment
metadata:
  name: web-front1
spec:
  replicas: 4
  selector:
    matchLabels:
      app: web-front1
  template:
    metadata:
      name: web-front1
      labels:
        app: web-front1
    spec:
      containers:
        - name: web-front1
          image: tacobayle/busybox-v1
          command: [ "sh", "-c"]
          args:
          - while true; do
              echo -e "HTTP/1.1 200 OK\n\n$(date)\nApp version is $(printenv AppVersion)\nNode is on nordiclab $(printenv MY_NODE_NAME)\nPod is $(printenv MY_POD_NAME)\nNamespace is $(printenv MY_POD_NAMESPACE)\nPod IP is $(printenv MY_POD_IP)\nPod Service account is $(printenv MY_POD_SERVICE_ACCOUNT)" | nc -l -p 8080;
            done;
          env:
            - name: MY_NODE_NAME
              valueFrom:
                fieldRef:
                  fieldPath: spec.nodeName
            - name: MY_POD_NAME
              valueFrom:
                fieldRef:
                  fieldPath: metadata.name
            - name: MY_POD_NAMESPACE
              valueFrom:
                fieldRef:
                  fieldPath: metadata.namespace
            - name: MY_POD_IP
              valueFrom:
                fieldRef:
                  fieldPath: status.podIP
            - name: MY_POD_SERVICE_ACCOUNT
              valueFrom:
                fieldRef:
                  fieldPath: spec.serviceAccountName
      restartPolicy: Always
Service
apiVersion: v1
kind: Service
metadata:
  name: web-front-1
spec:
  selector:
    app: web-front1
  ports:
    - protocol: TCP
      port: 80
      targetPort: 8080
  type: NodePort
Route
apiVersion: route.openshift.io/v1
kind: Route
metadata:
  name: ingress-okd.k8s.nordic.fqdn.nl
spec:
  host: ingress-okd.k8s.nordic.fqdn.nl
  path: "/"
  to:
   kind: Service
   name: web-front-1
  port:
    targetPort: 8080
  tls:
    termination: edge
    insecureEdgeTerminationPolicy: Redirect
    certificate: |-
     -----BEGIN CERTIFICATE-----
     <snip>
     -----END CERTIFICATE-----
    key: |-
     -----BEGIN PRIVATE KEY-----
     <snip>
     -----END PRIVATE KEY-----
SAML HostRule
This one is very important. Due to a discovered issue in the handling of SAML on EVH, we need to set a specific option on the EVH Parent. The issue is addressed in the next AVI release.
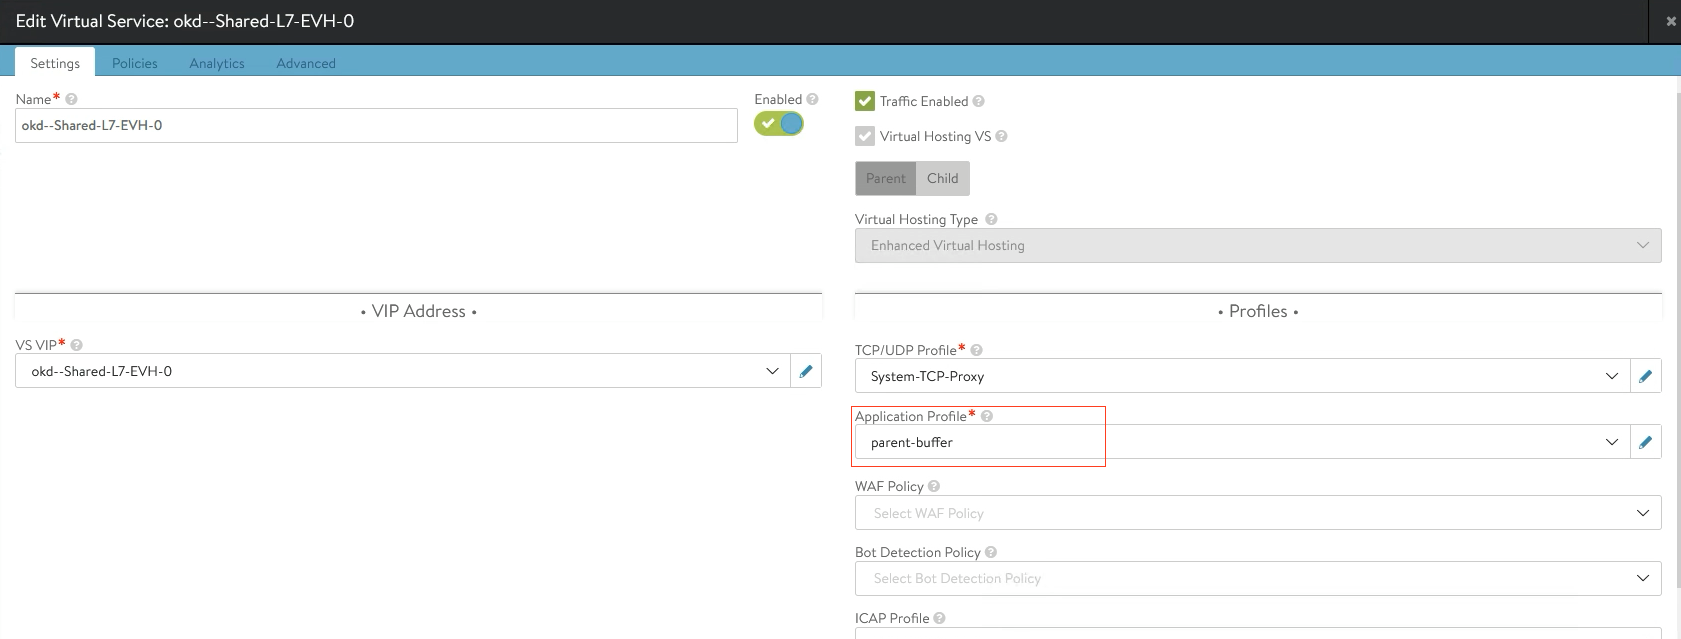
In my setup, the Parent VirtualService is named ‘okd–Shared-L7-EVH-0’
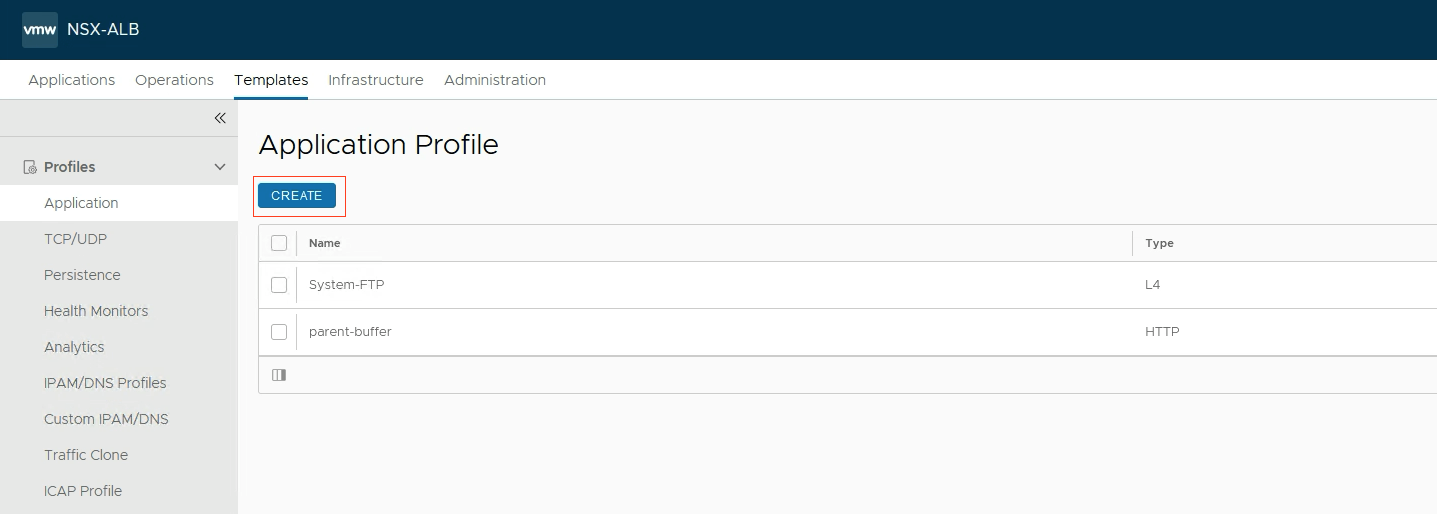
The application-profile I created is named ‘parent-buffer’.
Go to: Templates->Applications and press create to create one of type HTTP.
Enable ‘Enable Request Body Buffering’ in the profile
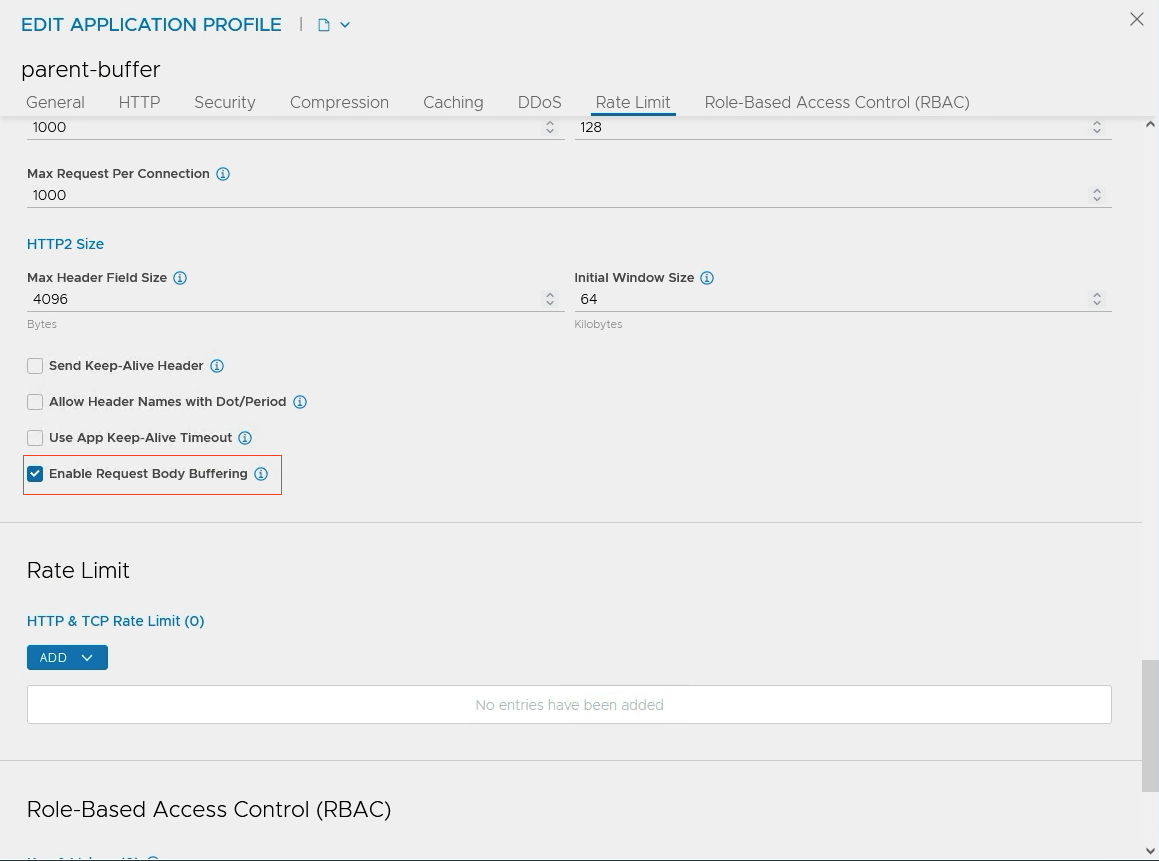
Refer to this profile in the yaml file.
apiVersion: ako.vmware.com/v1alpha1
kind: HostRule
metadata:
   name: saml-hostrule
spec:
  virtualhost:
    fqdn: okd--Shared-L7-EVH-0
    fqdnType: Contains
    applicationProfile: "parent-buffer"
You can check the VirtualService in the GUI.
Go to: Applications->VirtualService and edit your VirtualService.
Check if your created profile is configured correctly.
SAML SSORule
apiVersion: ako.vmware.com/v1alpha2
kind: SSORule
metadata:
  name: my-ssorule
  namespace: demo
spec:
  fqdn: ingress-okd.k8s.nordic.fqdn.nl
  samlSpConfig:
    authnReqAcsType: SAML_AUTHN_REQ_ACS_TYPE_URL
    cookieName: WjNkWL
    cookieTimeout: 120
    entityID: azure-oauth3
    singleSignonURL: https://ingress-okd.k8s.nordic.fqdn.nl/sso/acs/
    useIdpSessionTimeout: false
  ssoPolicyRef: azure-oauth
Testing
You can check the VirtualService in the GUI.
Go to: Applications->VirtualService en edit your VirtualService.
Go to: Policies->Access
The config should look similar to this.

Open a web browser and go to the URL of your VS. In my case it is https://ingress-okd.k8s.nordic.fqdn.nl
Upon opening, the browser will redirect to Azure and ask for your Username and Password
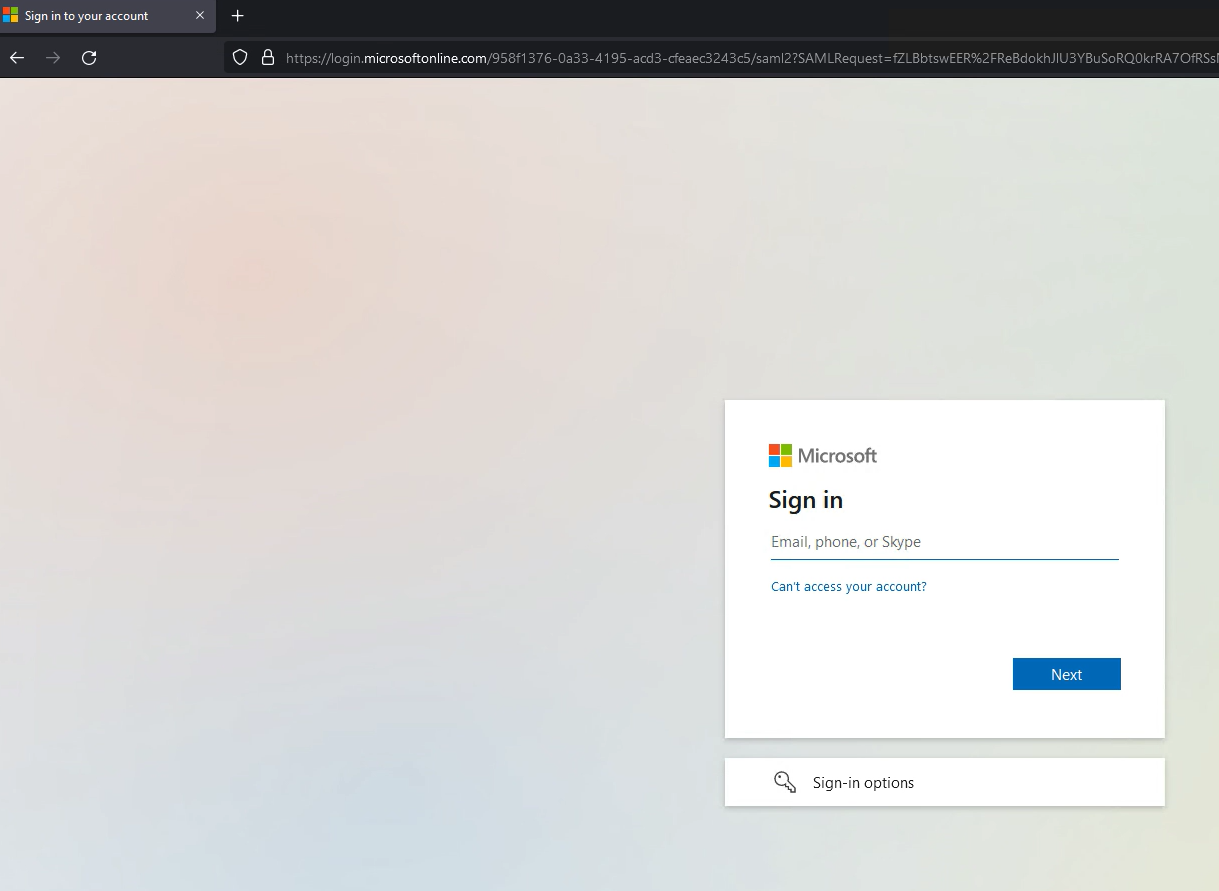
If the user is authenticated, the browser will redirect back to the VS and AVI allows access to the VS.
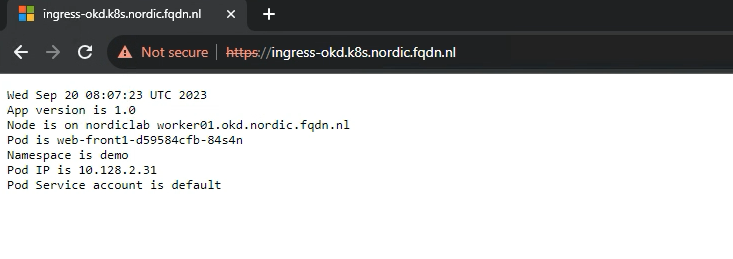
Final words
Using Azure as IDP is just an example. It can be any IDP that supports SAML.
I hope this blog was useful.
If you have comments or suggestions, please let me know!