
Introduction
NSX Advanced load balancer (AVI) is a 100% software-defined multi-cloud application services platform with Software Load Balancers, Intelligent WAF (iWAF), and Container Ingress.
All modern applications use load balancing nowadays. Load balancing is the process of distributing network traffic across multiple servers.
The goal of this blog
The goal of this blog is to configure L3 Direct Server Return (DSR) on Avi. I will be using IP-in-IP encapsulation. Avi can also do L2 DSR. See Direct Server Return on NSX Advanced Load Balancer for more information.
DSR is often applicable to audio and video applications as these applications are very sensitive to latency.
In my example, I am using TCP. You can also use UDP if you want.
I am not going over the Avi controller, SE, and cloud setup.
What I am using
For my setup, I am using the following.
AVI 22.1.4, using vCenter cloud
NSX 3.2.1.2
Ubuntu 22.04.1 LTS
Nsx is not needed for DSR to work. I am just using NSX in my lab.
If you do use NSX, URPF mode needs to be on ‘none’.
URPF stands for Unicast Reverse Path Forwarding.
When URPF is enabled, the T1 only forwards packets if they are received on the same interface that would be used to forward the traffic to the source of the packet. If the route to the source address of the packet is through a different interface than the one it is received on, the packet is dropped.
Network diagram
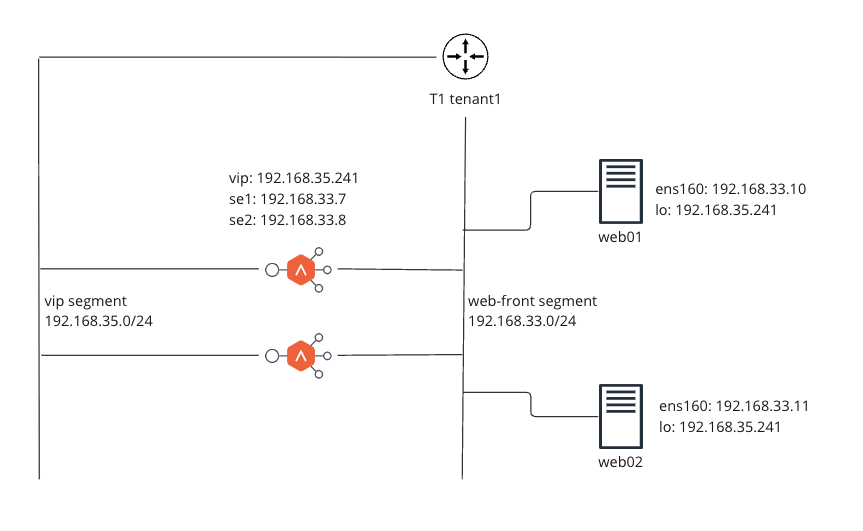
This is what my network setup looks like. For this demonstration, both segments are connected to the same T1.
How does it work
In the diagram, the VIP (192.168.35.241) on the ServiceEngines, is also configured on the loopback interface of the servers. This is needed for the server to be able to use that address as the source address.
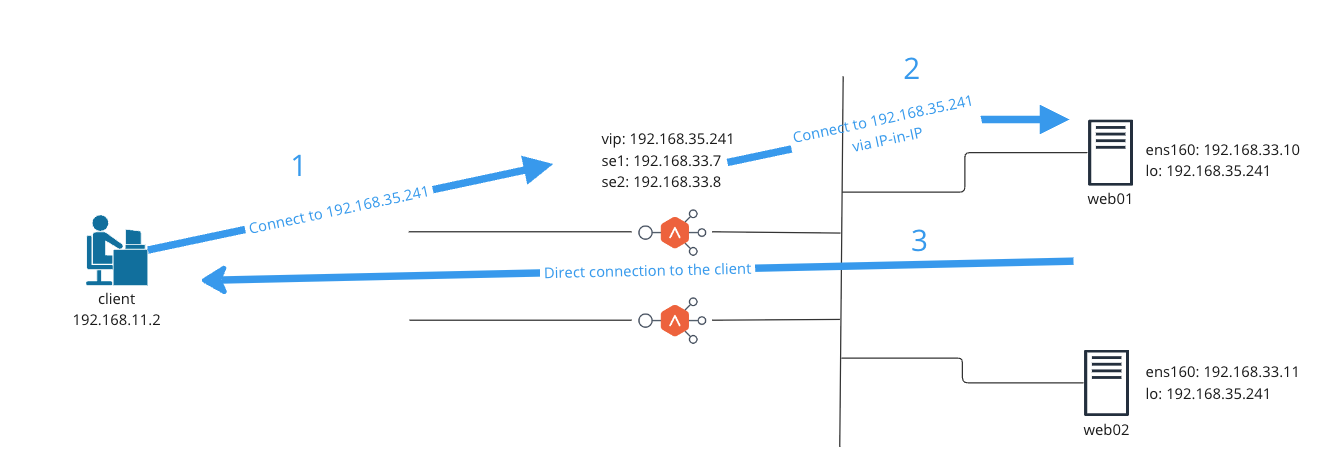
Step 1: The client connects to http://192.168.35.241, which is the VIP address.
Step 2: The ServiceEngines encapsulate the packet (source:192.168.11.2, dest:192.168.35.241) in IP-in-IP packet (source:192.168.33.7 dest:192.168.33.10)
Looking at the packet capture
The packet comes from 192.168.33.7 (SE1) sent to 192.168.33.10 (web01) with IP-in-IP from 192.168.11.2 (client) to 192.168.35.241 (web01 Loopback)
08:32:28.557485 IP 192.168.33.7 > 192.168.33.10: IP 192.168.11.2.50668 > 192.168.35.241.80: Flags [P.], seq 1:392, ack 1, win 8212, length 391: HTTP: GET / HTTP/1.1Step 3: The server sent back the packet directly to the client (source:192.168.35.241 dest:192.168.11.2)
Looking at the packet capture
The packet returns from 192.168.35.241 (web01 Loopback) directly to 192.168.11.2 (client)
08:32:28.557931 IP 192.168.35.241.80 > 192.168.11.2.50668: Flags [P.], seq 1:655, ack 392, win 501, length 654: HTTP: HTTP/1.1 200 OK
Configuration
How do we configure DSR on Avi and the Servers?
Configure the servers
First, we need to take care of some sysctl settings. Keep in mind that interface names might be different in your case. I have also added IPV6. L3 DSR ipv6 is supported from version 30.2.1
Add the following lines to /etc/sysctl.conf
net.ipv4.ip_forward=1
net.ipv4.conf.all.rp_filter=0


For IPV6 add
net.ipv6.conf.all.forwarding=1
Edit your Netplan configuration. Configuration names and interfaces might be different in your case.
vi /etc/netplan/01-netcfg.yaml
network:
    ethernets:
        ens160:
                dhcp4: false
                addresses:
                        - 192.168.33.10/24
                        - fc00::10/64
                routes:
                        - to: default
                          via: 192.168.33.1
                        - to: ::/0
                          via: fc00::1
                nameservers:
                        search: [lab.fqdn.nl]
                        addresses: [192.168.11.2]
        lo:
                dhcp4: false
                addresses:
                        - 192.168.35.241/32
                        - fc00:3::24a/128
    tunnels:
        tunl0:
                mode: ipip
                local: 192.168.33.10
                remote: 0.0.0.0
                addresses:
                        - 192.168.35.241/32
        ip6tnl0:
                mode: ip6ip6
                local: fc00::10
                remote: ::0
                addresses:
                        - fc00:3::24a/128
    version: 2
Configure Avi
It’s time to configure Avi.
1. Create a network profile
Goto Templates->Profiles->TCP/UDP and press Create
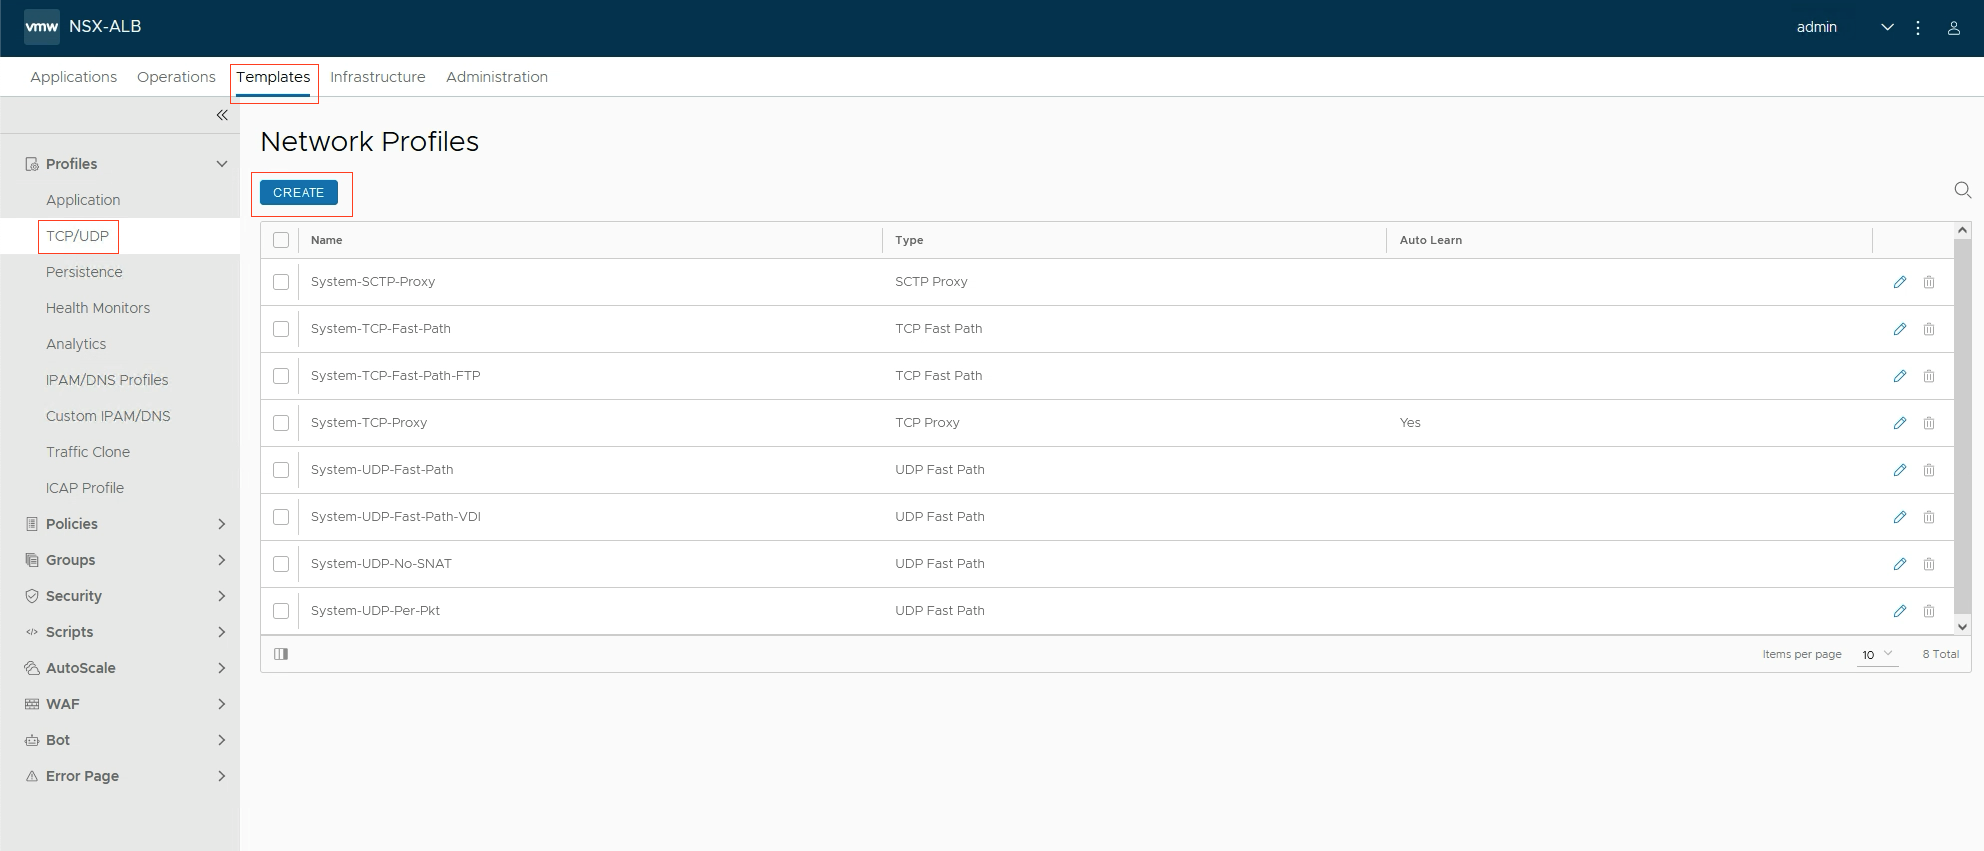
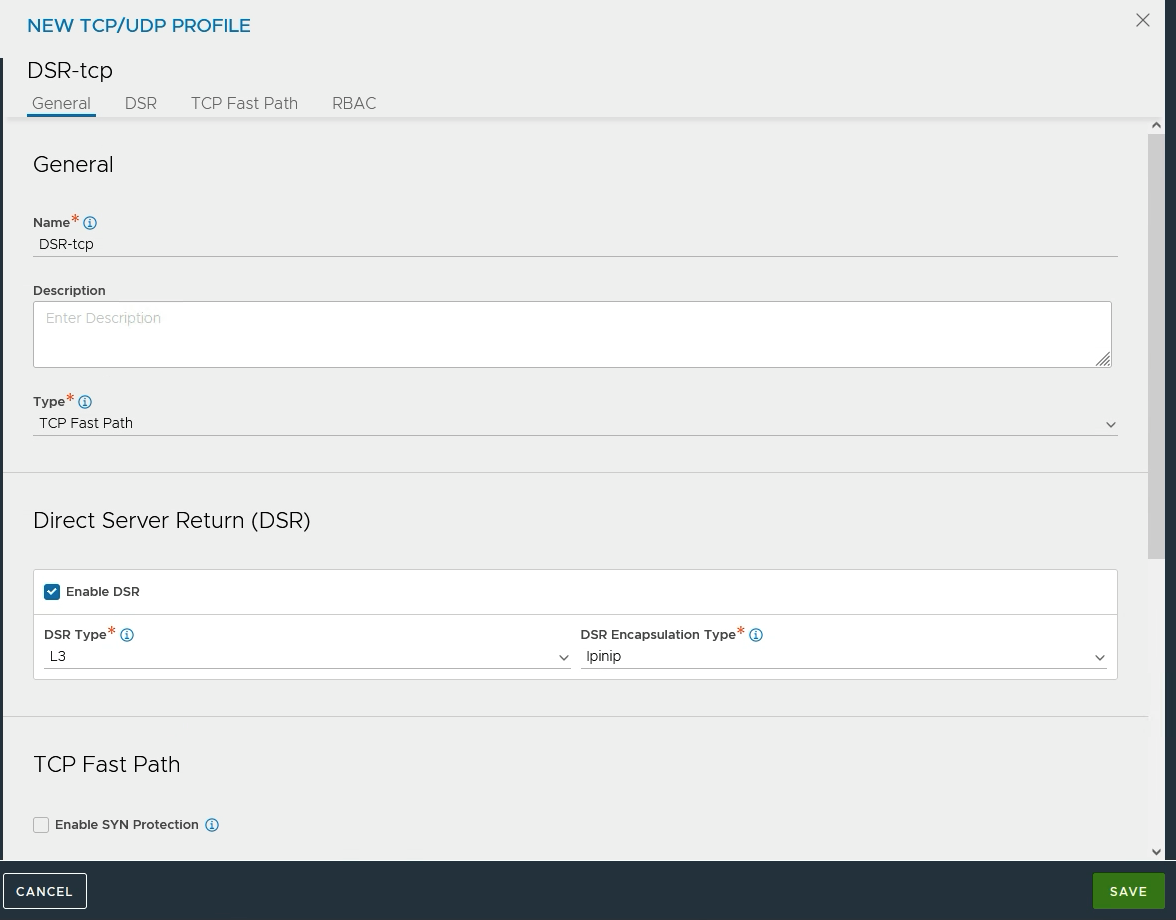
I am making a TCP profile. Select TCP Fast Path under Type.
Select Enable DSR under Direct Server Return. Type L3, encapsulation ipinip
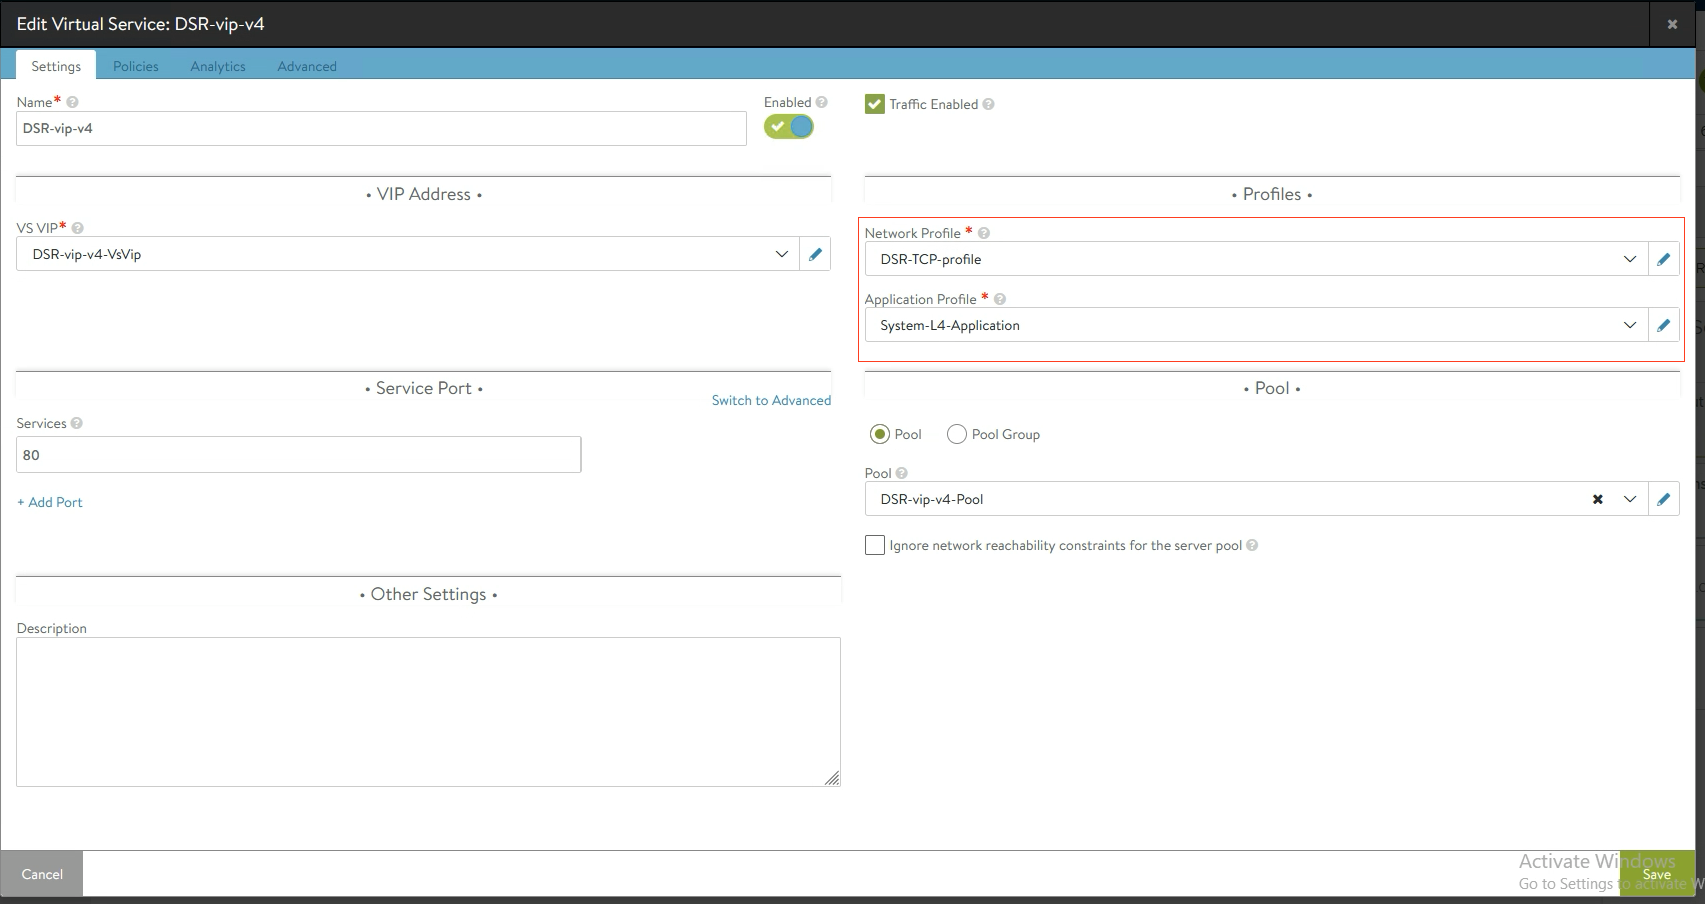
2. Create (or edit) a virtual service
Goto Applications->Virtual Services and create or edit a virtual service.
Under profiles, select Application profile System-L4-Application and the created Network Profile.
Under pool, create or select a pool.
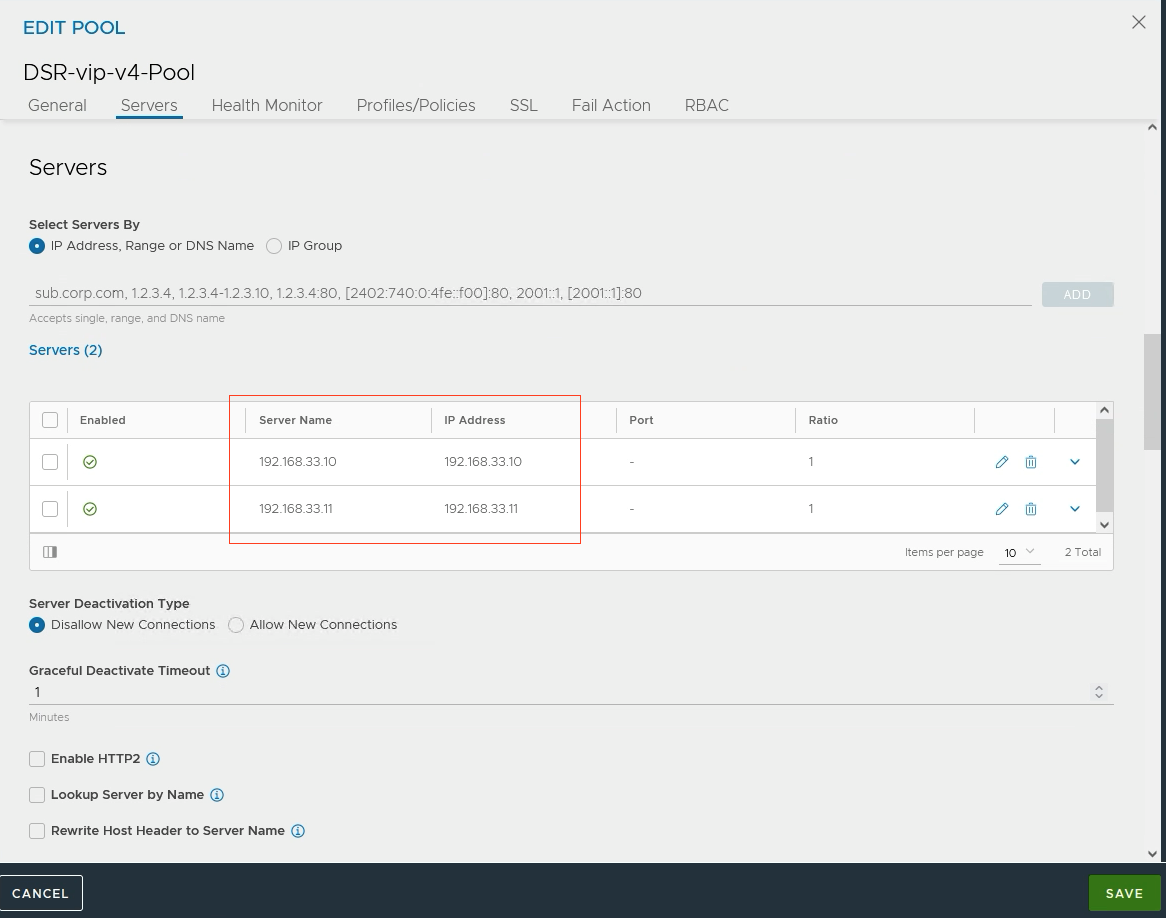
3. Create a pool
As a server IP address, use the IP address of the server itself. Not the VIP.
You can also configure a health monitor if that is needed.
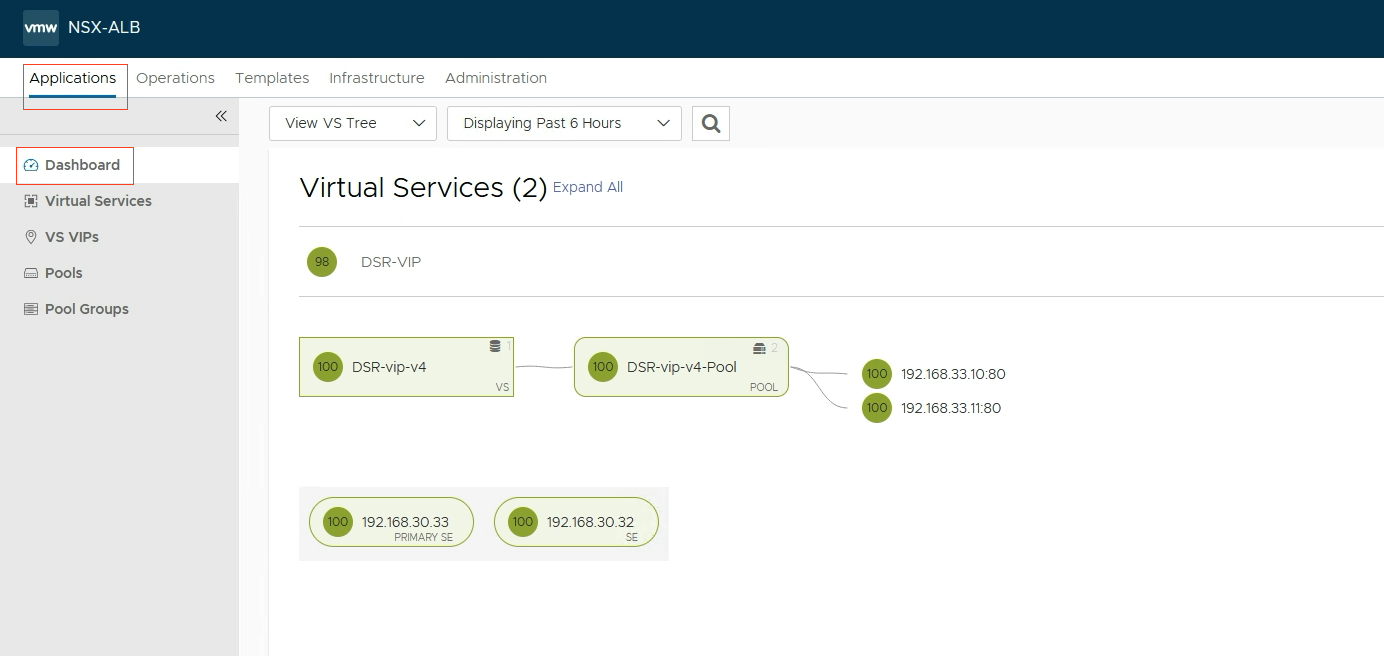
Goto Applications->Dashboard and check the status of your virtual service.
Final words
DSR can be very useful in some use cases. I.e audio and video. It can also be used with http (as I did in my example) or DNS.
If you have any questions or suggestions, please leave a comment.