Introduction
NSX Advanced load balancer (AVI) is a 100% software-defined multi-cloud application services platform with Software Load Balancers, Intelligent WAF (iWAF), and Container Ingress.
All modern applications use load balancing nowadays. Load balancing is the process of distributing network traffic across multiple servers.
Authentication is an essential part of this.
SAML is an acronym used to describe the Security Assertion Markup Language (SAML). Its primary role in online security is that it enables you to access multiple web applications using one set of login credentials. It works by passing authentication information in a particular format between two parties, usually an identity provider (IDP) and a web application.
The goal of this blog
The goal of this blog is to configure an application for SAML-based authentication against Azure IDP.
I will be using Azure as IDP. SAML will be configured on a VirtualService in AVI
I will not explain how to install AVI or how to do the initial configuration of service engines or VirtualServices.
What I am using
For my setup, I am using the following.
AVI 22.1.2-2p2
Azure
Azure setup
First I will setup Azure.
1. Create an enterprise application
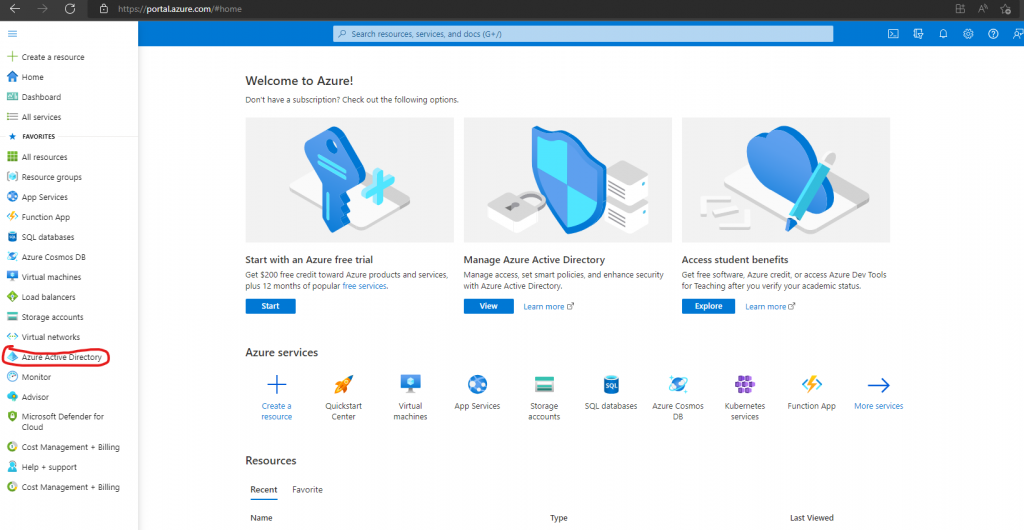
Go to Azure portal->Azure Active Directory
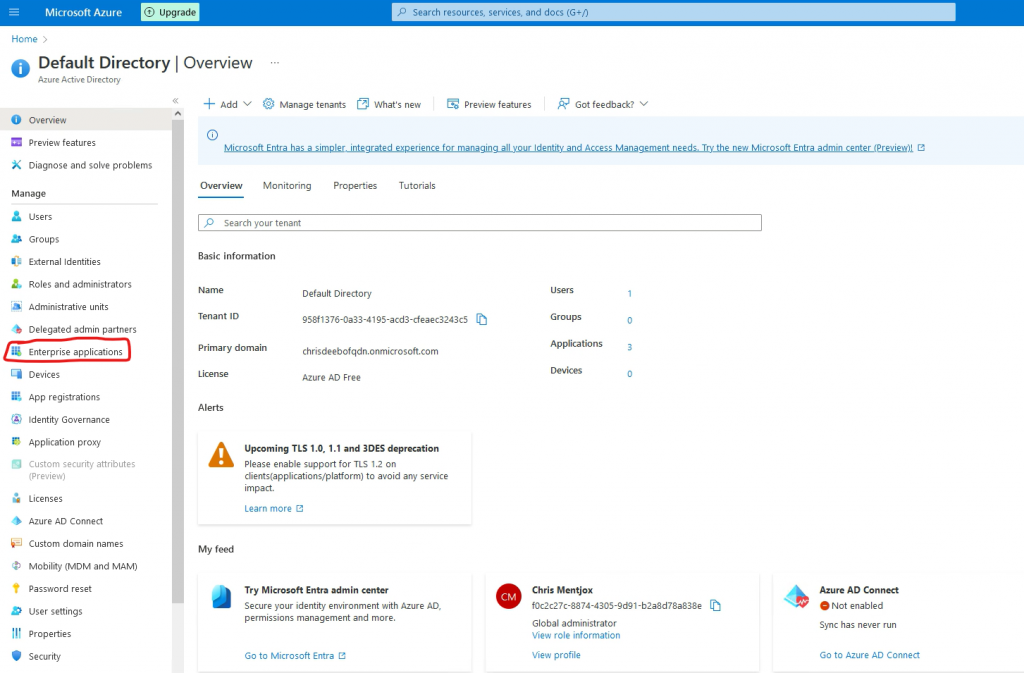
Go to Enterprise application
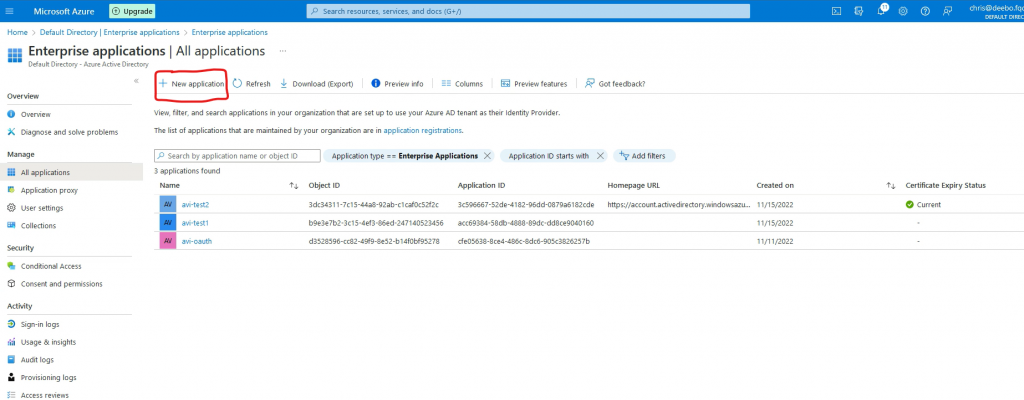
Go to New application
Go to Create your own application
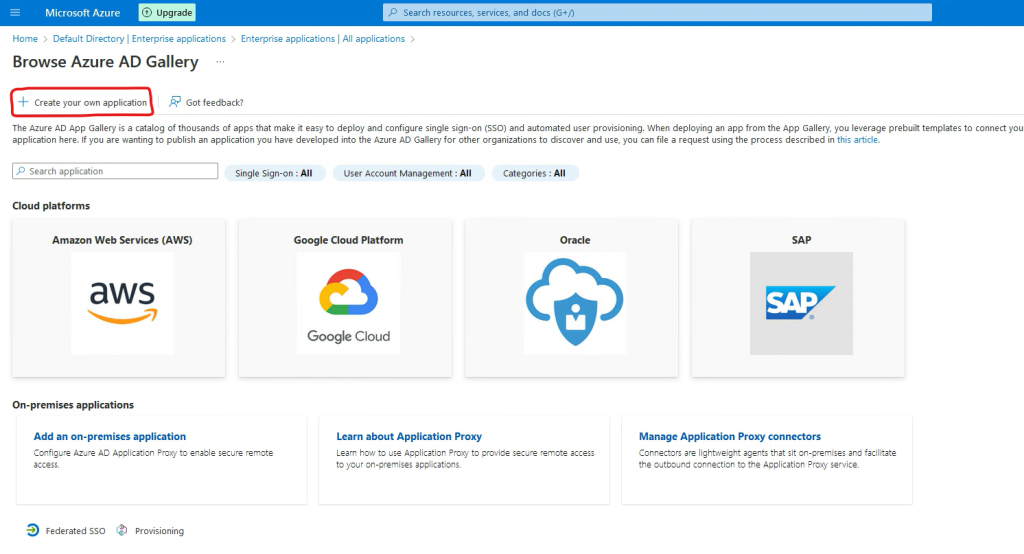
Give the application a name and select Integrate any other application and press Create.
The application will now be created.
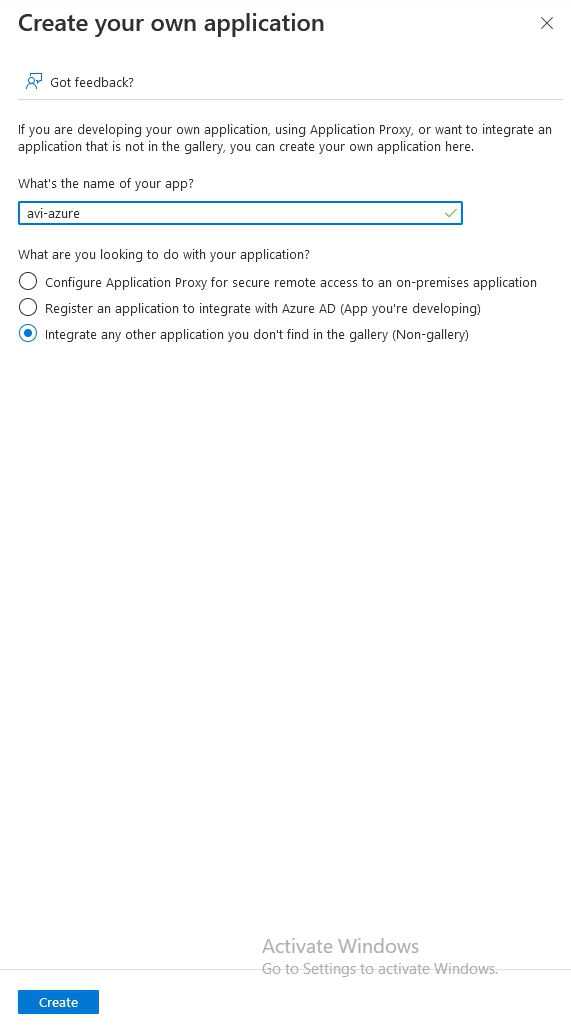
2. Setup single sign-on
Go to 2. Setup single sign on
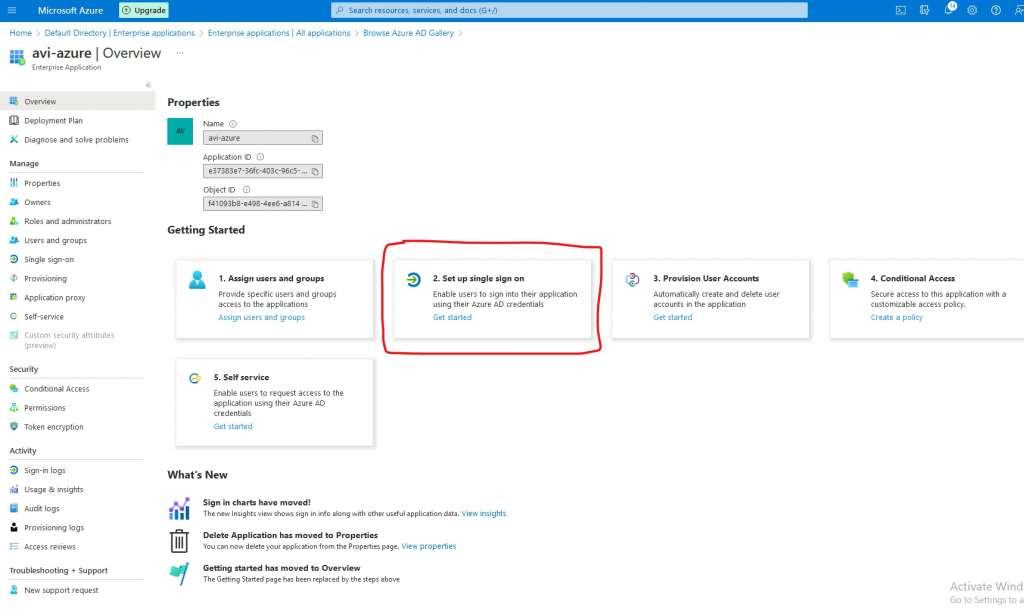
Go to SAML
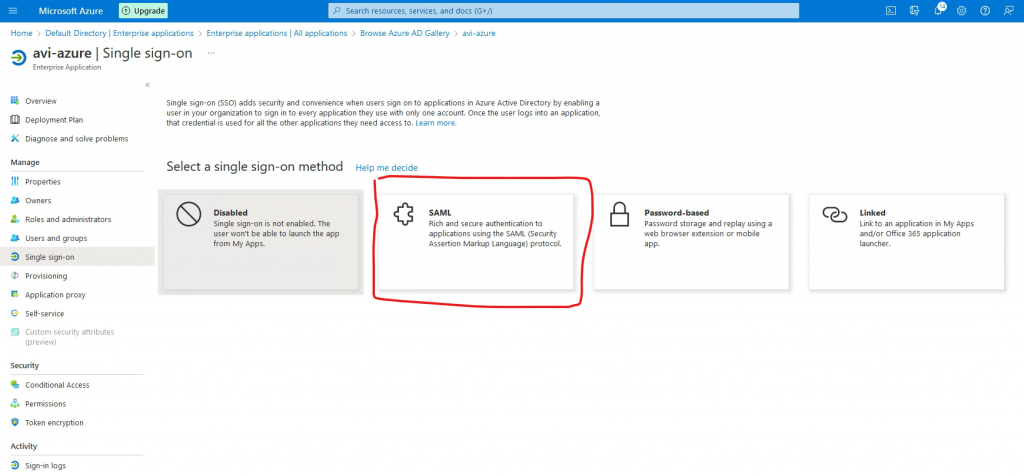
Go to Basic SAML Configuration and press Edit
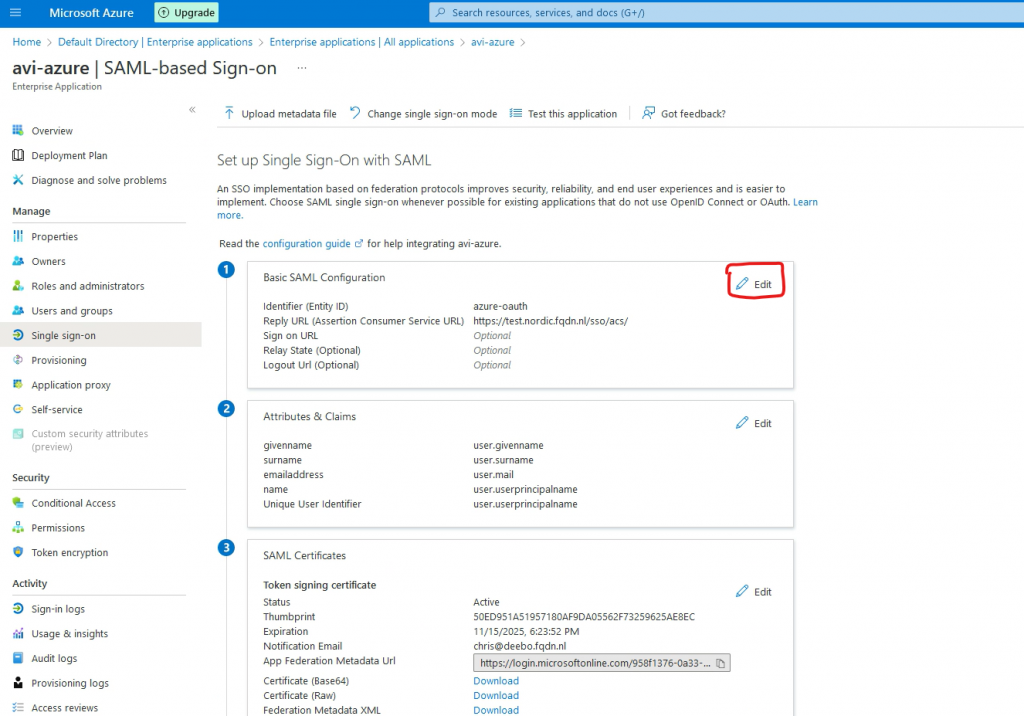
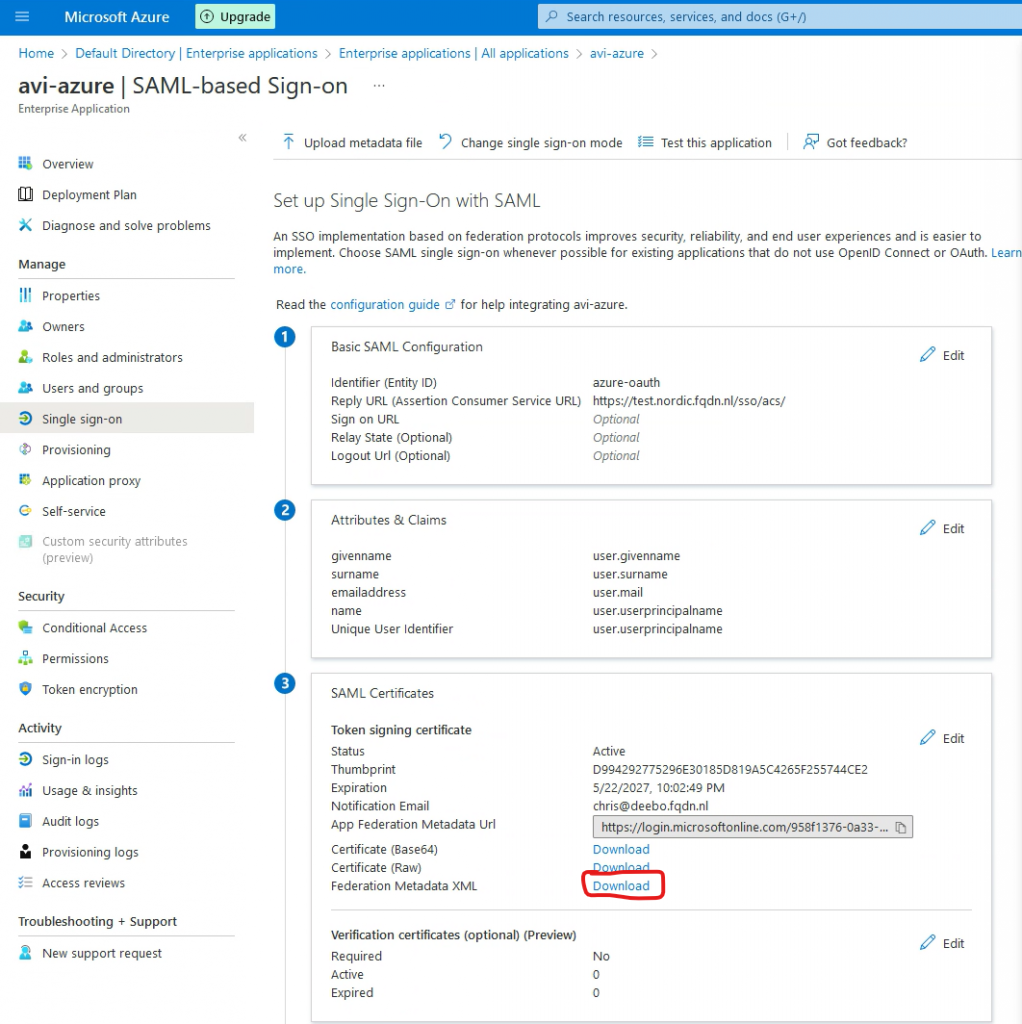
Go to Add identifier. This is the Entity ID, which should match with the config in AVI (See step 2, in the next chapter)
Go to Add reply URL. This is where the authentication token is sent to. This is pointing to my VS.
Add /sso/acs/ to the URL (Please note the trailing / )
Press Save
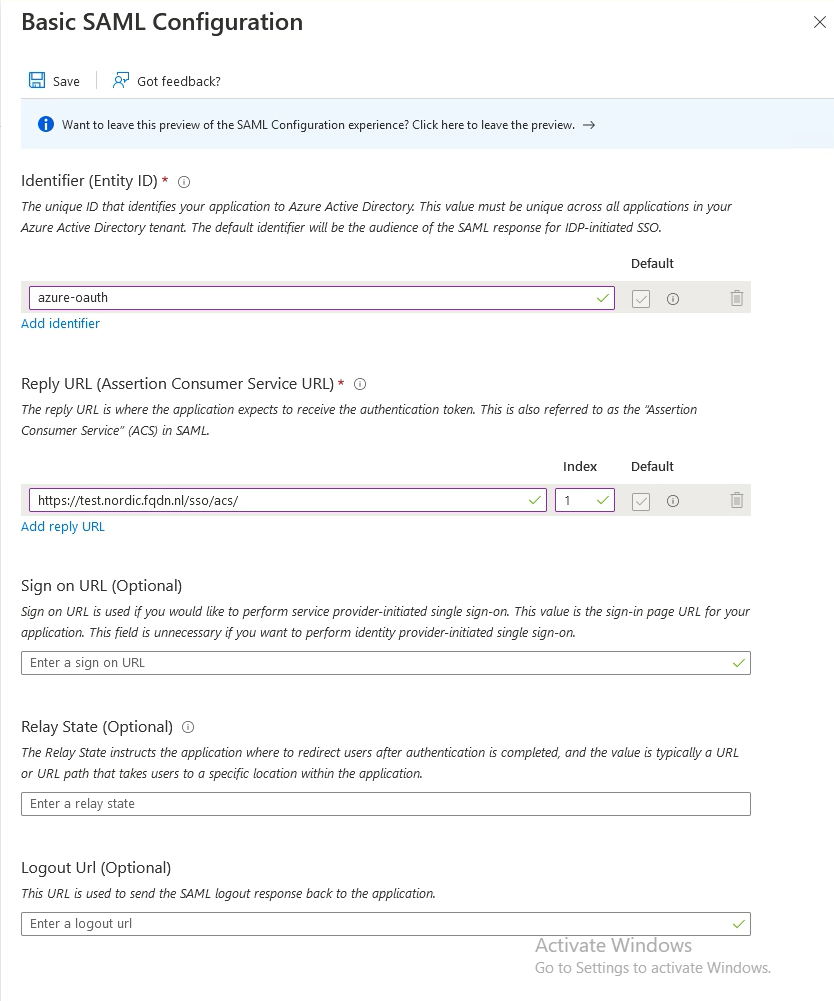
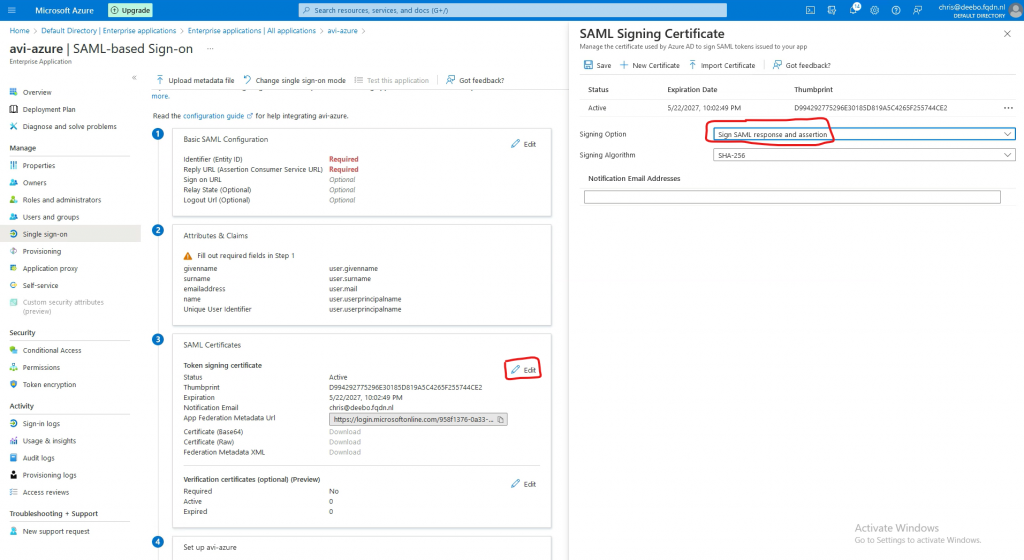
Go to SAML Certificates and press Edit
Change the signing Option to Sign SAML response and assertion
3. Adding users
In Azure go to Home->Azure Active Directory->Enterprise Applications->select your app
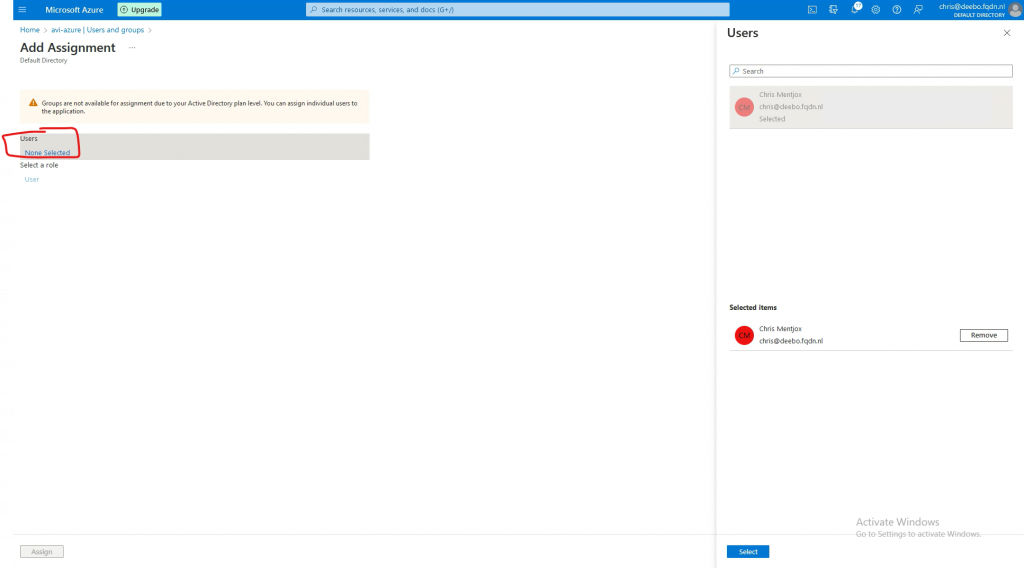
Go to Users and groups
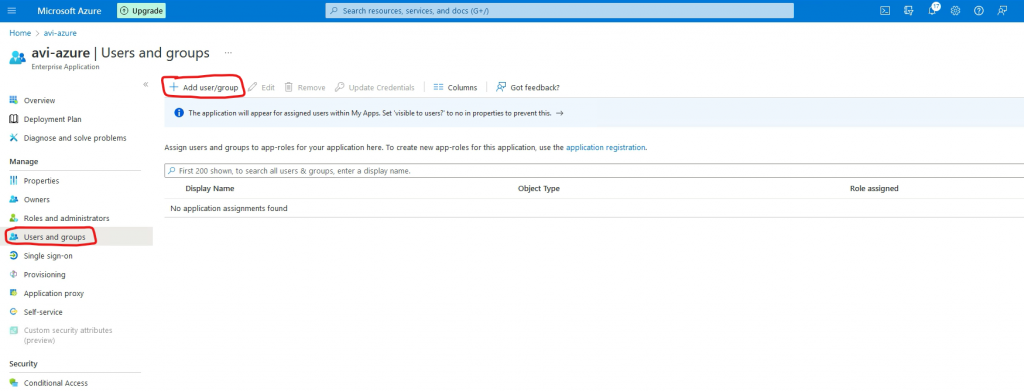
Press none selected and select your user.
AVI setup
1. Create an SSO policy
Go to Templates->Security->Auth Profile and press Create
Type: Select SAML
Service Provider: Select use user-provided entity ID
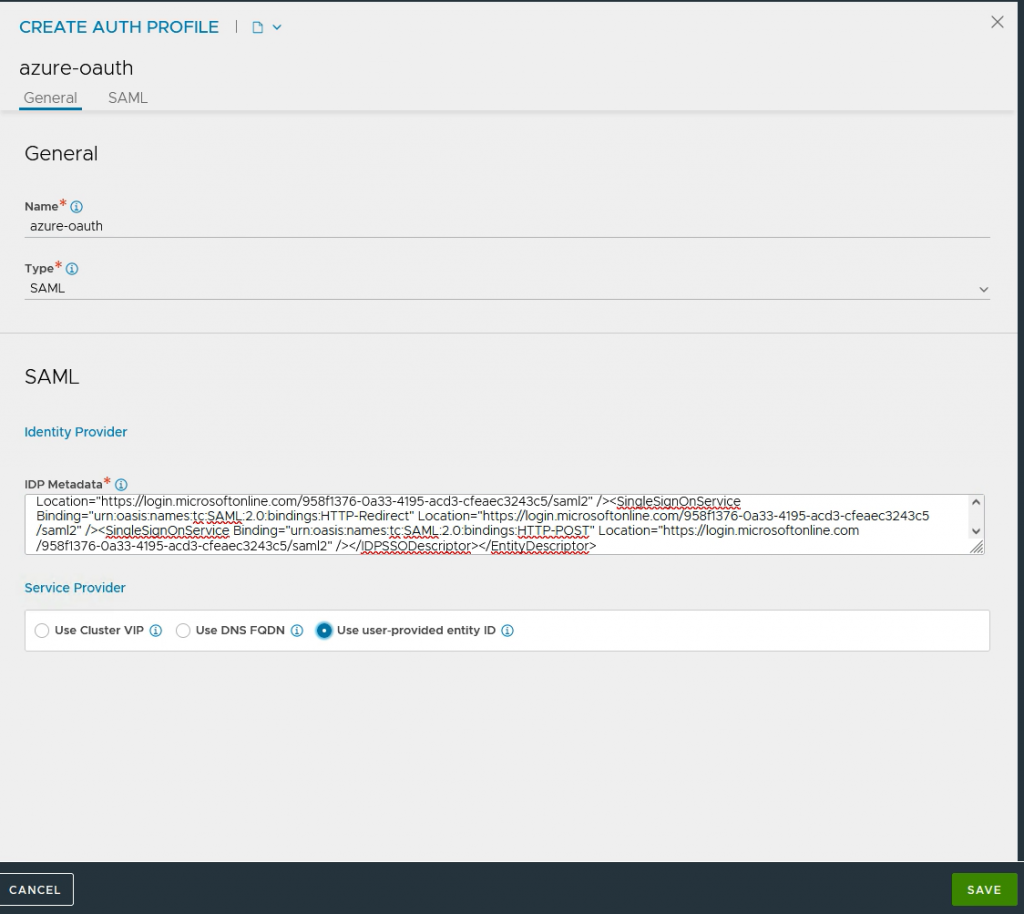
IDP Metadata: This data needs to be downloaded from Azure.
In Azure go to Home->Azure Active Directory->Enterprise Applications->select your app->Single sign-on
Under SAML Certificates select download next to Federation Metadata XML.
Paste this XML in IDP Metadata and press Save.
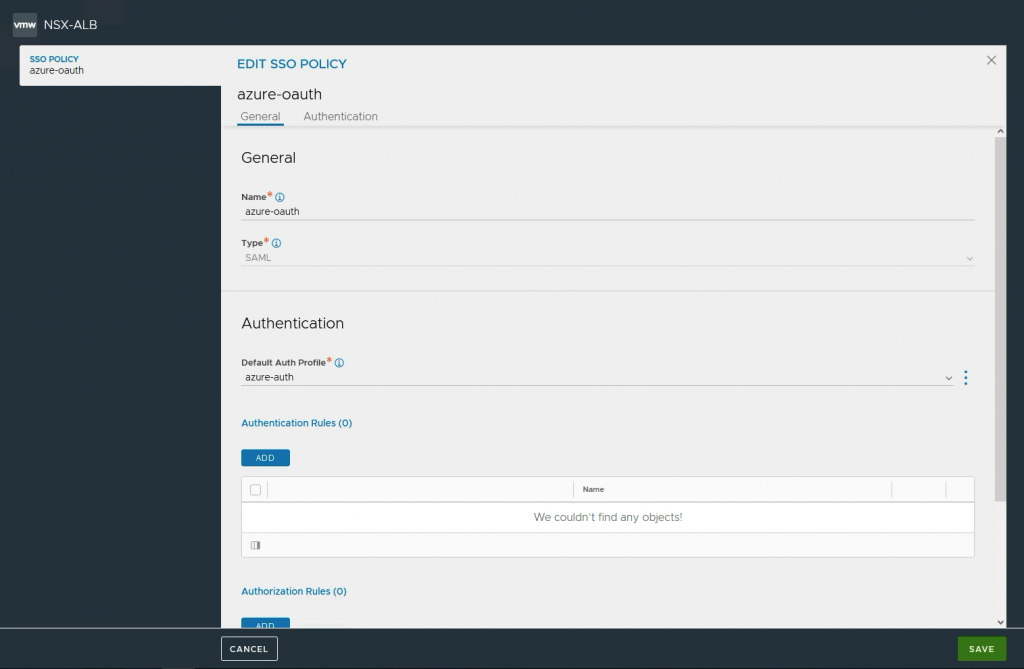
Go to Templates->Security->SSO policy and press Create
Type: Select SAML
Default Auth profile: Select the Auth profile you have created.
2. Configure Access policy on VS
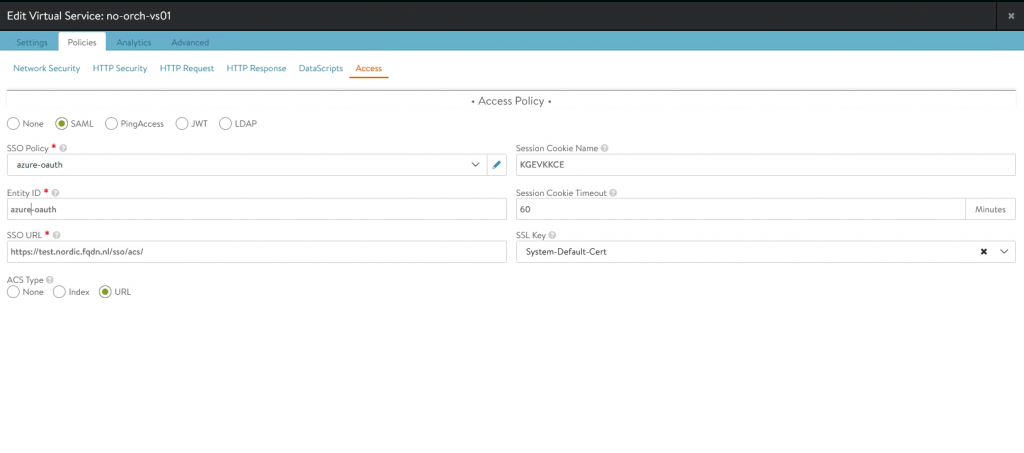
Go to your VS->Policies->Access
Select SAML.
Fill in the Entity ID, created in the last chapter.
SSO Policy: select the policy you created in step 1.
SSO URL needs to be the same as filled in step 2, previous chapter
Session Cookie Name can remain empty. It will be auto-populated.
SSL Key can remain empty.
Testing
Time for testing.
Open a web browser and go to the URL of your VS. In my case it is https://test.nordic.fqdn.nl
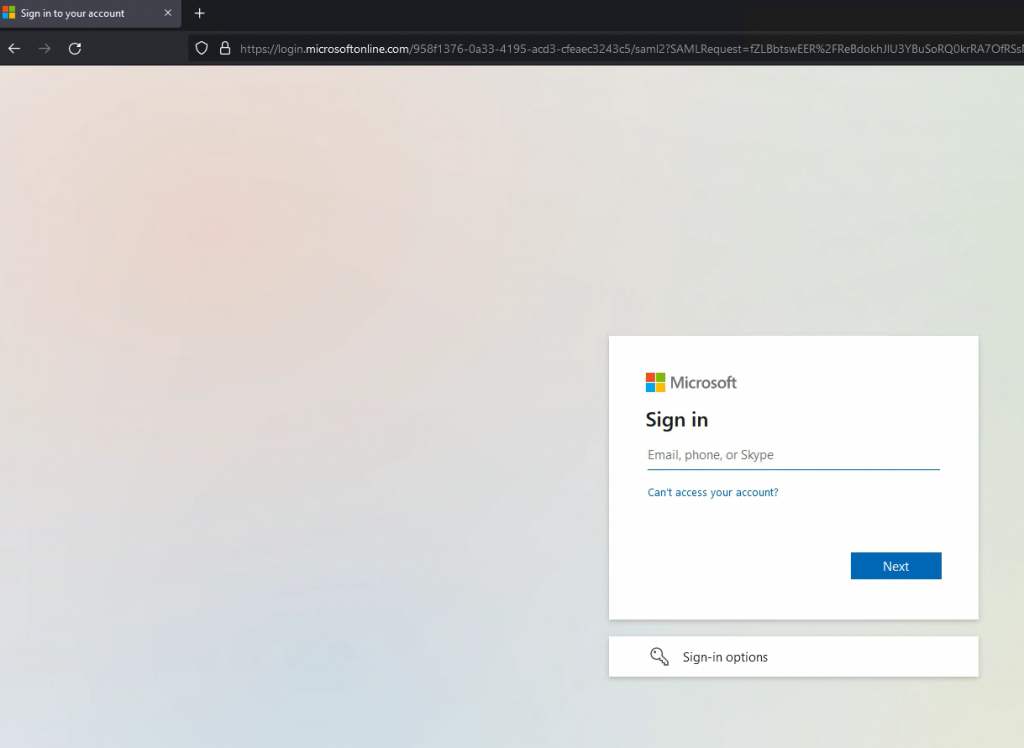
Upon opening, the browser will redirect to Azure and ask for your Username and Password
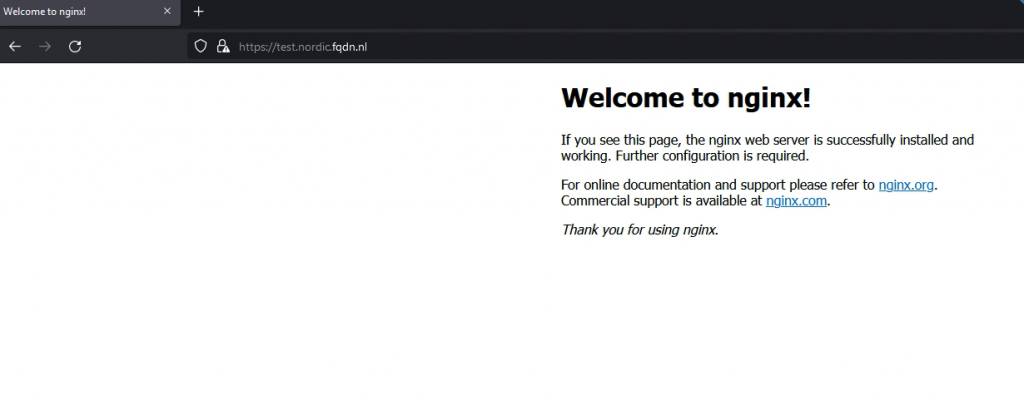
If the user is authenticated, the browser will redirect back to the VS and AVI allows access to the VS.
Support for multiple AssertionConsumerServiceURL
AVI 22.1.1 and 21.1.6 supports AssertionConsumerServiceURL.
Many IDPs allow a single configuration (Relying Party Trust) to support multiple applications through the use of multiple Assertion Consumer URLs. For SP-initiated SSO, the SP can supply the required Assertion Consumer URL to be used for the IDP post-back to the application in the authentication request through either AssertionConsumerServiceURL or AssertionConsumerServiceIndex attributes. The IDP will post back to the requested URL.
On my setup, I have created a new VS with the name test2.nordic.fqdn.nl
I am using the same SSO policy and Entity ID.
The SSO URL for this would then be https://test2.nordic.fqdn.nl/sso/acs

For this to work, we need to add the SSO URL to Azure.
In Azure go to Home->Azure Active Directory->Enterprise Applications->select your app->Single sign-on Got to Basic SAML Configuration press Edit

Press Add reply URL and add https://test2.nordic.fqdn.nl/sso/acs
Press Save.

Now I can go to the URL https://test2.nordics.fqdn.nl and login with Azure.
Because I am now using the same configuration in Azure, I can, after authenticating on one of the 2 sites, automatically login on to the other.
Final words
Using Azure as IDP is just an example. It can be any IDP that supports SAML.
I hope this blog was useful.
If you have comments or suggestions, please let me know!
Aaron