Introduction
VMware NSX-T 3.2 comes with NSX Application Plaform. This platform needs to run on a Kubernetes cluster.
So why not build a vSphere with Tanzu cluster. While I was building the platform and making notes, I ended up with a working Tanzu platform ready for the NSX Application platform. I deleted the whole setup to create a blog of all steps so you can also benefit from it.
vSphere with Tanzu is the new generation of vSphere for containerized applications. This single, streamlined solution bridges the gap between IT operations and developers with a new kind of infrastructure for modern, cloud-native applications both on-premises and in public clouds.
The goal of this blog
The goal of this blog is to get vSphere with Tanzu installed. This will be part 1 of 3
In this post, I will only focus on describing my setup and installing the Supervisor cluster.
I am using the built-in supervisor cluster which leverages the Tanzu Kubernetes Grid Service (TKGS), instead of deploying a TKG Management cluster.
Keep in mind that you do need a license for vSphere with Tanzu.
I am not going to explain how to install NSX-T and how to install a vSphere cluster.
You also need knowledge about Kubernetes.
Overview
My setup is as follows:
VMware vCenter server 7.0.3
4 nodes VMware ESXi 7.0.3 with enough capacity running vSAN
NSX-T 3.2.0
For system requirements please look here: https://docs.vmware.com/en/VMware-vSphere/7.0/vmware-vsphere-with-tanzu/GUID-B1388E77-2EEC-41E2-8681-5AE549D50C77.html
The IP CIDR I am going to use for deployment.
| IP CIDR | Used for | Segment name | Dhcp |
| 10.6.32.0/20 | Namespace network | -auto-created- | |
| 10.6.48.0/20 | service CIDR | -auto-created- | |
| 10.4.205.0/24 | ingress CIDR | -auto-created- | |
| 10.4.206.0/24 | egress CIDR | -auto-created- | |
| 10.4.195.0/24 | management CIDR | nxt-k8s-mgmt | DHCP enabled |
| Gateway | type | Description |
| bf-poc-nxt-tier0 | NSX-T T0 gateway | my T0 gateway. Tanzu t1’s will be connected here |
The setup looks like this
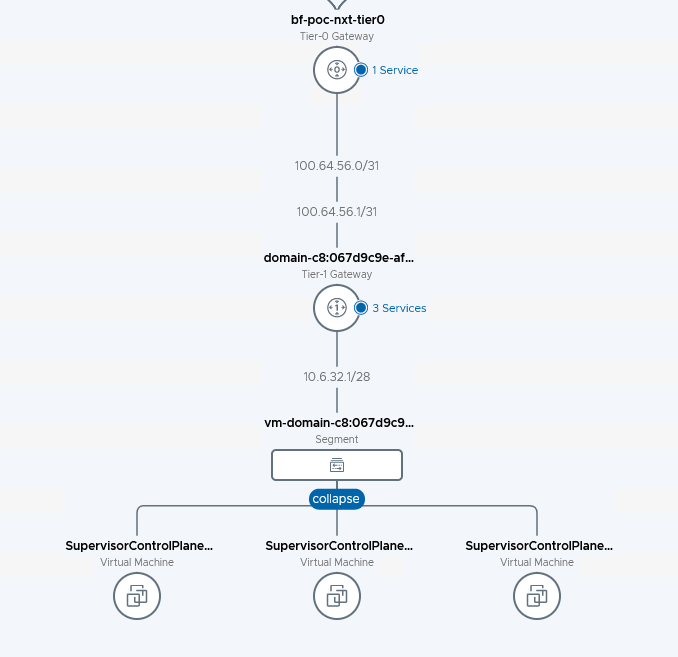
The T0 is something I created. With connectivity to the physical routers. Running BGP. I am only announcing 10.4.205.0/24 and 10.4.206.0/24 via BGP. These will be the only accessible IP’s from ‘the outside world’
Creating a content library
Content libraries are container objects for VM and vApp templates and other types of files, such as ISO images, text files, and so on. To deploy virtual machines and vApps in the vSphere inventory, you can use the templates in the library. You can also use content libraries to share content across vCenter Server instances in the same or different locations. Sharing templates and files results in consistency, compliance, efficiency, and automation in deploying workloads at scale.
vSphere with Tanzu needs a content library with Kubernetes images to deploy the cluster.
I will first start with creating a content library
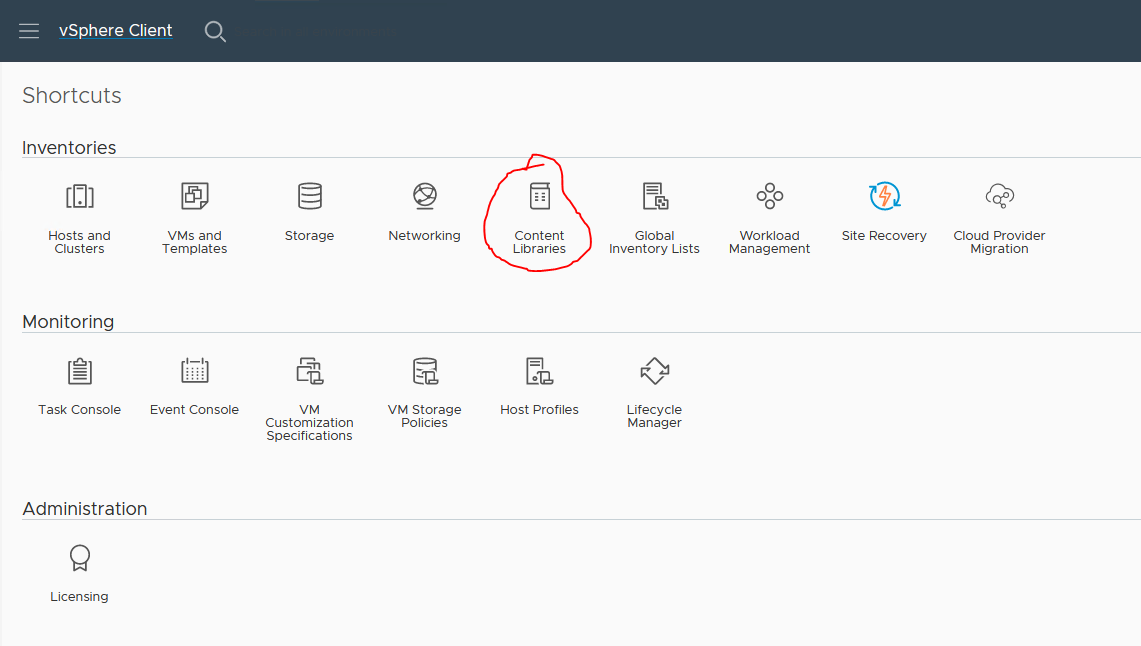
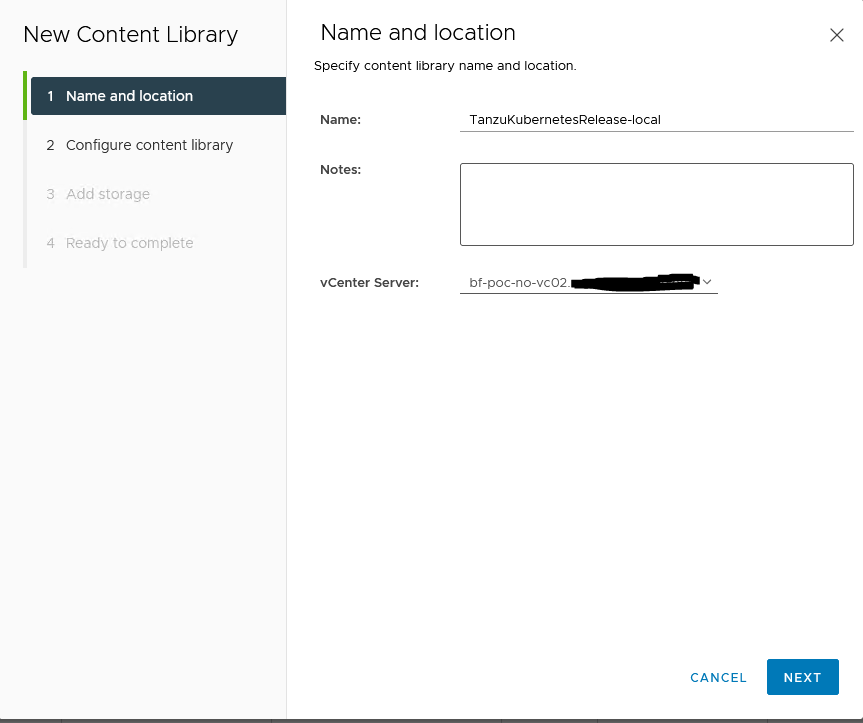
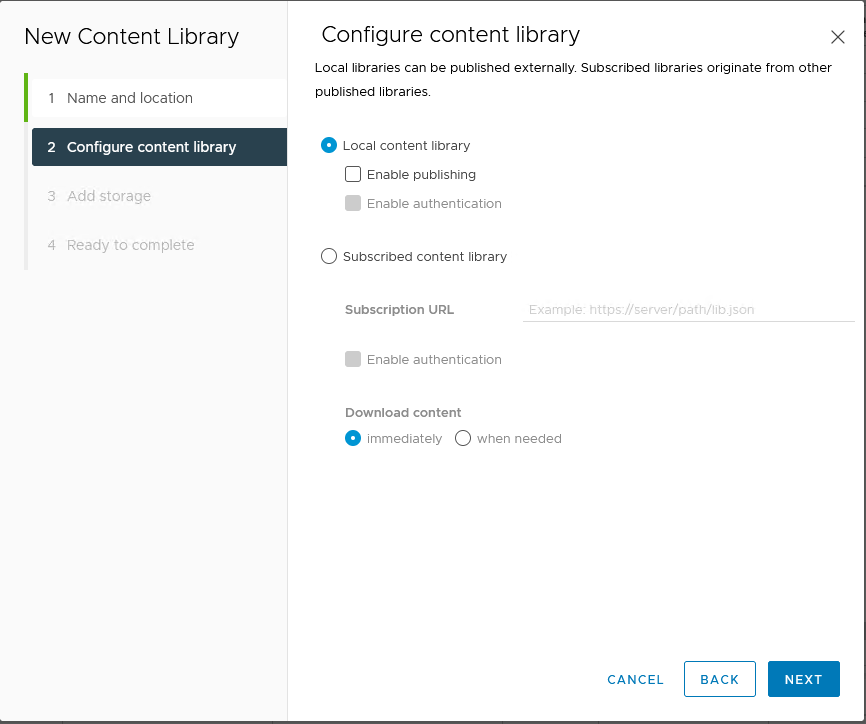
I have created a local content library and added the Kubernetes images by hand. You can also Subscribe to a library (this requires internet access, I do not have from these hosts. More on this later)
Go through the next steps and select the correct storage where you want the content library to reside.
Installation of Supervisor cluster
The supervisor cluster is the main part for vSphere with Tanzu
To install the Supervisor cluster follow the next steps
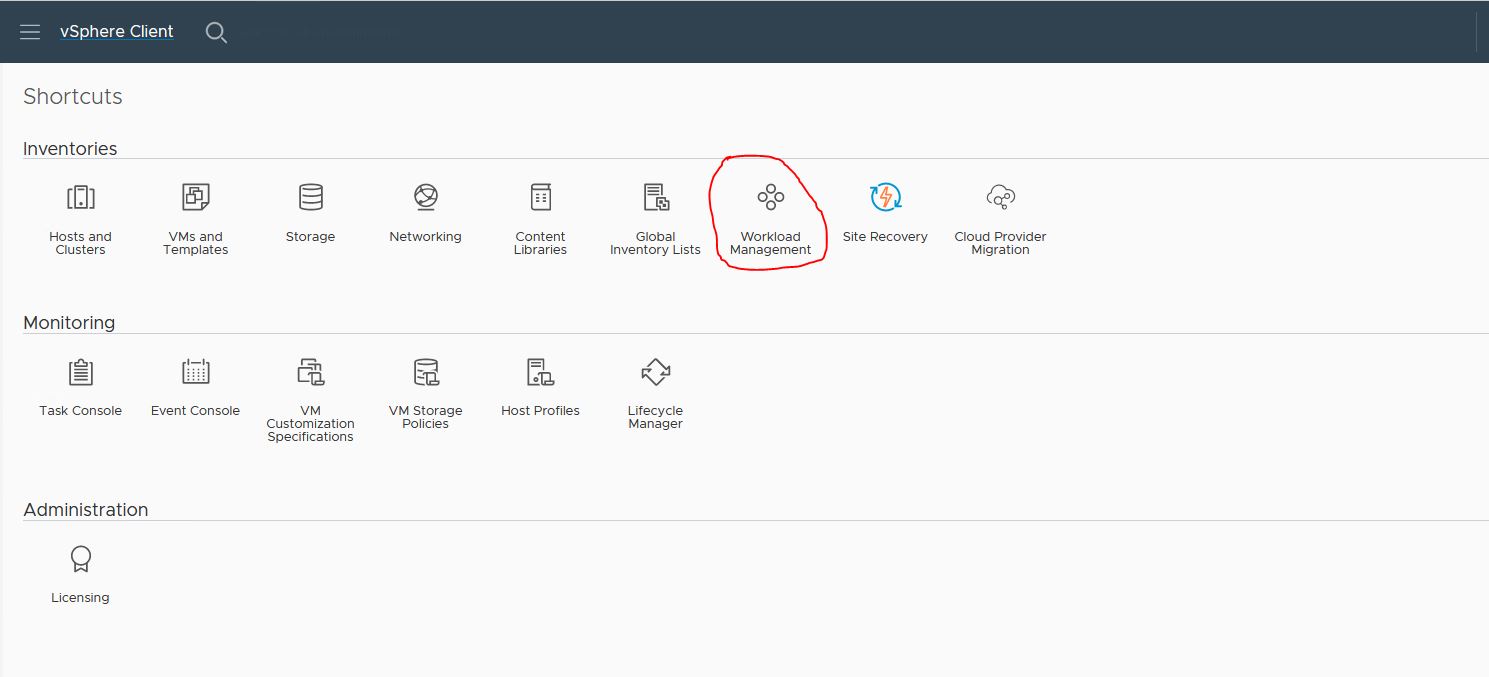
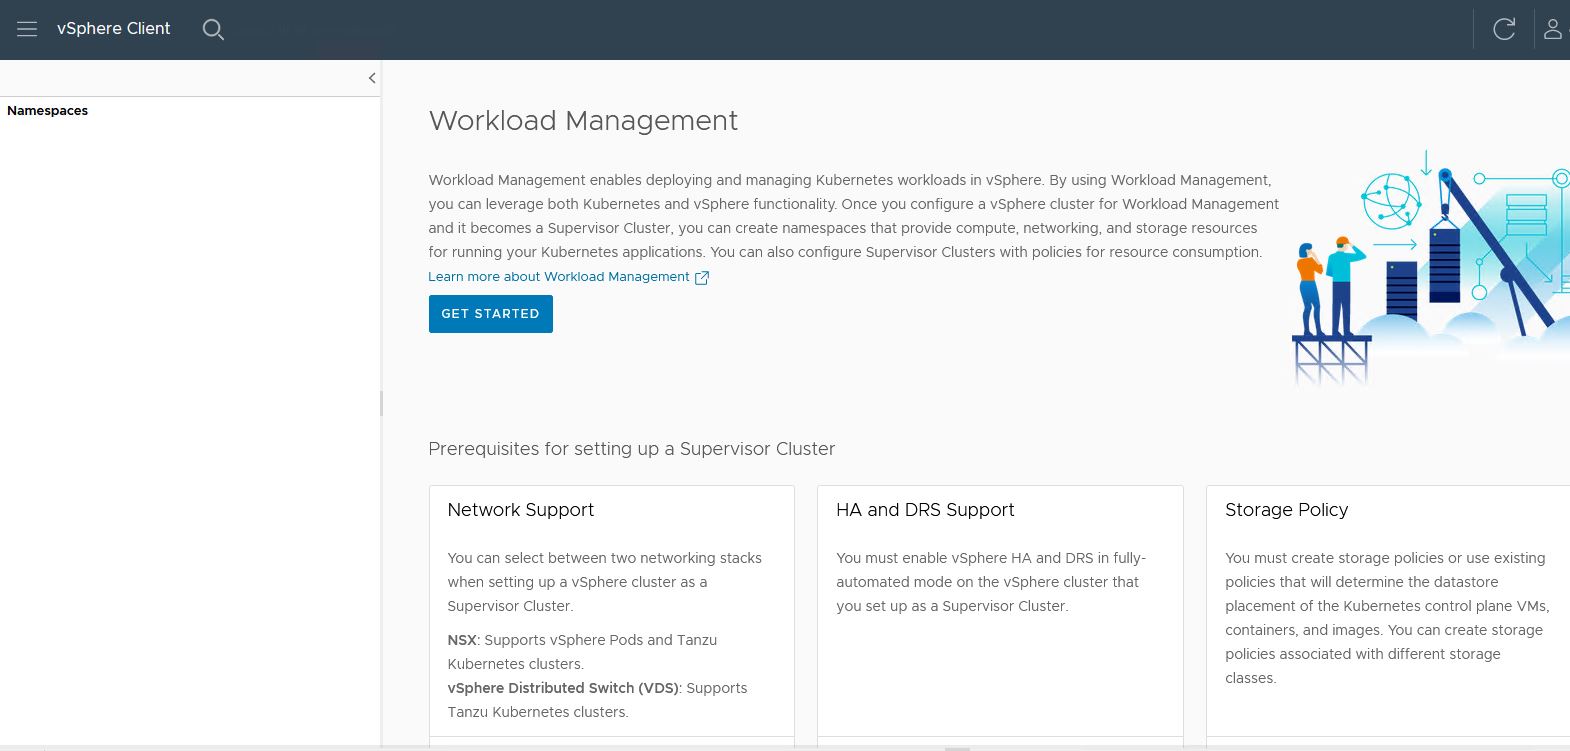
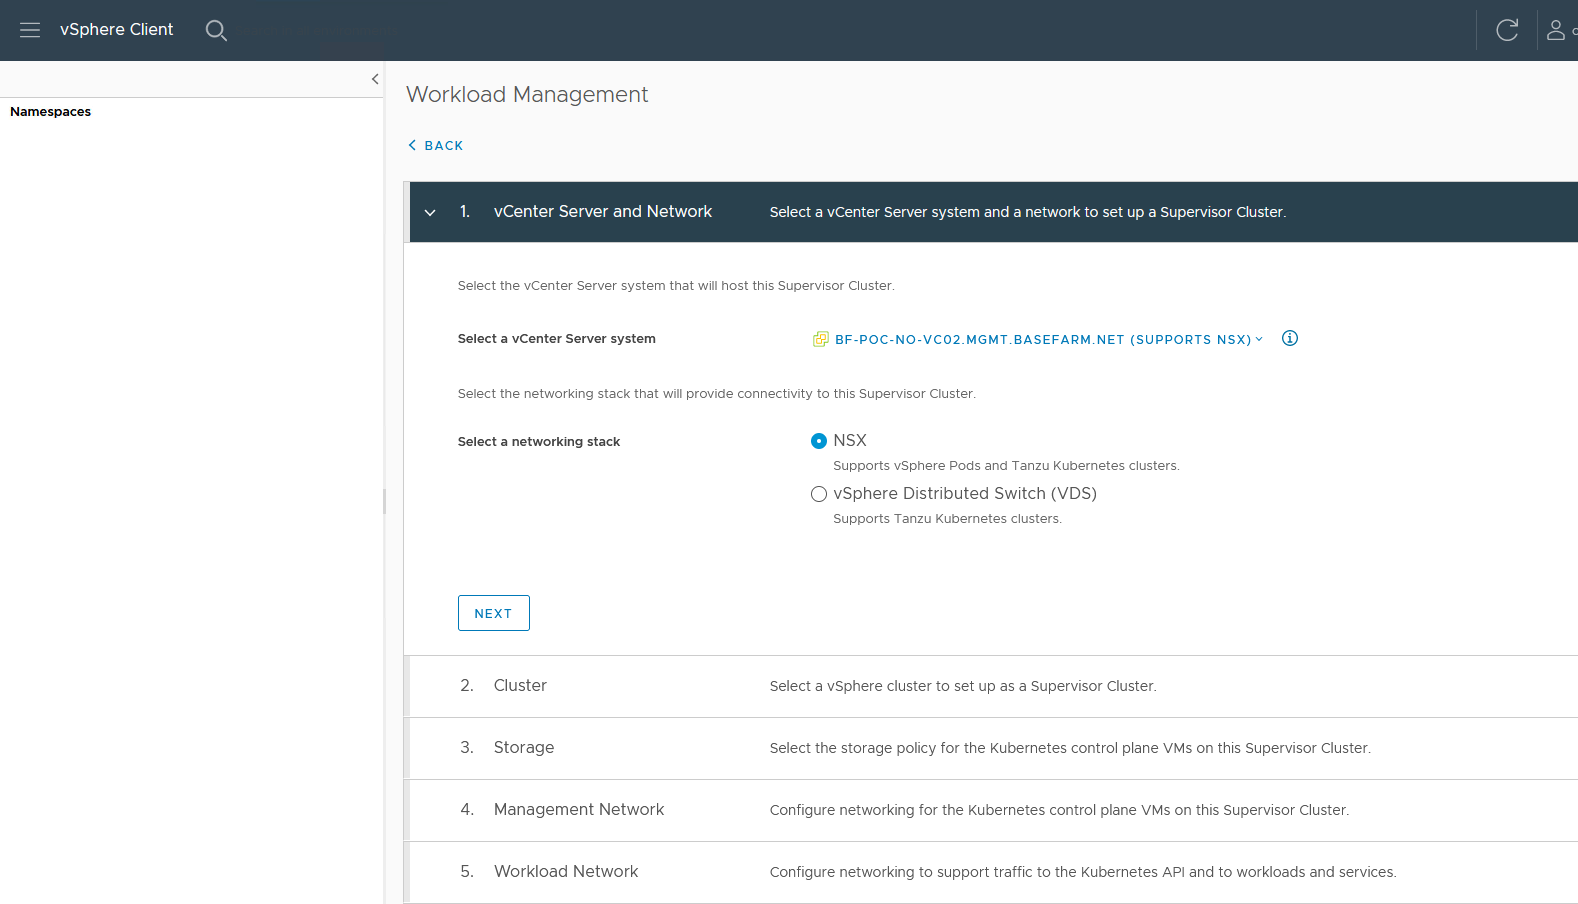
- From the vSphere client go to Workload Management and follow the Getting Started
I have chosen to use the NSX option. This will use the NSX internal load balancer.
If you choose VDS, it will require NSX Advanced Loadbalancer (AVI)
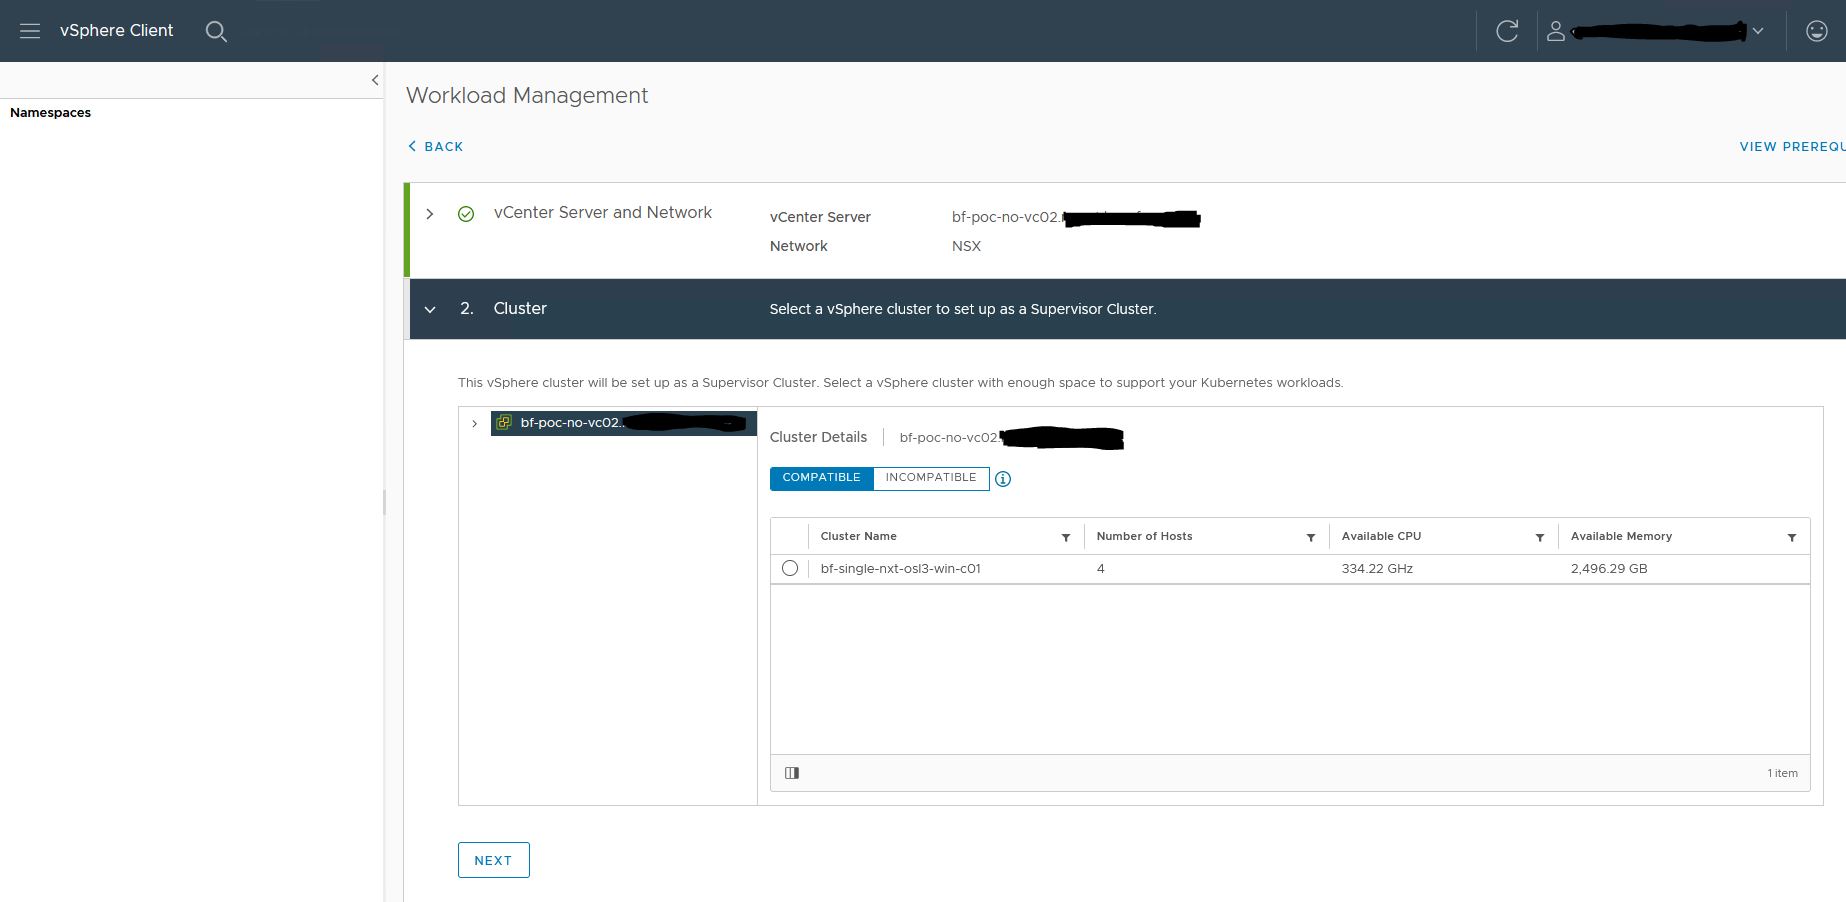
2. Select the cluster you want to use as a supervisor cluster.
It might be that your cluster is in Incompatibly. Check the incompatibility reasons.
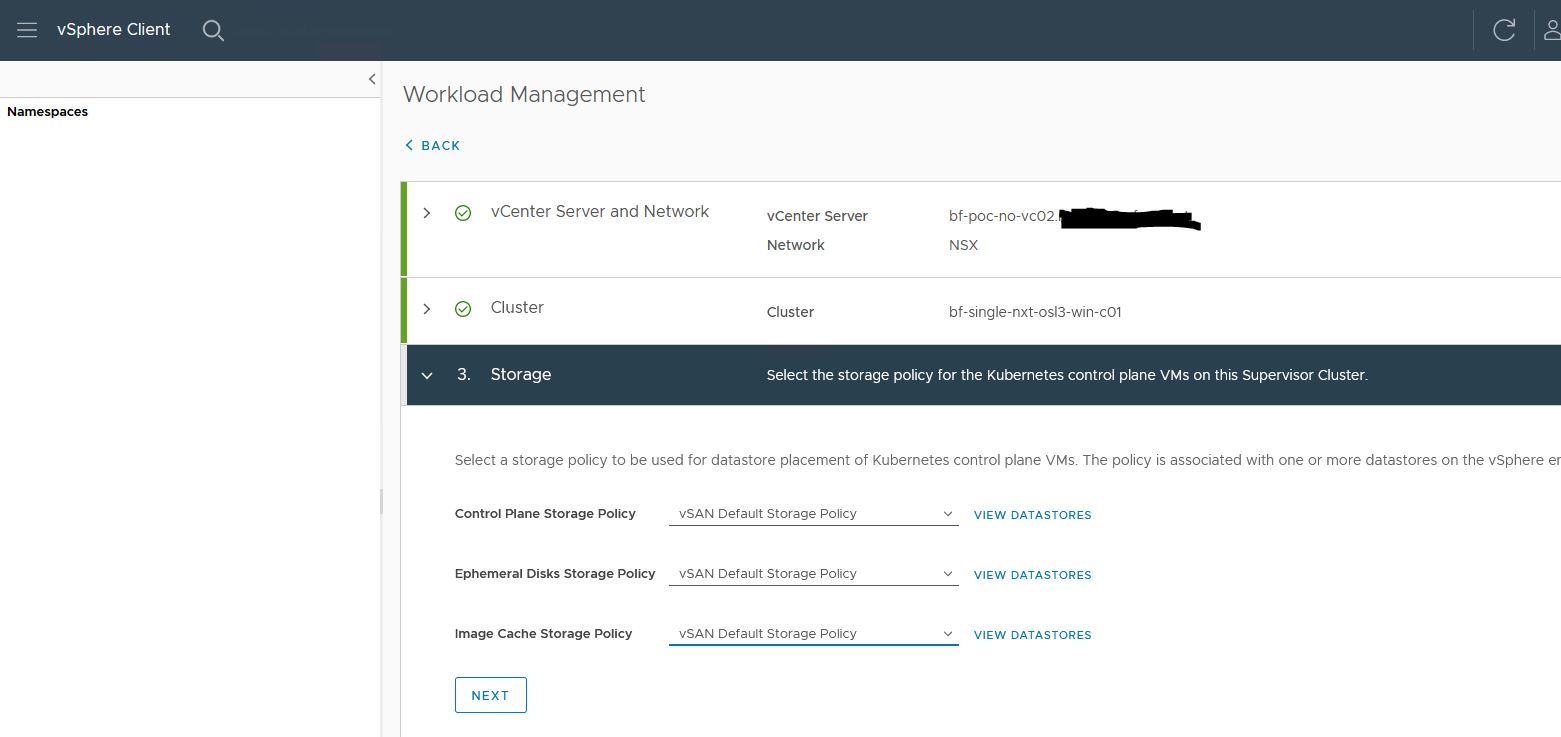
3. Select storage profile
I am using vSAN on the cluster. So I am using a vSAN profile. It might be that you need to create a storage profile that fits best for your storage.
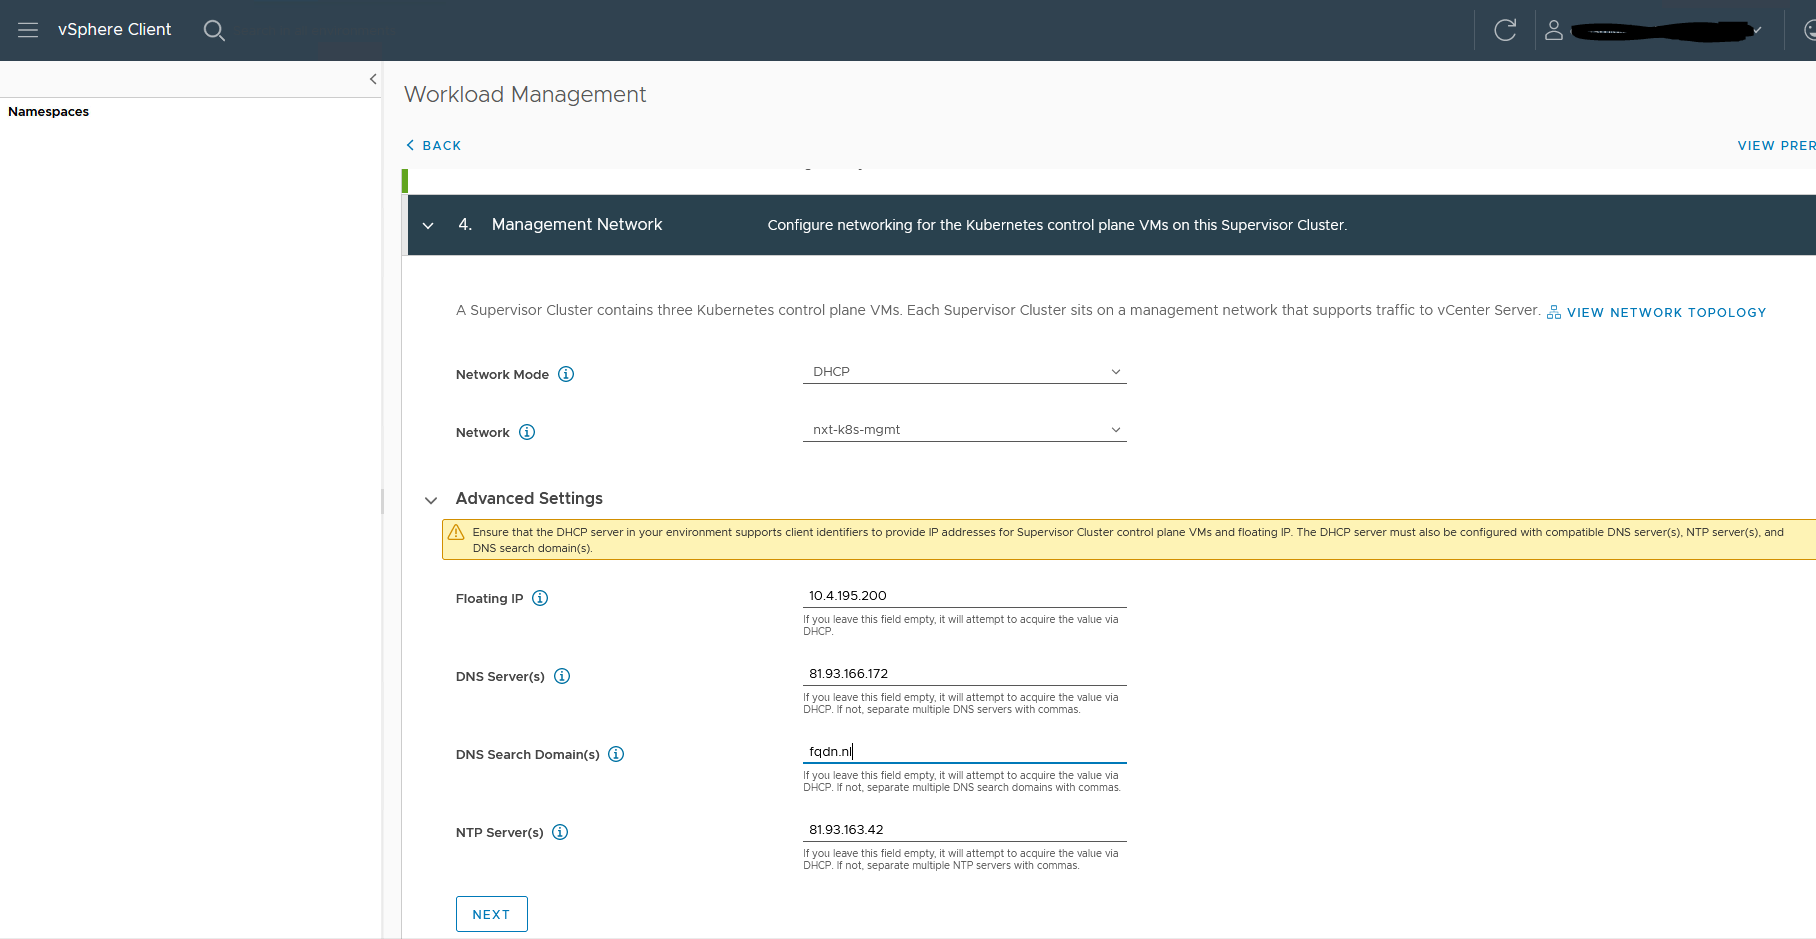
4. Select the management network
The network I use is an NSX-T segment with DHCP enabled.
I choose to set the Floating IP, DNS, NTP, and domain by hand.
The floating IP should not be part of the DHCP pool, but it needs to be in the same range.
The DHCP range I use is 10.4.195.210-10.4.195.250
You can also choose to use a static assignment. The install will ask for a start IP and will use 5 consecutive IP’s starting from that IP
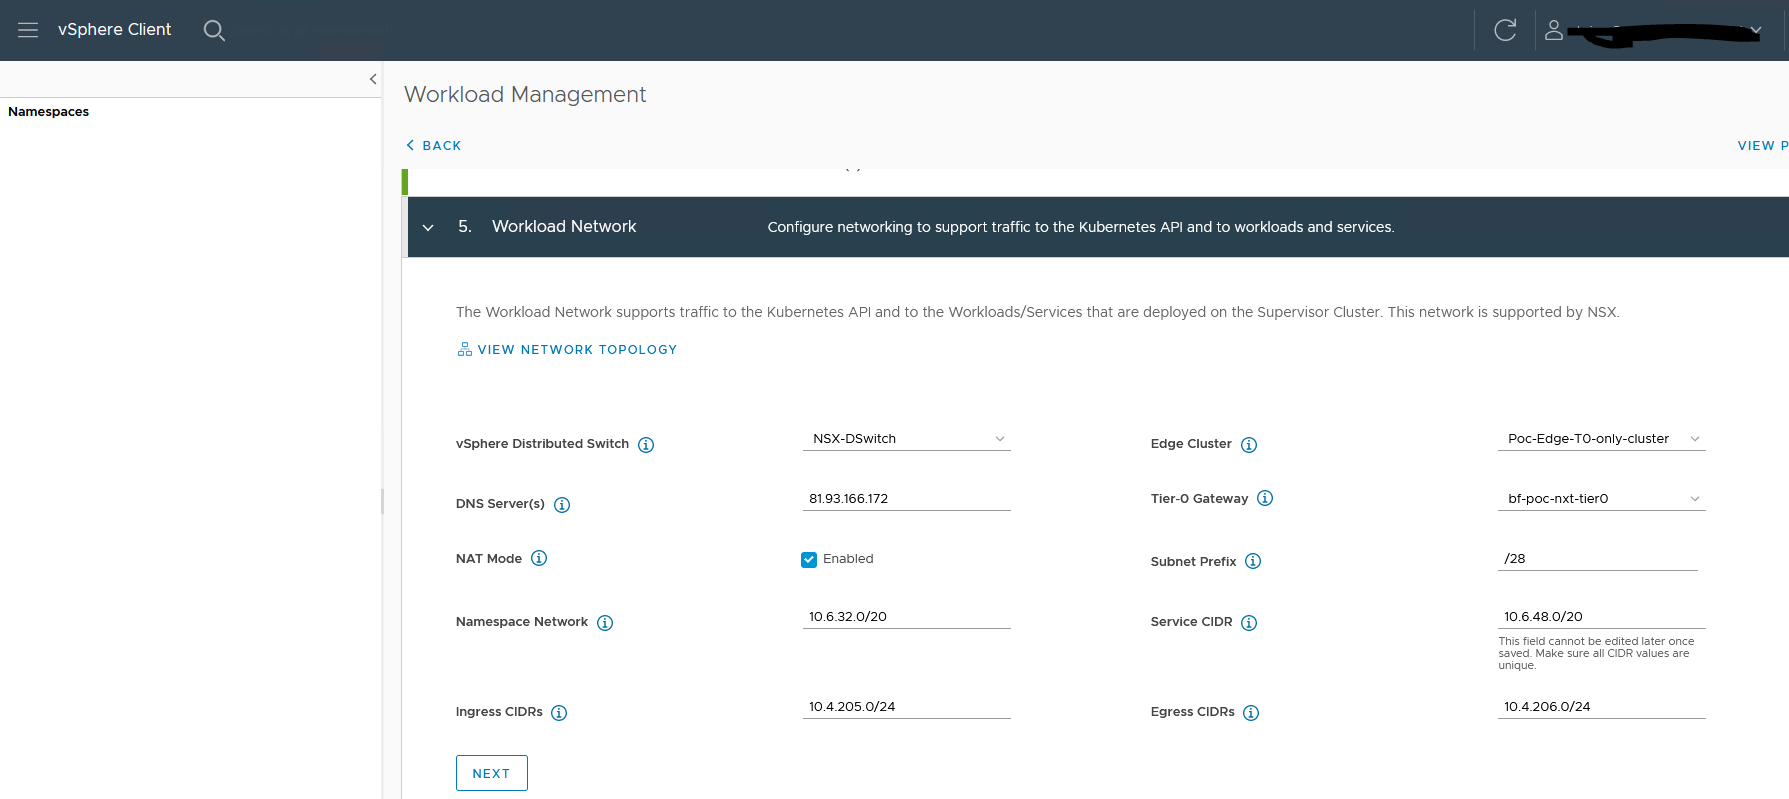
5. Select the Workload network.
I use private IPs for Ingress and Egress cidr. These are the only IP CIDR announced from T0 to the external router.
You can choose to use external IP here. In my case private just works fine. I do not need internet world connectivity to it.
6. Select the content library
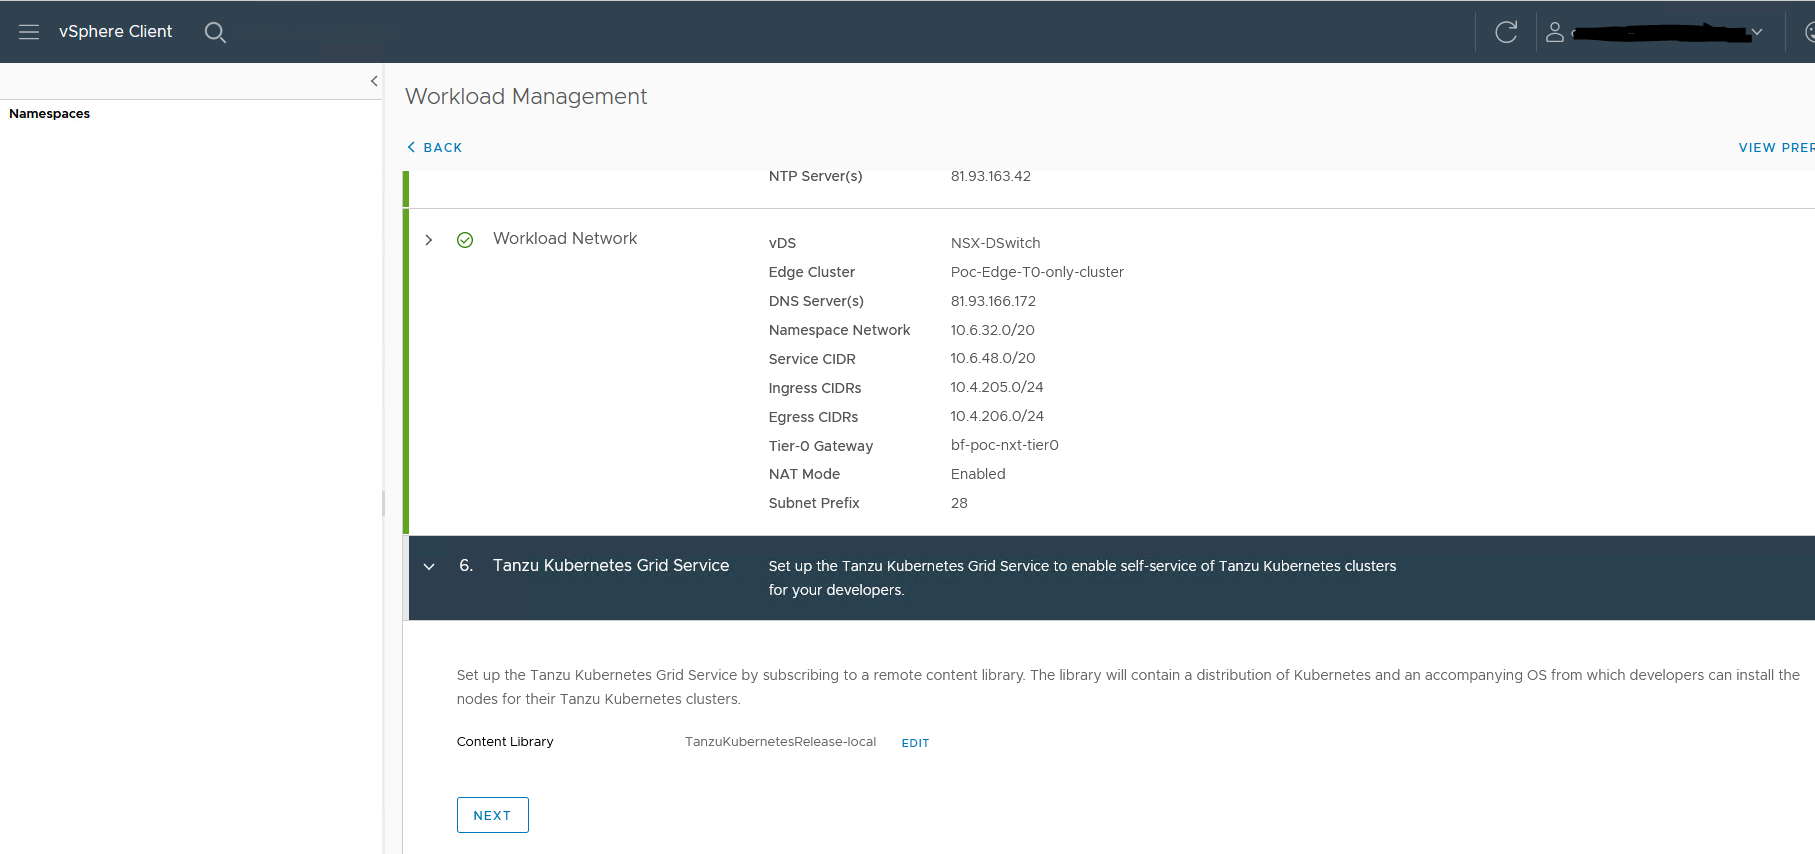
7. Select the size for the control plane
I am using a small setup
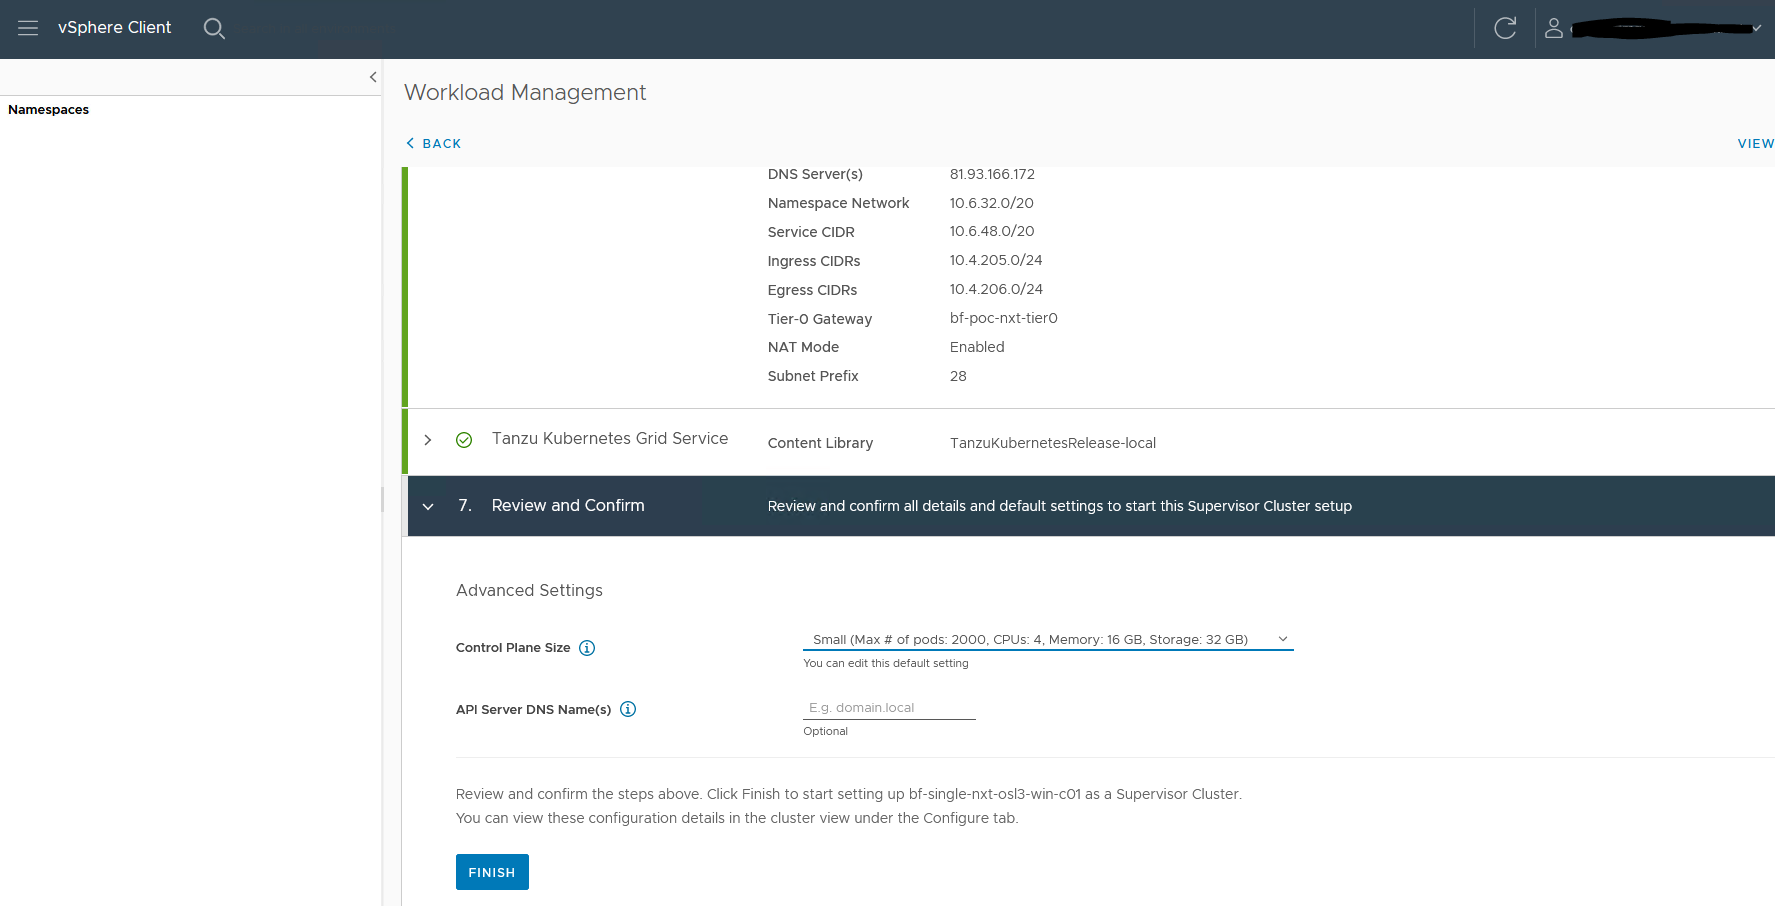
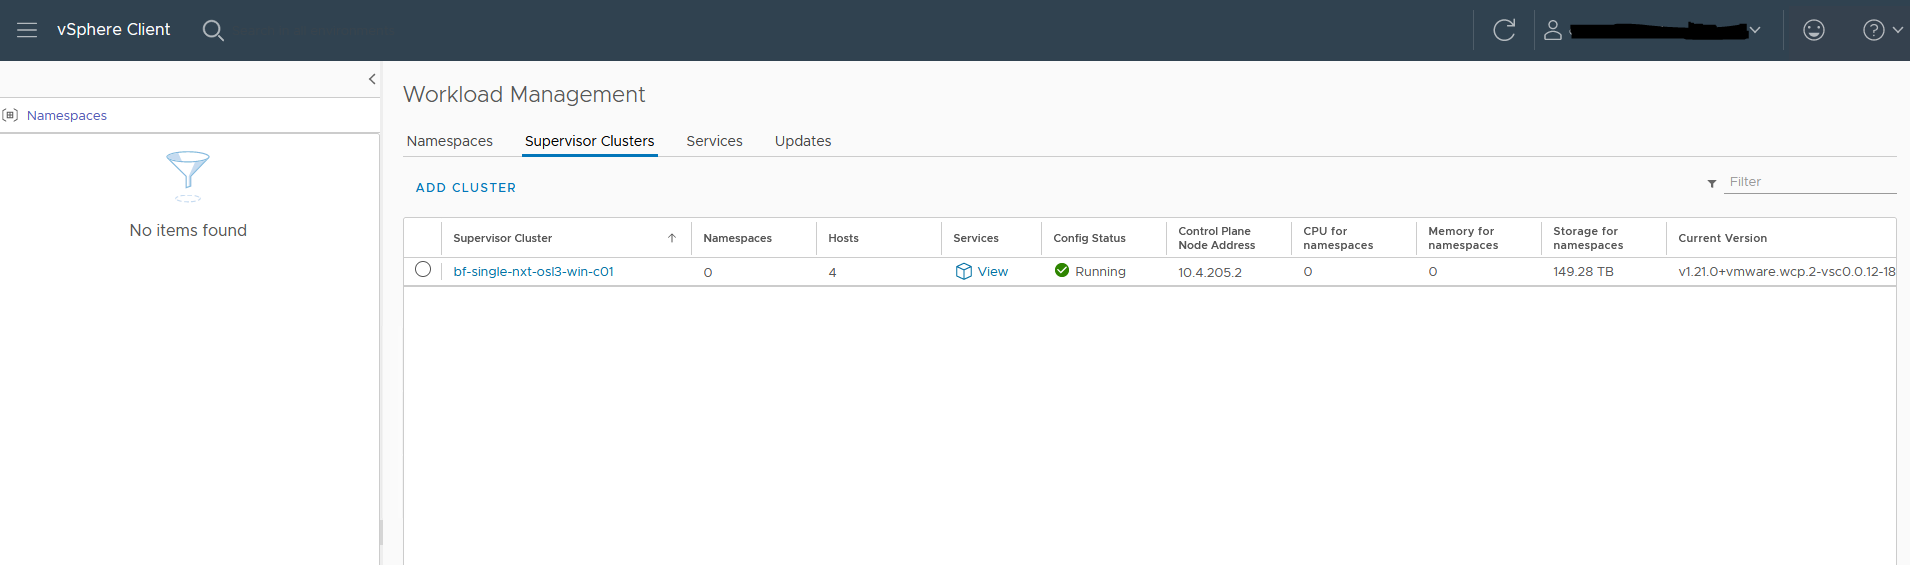
The installation will start. When everything goes well Config status will turn green.
There can be multiple reasons if the install fails.
One of the most common is a firewall. The Supervisor nodes need to be able to communicate with vCenter.
Check your firewall logs.
Kubernetes CLI tools
Now we need to install the CLI tools. I have done it on Linux. To download the tools go to https://10.4.205.2 (this is the IP you see in the last picture ‘Control plane Node Address’
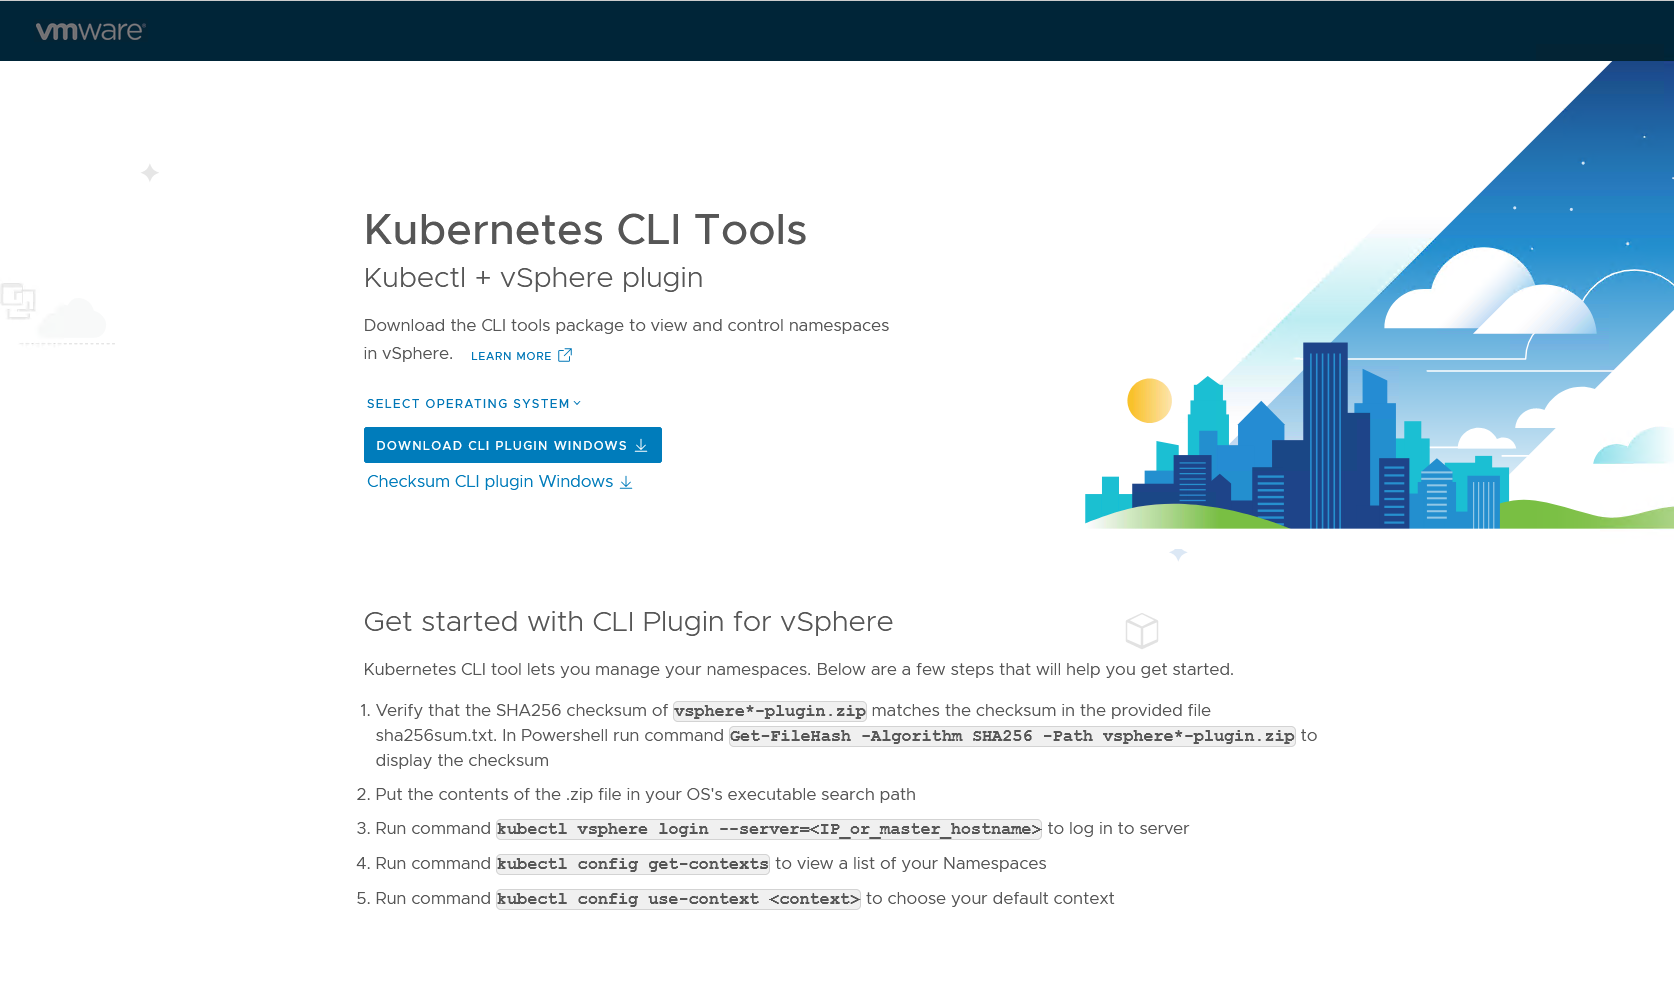
Download and install the tools. i.e copy bin/* to /usr/local/bin
Login to the cluster
kubectl vsphere login --server=10.4.205.2 --insecure-skip-tls-verify

Username: chris
KUBECTL_VSPHERE_PASSWORD environment variable is not set. Please enter the password below
Password:
Logged in successfully.

You have access to the following contexts:
   10.4.205.2

If the context you wish to use is not in this list, you may need to try
logging in again later, or contact your cluster administrator.
You can now run normal kubectl commands like
kubectl get nodes
NAME                               STATUS   ROLES                  AGE     VERSION
421e02152096fab94c7c40ef17fa0f41   Ready    control-plane,master   5h47m   v1.21.0+vmware.wcp.2
421e88d75da084d9d9d9c3e70b2f593c   Ready    control-plane,master   5h50m   v1.21.0+vmware.wcp.2
421e93ed3e5c98a774cb7db7d45a48d2   Ready    control-plane,master   5h56m   v1.21.0+vmware.wcp.2
bf-osl3-nxt003                     Ready    agent                  5h49m   v1.21.0-sph-67b14b6
bf-osl3-nxtesx002                  Ready    agent                  5h50m   v1.21.0-sph-67b14b6
bf-osl3-nxtesx005                  Ready    agent                  5h50m   v1.21.0-sph-67b14b6
bf-osl3-nxtesx006                  Ready    agent                  5h47m   v1.21.0-sph-67b14b6

kubectl get pods -n  kube-system
NAME                                                       READY   STATUS    RESTARTS   AGE
coredns-689d589965-9xdnl                                   1/1     Running   0          5h56m
coredns-689d589965-b5tcq                                   1/1     Running   6          5h56m
coredns-689d589965-sx4v7                                   1/1     Running   0          5h56m
docker-registry-421e02152096fab94c7c40ef17fa0f41           1/1     Running   0          5h47m
docker-registry-421e88d75da084d9d9d9c3e70b2f593c           1/1     Running   0          5h50m
docker-registry-421e93ed3e5c98a774cb7db7d45a48d2           1/1     Running   0          5h56m
Conclusion
This concludes part 1.
Part 2 and 3 will focus on the installation of a Kubernetes onto the prepared Tanzu cluster, installing Harbor, and finally installing the NSX Application Platform.
If you have any questions or suggestions, please let me know in the comments.
Dave
chris