Introduction
VMware NSX-T 3.2 comes with NSX Application Plaform (NAPP). This platform needs to run on a Kubernetes cluster.
So why not build a vSphere with the Tanzu cluster. While I was building the platform and making notes, I ended up with a working Tanzu platform ready for the NSX Application platform. I deleted the whole setup to create a blog of all steps so you can also benefit from it.
vSphere with Tanzu is the new generation of vSphere for containerized applications. This single, streamlined solution bridges the gap between IT operations and developers with a new kind of infrastructure for modern, cloud-native applications both on-premises and in public clouds.
The goal of this blog
The goal of this blog is to get vSphere with Tanzu installed. This will be part 2 of 4
You can find part 1 here: Vsphere with Tanzu series part 1 – FQDN blog
In this post, I will only focus on creating a namespace and installing a Tanzu cluster onto the prepared Supervisor cluster in part 1.
I am using the built-in supervisor cluster which leverages the Tanzu Kubernetes Grid Service (TKGS), instead of deploying a TKG Management cluster.
Keep in mind that you do need a license for vSphere with Tanzu.
I am not going to explain how to install NSX-T and how to install a vSphere cluster.
You also need knowledge about Kubernetes.
Creating Namespace
vSphere with Tanzu workloads, including vSphere Pods, VMs, and Tanzu Kubernetes clusters, are deployed to a vSphere Namespace. You define a vSphere Namespace on a Supervisor Cluster and configure it with resource quota and user permissions. Depending on the DevOps needs and workloads they plan to run, you might also assign storage policies, VM classes, and content libraries for fetching the latest Tanzu Kubernetes releases and VM images.
I will continue where I left off in part 1.
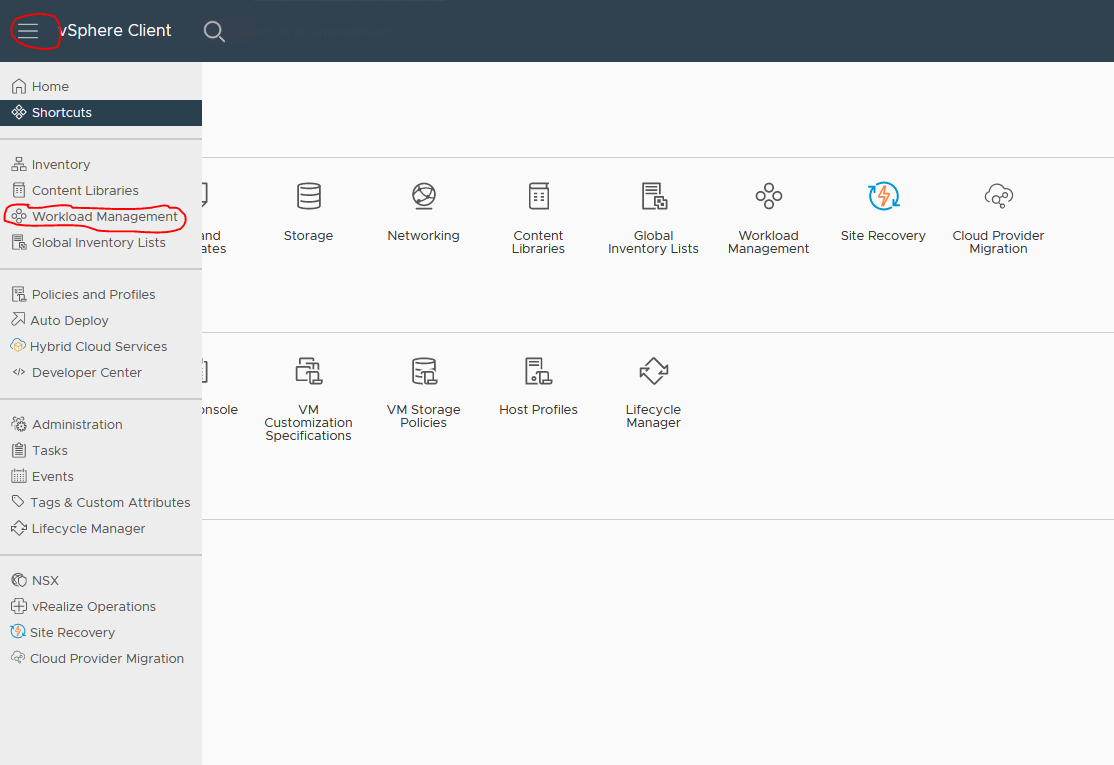
- Navigate to Workload Management
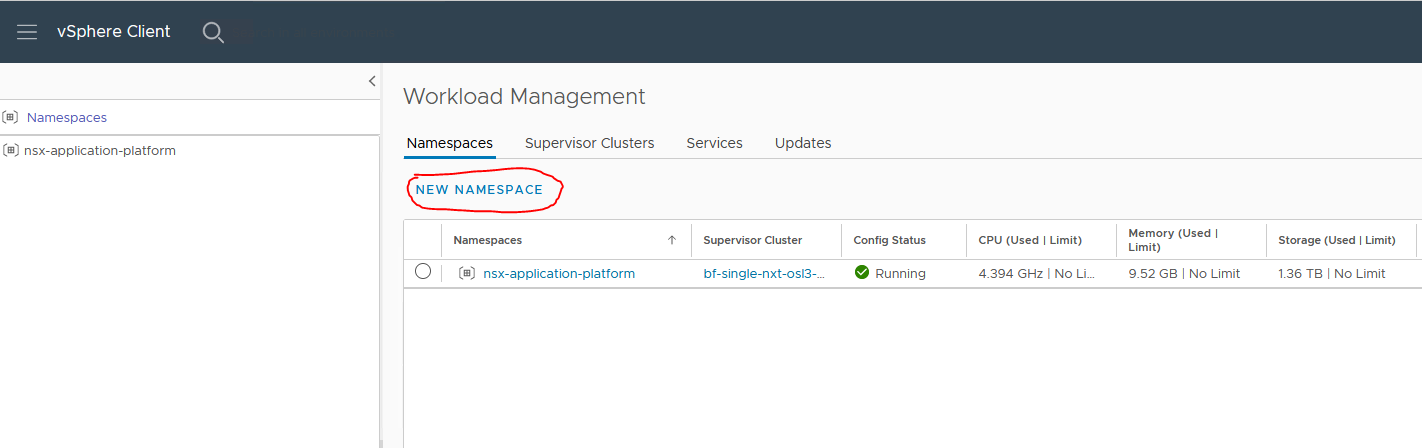
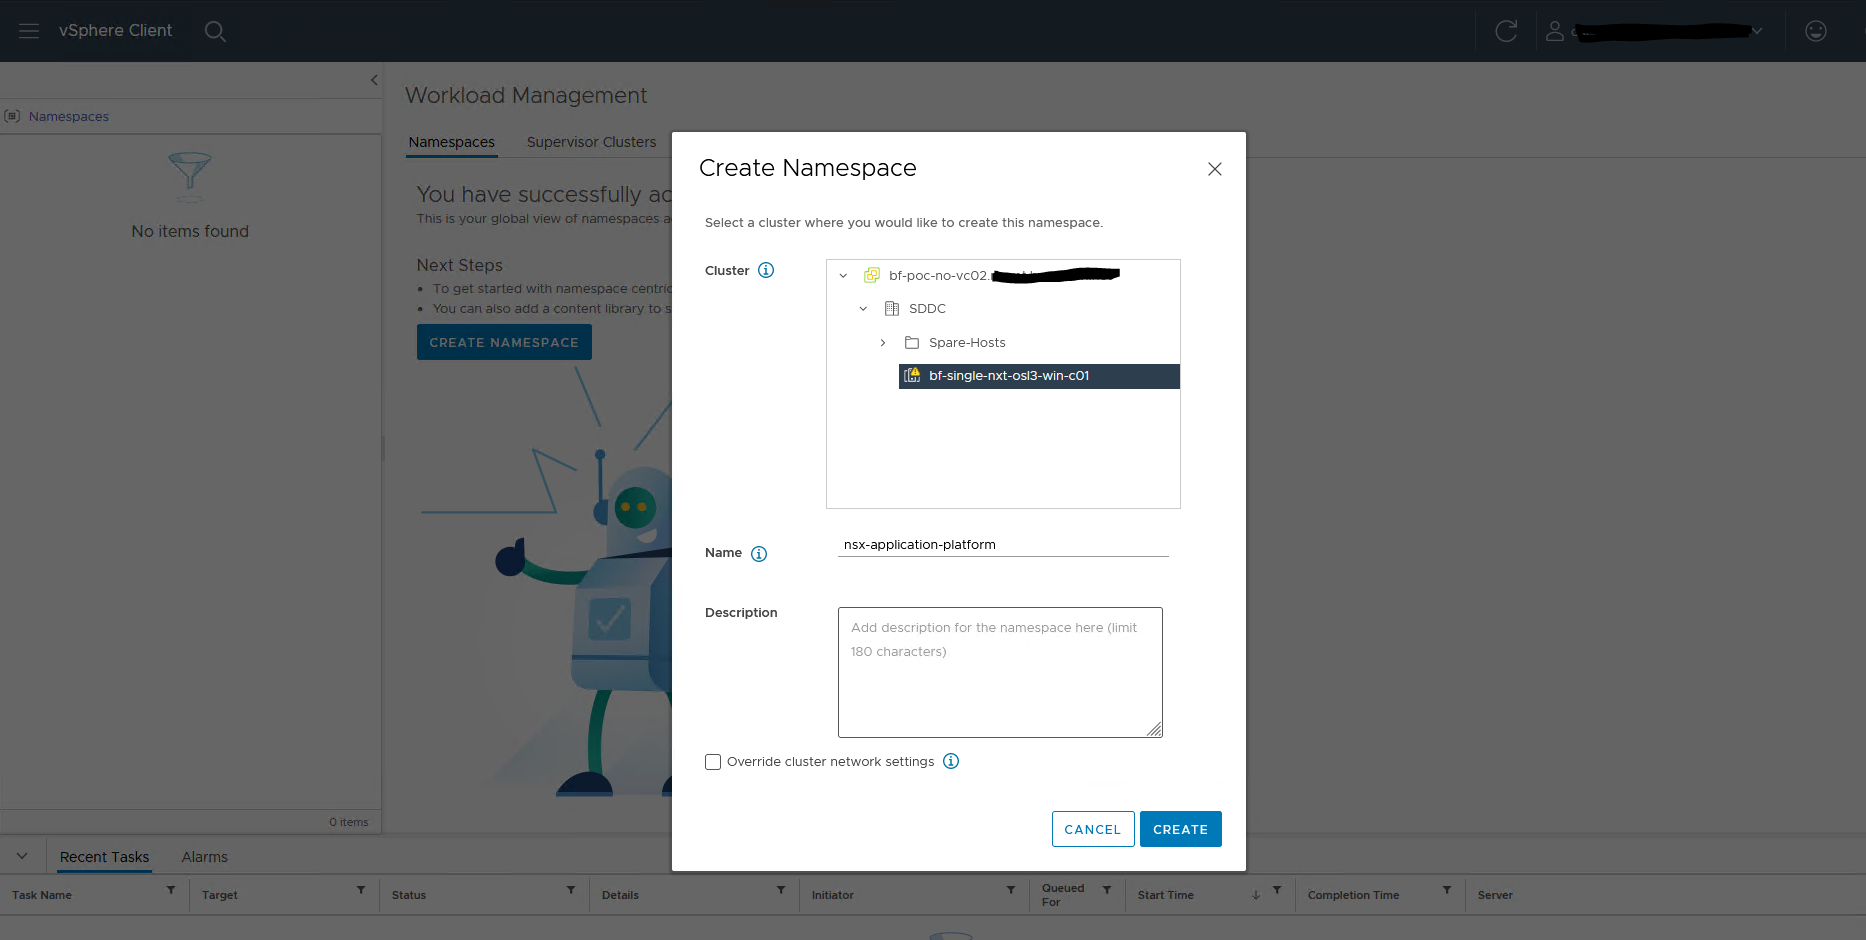
2. Create a new namespace
I named my namespace nsx-application-platform
3. Add a storage profile
I have selected my vSAN storage profile

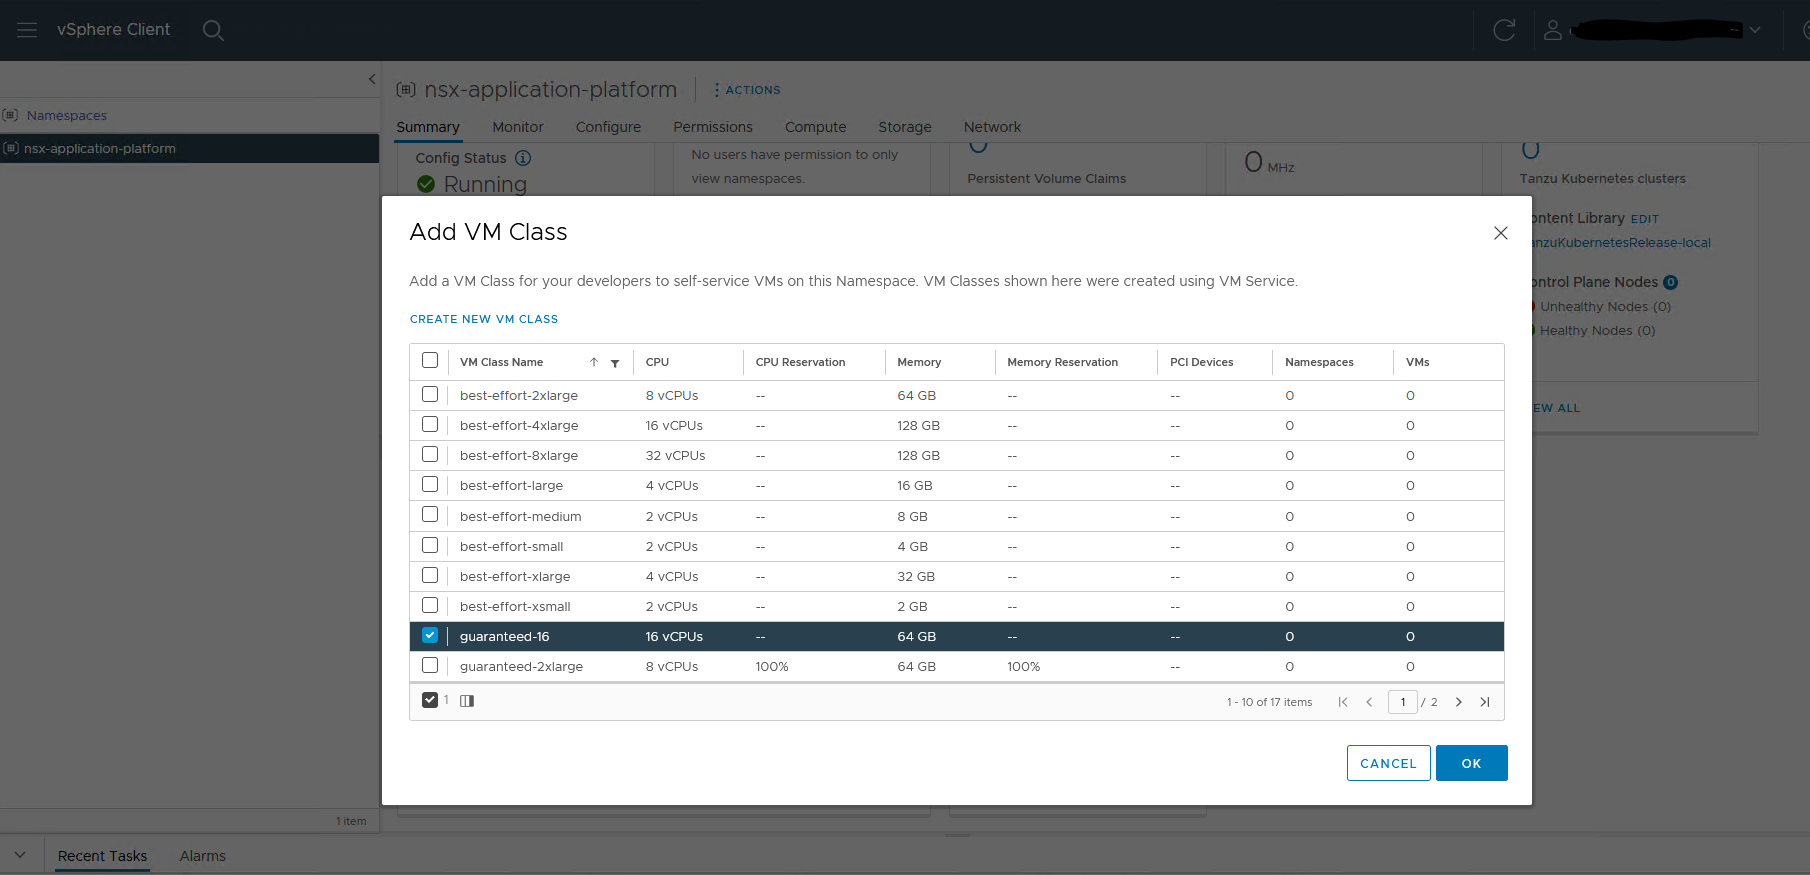
3. Add VM Service and content Libraries
Under VM Service add a VM class.
I have created a class ‘guaranteed-16’ With 16vCPU and 64GB ram.
I also select the ‘guaranteed-medium’ that is created by default.
Yes, 16vCPU and 64GB ram this is required for the NSX application platform.
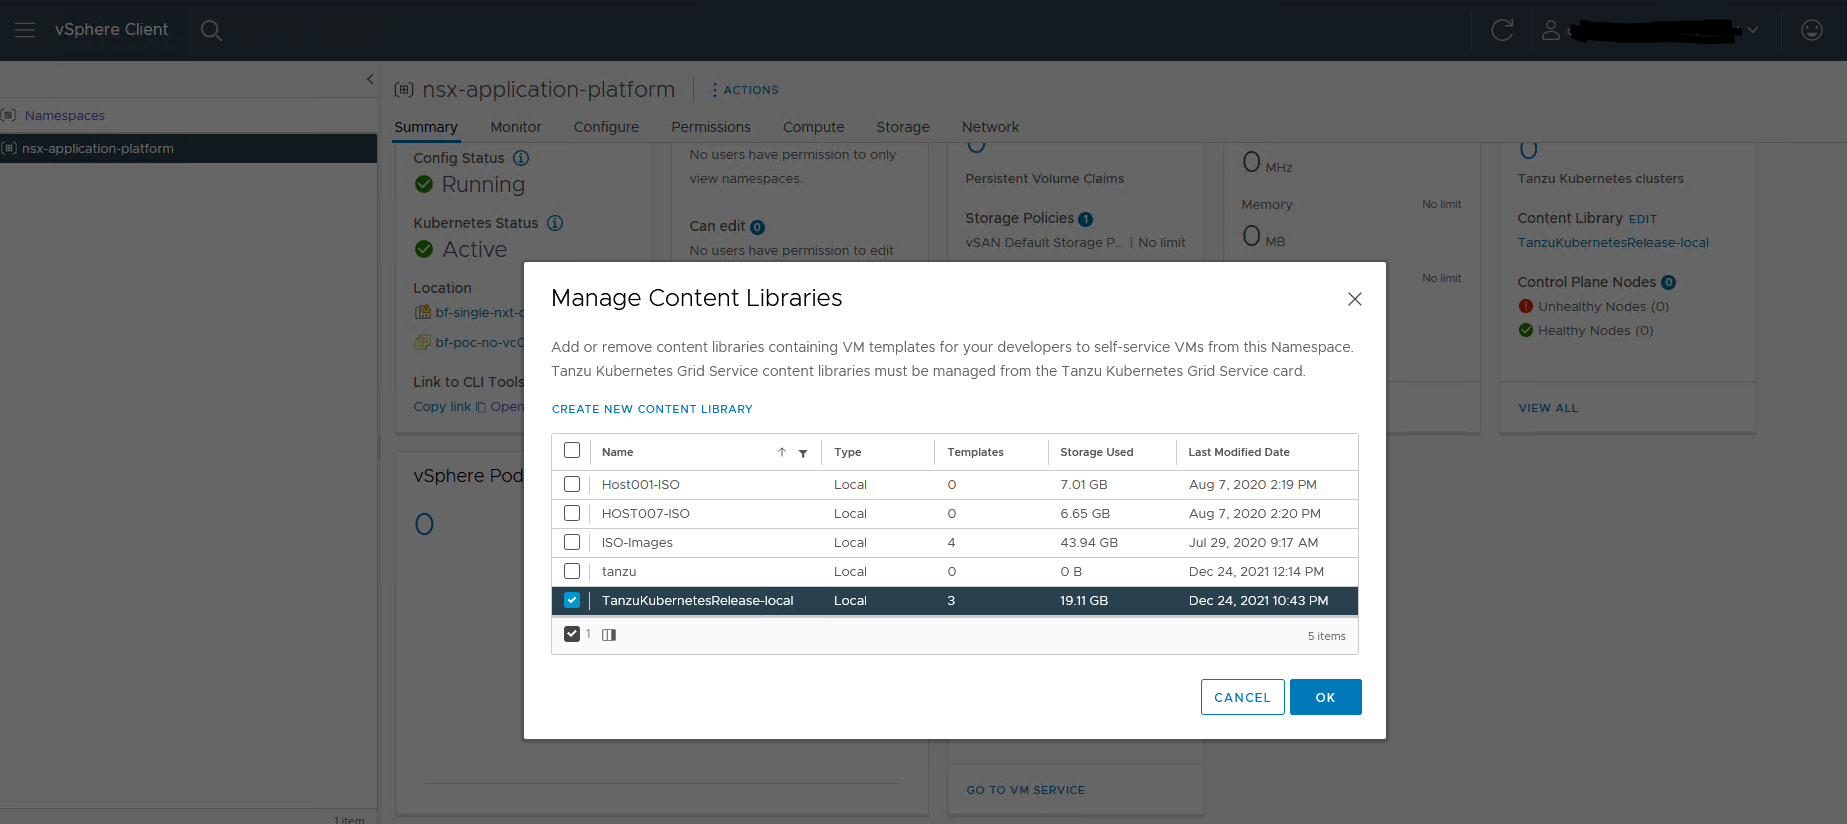
4. Under Content libraries add a library
My library is called TanzuKubernetesRelease-local (see series 1 on how to create them)
5. Add permissions
I have added my own user as the owner of the namespace

The namespace is now ready to use.
Populating the content Library
For Tanzu to be able to pull the Tanzu Kubernetes images from the library, we need to fill it.
Documentation about the process can be found here: Create, Secure, and Synchronize a Local Content Library for Tanzu Kubernetes releases (vmware.com)
In the documentation, you can find how to create a Subscribed content library.
As explained in Part 1, I do not have internet access to the vCenter. So I need to manually add the templates to the library.
- goto https://wp-content.vmware.com/v2/latest
- find the version you want to use. i.e goto https://wp-content.vmware.com/v2/latest/ob-18903450-photon-3-k8s-v1.20.12—vmware.1-tkg.1.b9a42f3/
- Download all the files
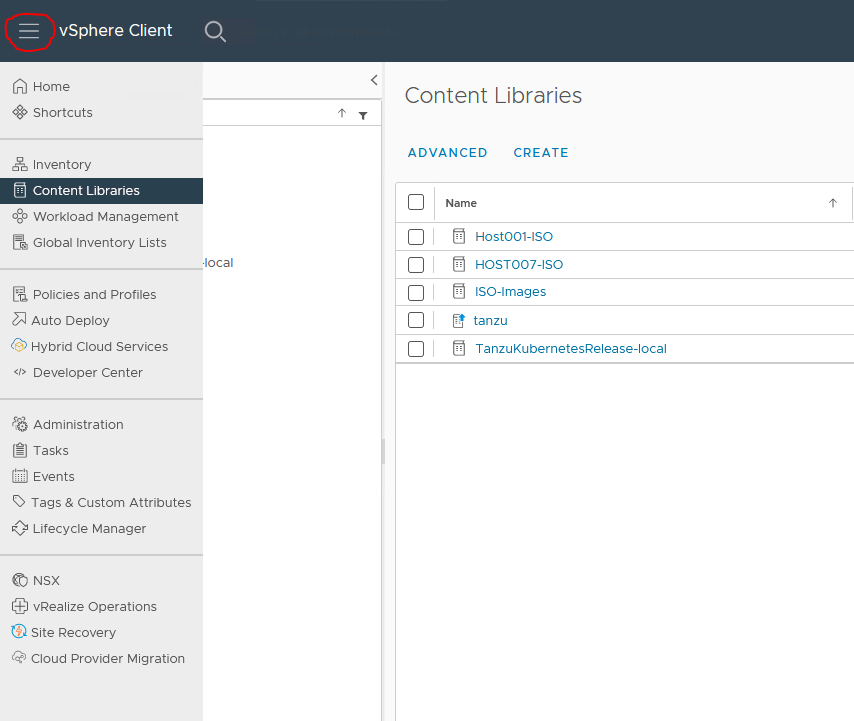
- Goto the vSphere client and open the, in part 1, created content library, and import items.
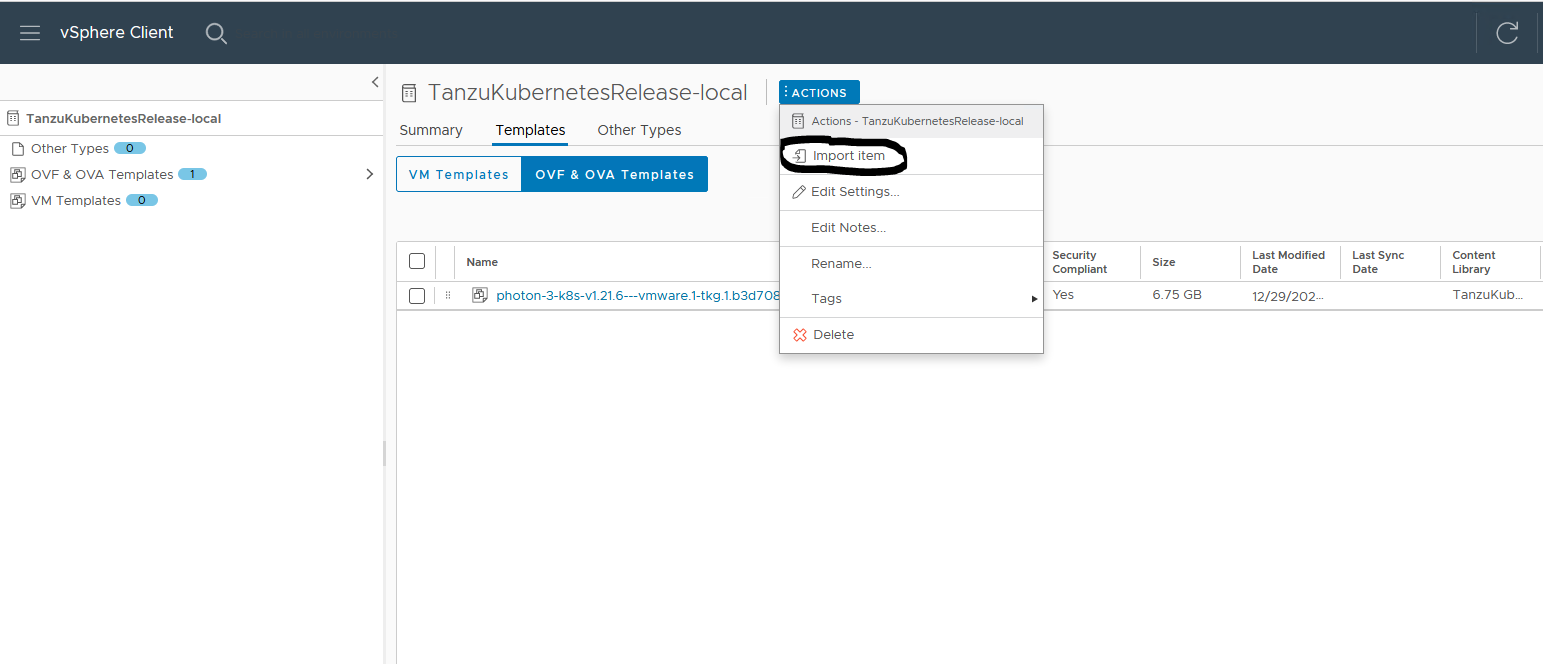
5. Import the files to the library
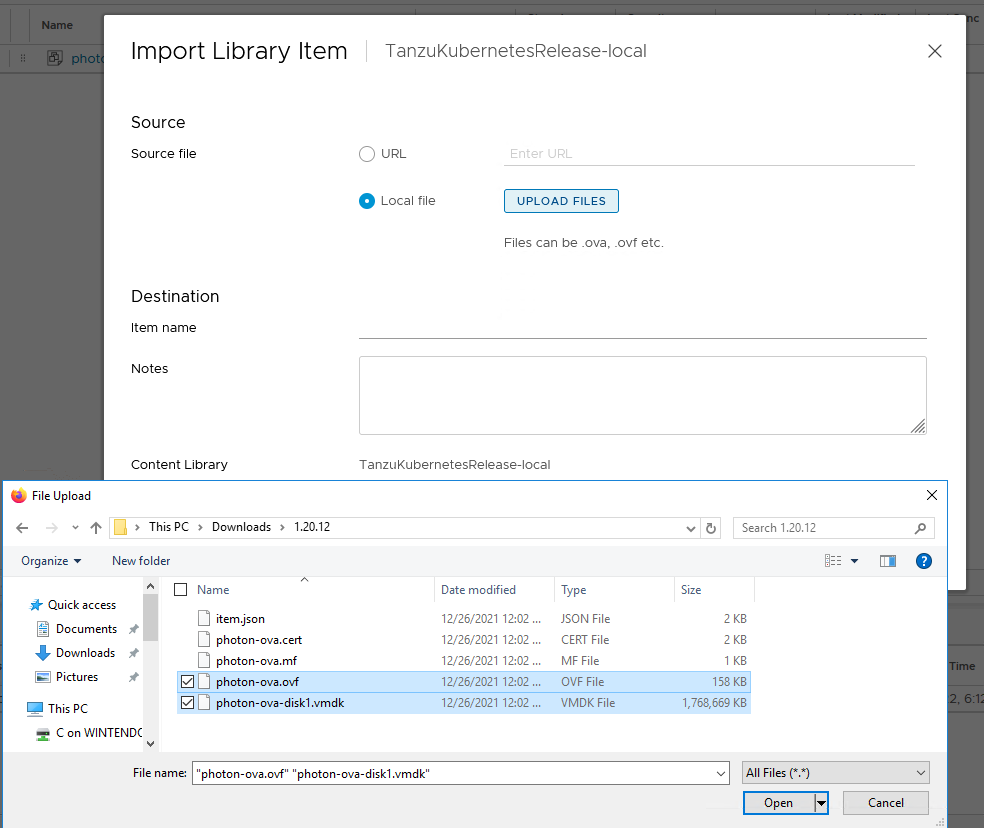
Change the item name to the exact name as on wp-content.vmware.com
In this case ‘photon-3-k8s-v1.20.12—vmware.1-tkg.1.b9a42f3’ (leave ‘ob-18903450-‘ out of the name)
Checking all settings
It is important to check all the settings. Also, the naming that is shown, is used in the YAML file later.
- kubectl get virtualmachineclassbindings
This will show the VM classes I have selected. - kubectl get tkr
This will show the Tanzu Kubernetes releases in the contenct library - kubectl get storageclasses
This will show the storage class i have selected
kubectl vsphere login --server=10.4.205.2 --insecure-skip-tls-verify

Username: chrism
KUBECTL_VSPHERE_PASSWORD environment variable is not set. Please enter the password below
Password:
Logged in successfully.

You have access to the following contexts:
   10.4.205.2
   nsx-application-platform

If the context you wish to use is not in this list, you may need to try
logging in again later, or contact your cluster administrator.

To change context, use `kubectl config use-context <workload name>`

kubectl config use-context nsx-application-platform
kubectl get storageclasses
NAME                          PROVISIONER              RECLAIMPOLICY   VOLUMEBINDINGMODE   ALLOWVOLUMEEXPANSION   AGE
vsan-default-storage-policy   csi.vsphere.vmware.com   Delete          Immediate           true                   6d10h


kubectl get virtualmachineclassbindings
NAME                VIRTUALMACHINECLASS   AGE
guaranteed-16       guaranteed-16         17m
guaranteed-medium   guaranteed-medium     11s

kubectl get tkr
NAME                                VERSION                          READY   COMPATIBLE   CREATED   UPDATES AVAILABLE
v1.20.12---vmware.1-tkg.1.b9a42f3   1.20.12+vmware.1-tkg.1.b9a42f3   True    True         38h
v1.21.6---vmware.1-tkg.1.b3d708a    1.21.6+vmware.1-tkg.1.b3d708a    True    True         6d10h
Deploying a Tanzu cluster
Time to deploy the cluster.
I am going to use the following CIDR for the cluster. As you might notice, I am only using Namespace and Service CIDR.
Ingress and egress are controlled by the supervisor. The CIDR may not overlap with the CIDR uses for the supervisor cluster.
| IP CIDR | Used for | Segment name |
| 10.6.68.0/22 | Namespace network | -auto-created- |
| 10.6.64.0/22 | service CIDR | -auto-created- |
I have created a YAML file for the deployment of the cluster called ‘deploy.yaml’
- name of the cluster: tkgs-v2-cluster-default
- vmclass: guaranteed-medium and guaranteed-16
- tkg version: v1.21.6—vmware.1-tkg.1.b3d708a
- worker replicas: use 3 if you want advanced version or 1 if you want Evaluation version.
The number of controll plane nodes and worker nodes may not exceed the required number.
1 control / 3 worker -> Standard and Advanced version
1 control / 1 worker -> Evaluation version
An important note here. For running the NAPP Evaluation or Advanced version, a larger volume needs to be mounted on the worker nodes. The size needs to be 64GB.
apiVersion: run.tanzu.vmware.com/v1alpha2
kind: TanzuKubernetesCluster
metadata:
  name: tkgs-v2-cluster-default
  namespace: nsx-application-platform
spec:
  topology:
    controlPlane:
      replicas: 1
      vmClass: guaranteed-medium
      storageClass: vsan-default-storage-policy
      tkr:
        reference:
          name: v1.21.6---vmware.1-tkg.1.b3d708a
    nodePools:
    - name: worker-nodepool-a1
      replicas: 3
      vmClass: guaranteed-16
      storageClass: vsan-default-storage-policy
      volumes:
        - name: containerd
          mountPath: /var/lib/containerd
          capacity:
            storage: 64Gi
      tkr:
        reference:
          name: v1.21.6---vmware.1-tkg.1.b3d708a
  settings:
    network:
      cni:
        name: antrea
      services:
        cidrBlocks: ["10.6.64.0/22"]
      pods:
        cidrBlocks: ["10.6.68.0/22"]
Login to the cluster and deploy the YAML file
kubectl vsphere login --server=10.4.205.2 --insecure-skip-tls-verify

Username: chrism
KUBECTL_VSPHERE_PASSWORD environment variable is not set. Please enter the password below
Password:
Logged in successfully.

You have access to the following contexts:
   10.4.205.2
   nsx-application-platform

If the context you wish to use is not in this list, you may need to try
logging in again later, or contact your cluster administrator.

To change context, use `kubectl config use-context <workload name>`

kubectl config use-context nsx-application-platform
kubectl apply -f deploy.yaml
tanzukubernetescluster.run.tanzu.vmware.com/tkgs-v2-cluster-default created
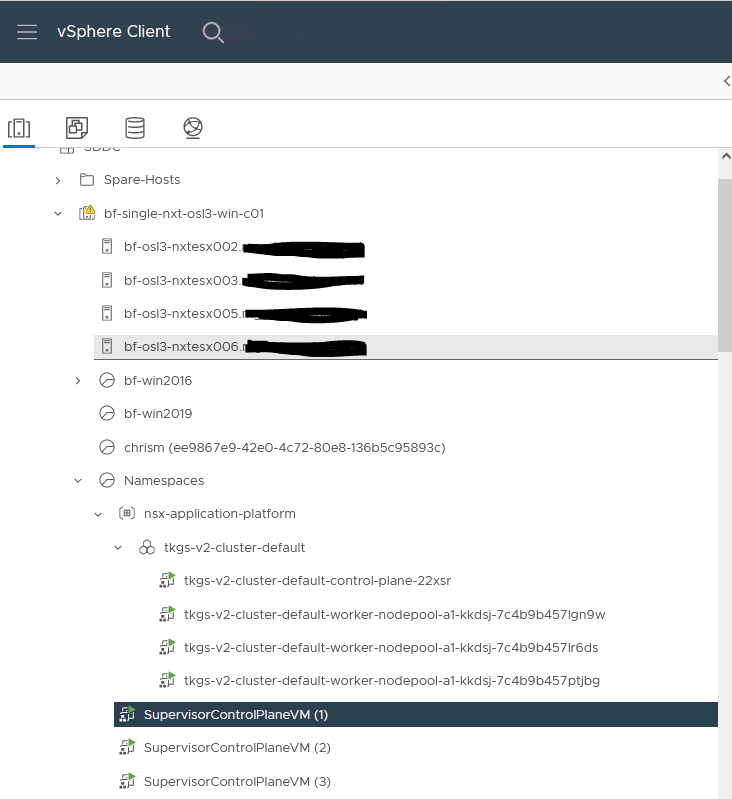
After a couple of minutes, the cluster should be up.
You can check the vSphere client to see the deployed VM’s
After the successful creation of the cluster, you can log in to it and use the normal kubectl commands
kubectl vsphere login --server=10.4.205.2 --insecure-skip-tls-verify --tanzu-kubernetes-cluster-name tkgs-v2-cluster-default --tanzu-kubernetes-cluster-namespace nsx-application-platformlatform

Username: chrism
KUBECTL_VSPHERE_PASSWORD environment variable is not set. Please enter the password below
Password:
Logged in successfully.

You have access to the following contexts:
   10.4.205.2
   nsx-application-platform
   tkgs-v2-cluster-default

If the context you wish to use is not in this list, you may need to try
logging in again later, or contact your cluster administrator.

To change context, use `kubectl config use-context <workload name>`

kubectl config use-context tkgs-v2-cluster-default
Switched to context "tkgs-v2-cluster-default".
kubectl get nodes
NAME                                                              STATUS   ROLES                  AGE   VERSION
tkgs-v2-cluster-default-control-plane-22xsr                       Ready    control-plane,master   45h   v1.21.6+vmware.1
tkgs-v2-cluster-default-worker-nodepool-a1-kkdsj-7c4b9b457lgn9w   Ready    <none>                 45h   v1.21.6+vmware.1
tkgs-v2-cluster-default-worker-nodepool-a1-kkdsj-7c4b9b457lr6ds   Ready    <none>                 45h   v1.21.6+vmware.1
tkgs-v2-cluster-default-worker-nodepool-a1-kkdsj-7c4b9b457ptjbg   Ready    <none>                 45h   v1.21.6+vmware.1
Within NSX-T it looks like this
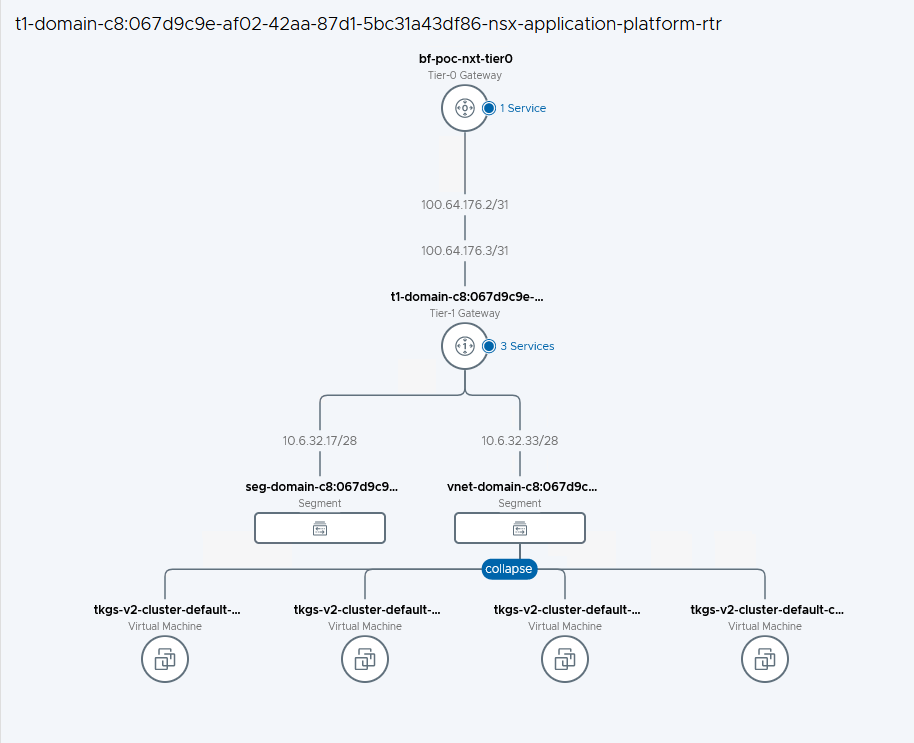
You now have the Tanzu cluster ready for the NAPP deployment.
Conclusion
This concludes part 2.
Part 3 will focus on the installation of Harbor, and finally installing the NSX Application Platform.
If you have any questions or suggestions, please let me know in the comments.