
Introduction
The Avi Kubernetes Operator (AKO) is an operator which works as an ingress Controller in a Kubernetes environment. It remains in sync with the necessary Kubernetes objects and calls Avi Controller APIs to configure the virtual services.
The goal of this blog
Avi AKO public registry can be found at https://projects.registry.vmware.com/chartrepo/ako, which contains the officially released images.
I wanted to have my own registry and be able to use other branches found on Github
This blog will explain to you
1. Install Harbor
2. Get and build Ako from GitHub
3. Upgrade your existing running Ako
Harbor is an open-source registry that secures artifacts with policies and role-based access control, ensures images are scanned and free from vulnerabilities, and signs images as trusted. Harbor, a CNCF Graduated project, delivers compliance, performance, and interoperability to help you consistently and securely manage artifacts across cloud-native compute platforms like Kubernetes and Docker.
Installing Harbor
For the installation, I am using a CentOS Stream release 8 VM
- CentOS Stream release 8
- 2vCPU/8GB memory
- 2 disks, one for os (60GB) and one for data (100GB mounted on /data)
- Install Docker. You can find the official steps here
$ sudo dnf config-manager --add-repo=https://download.docker.com/linux/centos/docker-ce.repo

$ sudo dnf list docker-ce
docker-ce.x86_64       3:20.10.17-3.el8      @docker-ce-stable

$ sudo dnf install docker-ce --nobest -y
$ sudo dnf install curl -y
2. Check if Docker is running
$ sudo systemctl status docker
 ? docker.service - Docker Application Container Engine
   Loaded: loaded (/usr/lib/systemd/system/docker.service; enabled; vendor preset: disabled)
   Active: active (running) since Mon 2022-07-18 09:00:58 UTC; 2h 27min ago
     Docs: https://docs.docker.com
 Main PID: 92482 (dockerd)
    Tasks: 52
   Memory: 2.7G
3. Install docker-compose and helm
$ sudo curl -L "https://github.com/docker/compose/releases/download/1.27.4/docker-compose-$(uname -s)-$(uname -m)" -o /usr/local/bin/docker-compose

$ sudo chmod +x /usr/local/bin/docker-compose
$ docker-compose --version
docker-compose version 1.27.4, build 40524192

$ curl -fsSL -o get_helm.sh https://raw.githubusercontent.com/helm/helm/main/scripts/get-helm-3
$ chmod 700 get_helm.sh
$ sudo ./get_helm.sh
Helm v3.9.2 is available. Changing from version v3.9.0.
Downloading https://get.helm.sh/helm-v3.9.2-linux-amd64.tar.gz
Verifying checksum... Done.
Preparing to install helm into /usr/local/bin
helm installed into /usr/local/bin/helm
4. Download Harbor
I have downloaded the online installer, which will pull the images from Harbor. You can choose to use the offline installer (harbor-offline-installer-v2.5.3.tgz)
$ wget https://github.com/goharbor/harbor/releases/download/v2.5.3/harbor-online-installer-v2.5.3.tgz
$ tar xvfz harbor-online-installer-v2.5.3.tgz
$ cd harbor
$ cp harbor.yml.tmpl harbor.yml
5. edit harbor.yml with your favorite editor
Important notes here. Use an official trusted certificate. i.e lets-encrypt. If you do not, you might get an error: ‘x509: certificate signed by unknown authority’
- hostname: harbor.fqdn.nl
Note this hostname. I used lets-encrypt to get a certificate for it. - data_volume: /data/harbor
- certificate: /data/cert/harbor.fqdn.nl.crt
This file contains Root, Intermediate and Cert - private_key: /data/cert/harbor.fqdn.nl.key
This file contains the certificate key - harbor_admin_password: Harbor12345
$ ls -1 /data/cert/
harbor.fqdn.nl.crt
harbor.fqdn.nl.key
# Configuration file of Harbor
# The IP address or hostname to access admin UI and registry service.
# DO NOT use localhost or 127.0.0.1, because Harbor needs to be accessed by external clients.
hostname: harbor.fqdn.nl
# http related config
http:
# port for http, default is 80. If https enabled, this port will redirect to https port
port: 80
# https related config
https:
# # https port for harbor, default is 443
port: 443
# # The path of cert and key files for nginx
certificate: /data/cert/harbor.fqdn.nl.crt
private_key: /data/cert/harbor.fqdn.nl.key
# Uncomment external_url if you want to enable external proxy
# And when it enabled the hostname will no longer used
# external_url: https://reg.mydomain.com:8433
# The initial password of Harbor admin
# It only works in first time to install harbor
# Remember Change the admin password from UI after launching Harbor.
harbor_admin_password: Harbor12345
# Harbor DB configuration
database:
# The password for the root user of Harbor DB. Change this before any production use.
password: root123
# The maximum number of connections in the idle connection pool. If it <=0, no idle connections are retained.
max_idle_conns: 50
# The maximum number of open connections to the database. If it <= 0, then there is no limit on the number of open connections.
# Note: the default number of connections is 100 for postgres.
max_open_conns: 100
# The default data volume
data_volume: /data/harbor6. Install Harbor
You need to use the option ‘–with-chartmuseum’
This is necessary for the Helm charts
$ sudo ./install.sh --with-chartmuseum

[Step 0]: checking if docker is installed ...

Note: docker version: 20.10.12

[Step 1]: checking docker-compose is installed ...

Note: docker-compose version: 1.27.4


[Step 2]: preparing environment ...

[Step 3]: preparing harbor configs ...
prepare base dir is set to /root/k8s/harbor/harbor-2.5.3
Clearing the configuration file: /config/registry/config.yml
Clearing the configuration file: /config/registry/passwd
Clearing the configuration file: /config/core/env
Clearing the configuration file: /config/core/app.conf
Clearing the configuration file: /config/nginx/nginx.conf
Clearing the configuration file: /config/log/rsyslog_docker.conf
Clearing the configuration file: /config/log/logrotate.conf
Clearing the configuration file: /config/registryctl/env
Clearing the configuration file: /config/registryctl/config.yml
Clearing the configuration file: /config/chartserver/env
Clearing the configuration file: /config/portal/nginx.conf
Clearing the configuration file: /config/jobservice/env
Clearing the configuration file: /config/jobservice/config.yml
Clearing the configuration file: /config/db/env
Generated configuration file: /config/portal/nginx.conf
Generated configuration file: /config/log/logrotate.conf
Generated configuration file: /config/log/rsyslog_docker.conf
Generated configuration file: /config/nginx/nginx.conf
Generated configuration file: /config/core/env
Generated configuration file: /config/core/app.conf
Generated configuration file: /config/registry/config.yml
Generated configuration file: /config/registryctl/env
Generated configuration file: /config/registryctl/config.yml
Generated configuration file: /config/db/env
Generated configuration file: /config/jobservice/env
Generated configuration file: /config/jobservice/config.yml
loaded secret from file: /data/secret/keys/secretkey
Generated configuration file: /config/chartserver/env
Generated configuration file: /compose_location/docker-compose.yml
Clean up the input dir


[Step 4]: starting Harbor ...
Creating network "harbor-253_harbor" with the default driver
Creating network "harbor-253_harbor-chartmuseum" with the default driver
Creating harbor-log ... done
Creating harbor-portal ... done
Creating harbor-db     ... done
Creating redis         ... done
Creating chartmuseum   ... done
Creating registryctl   ... done
Creating registry      ... done
Creating harbor-core   ... done
Creating nginx             ... done
Creating harbor-jobservice ... done
---Harbor has been installed and started successfully.---
7. (Optional) Installing Cosign
Artifact signing and signature verification are critical security capabilities that allow you to verify the integrity of an artifact. For more information click here. I will use cosign later to sign the artifacts.
$ sudo wget "https://github.com/sigstore/cosign/releases/download/v1.6.0/cosign-1.6.0.x86_64.rpm"
$ sudo rpm -ivh cosign-1.6.0.x86_64.rpm
$ sudo ln -s /usr/local/bin/cosign-linux-amd64 /usr/local/bin/cosign
$ sudo cosign generate-key-pair
8. Check if Harbor is running
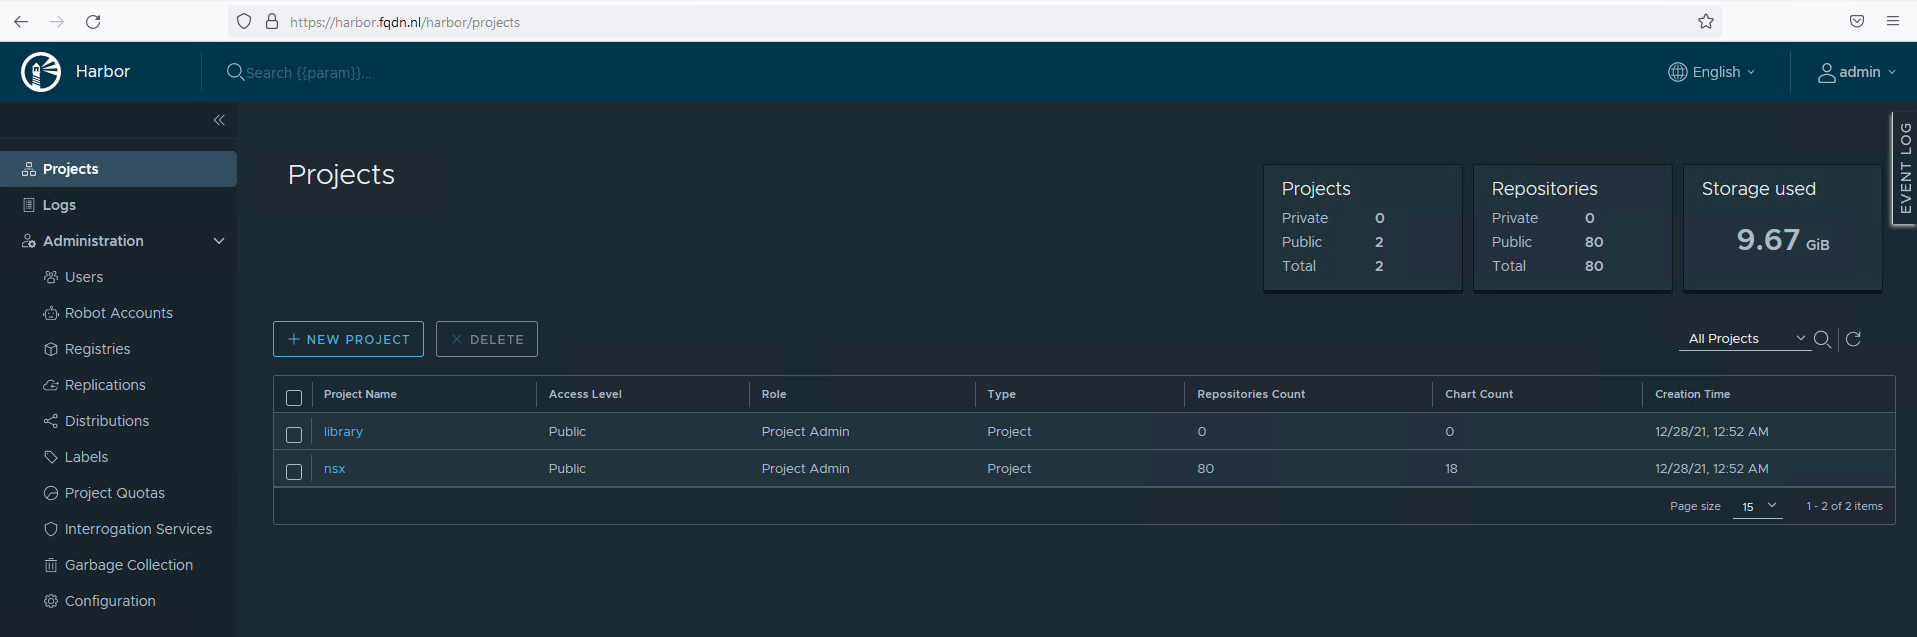
Use the browser to go to your hostname. In my case it is https://harbor.fqdn.nl
Uploading AKO files to Harbor
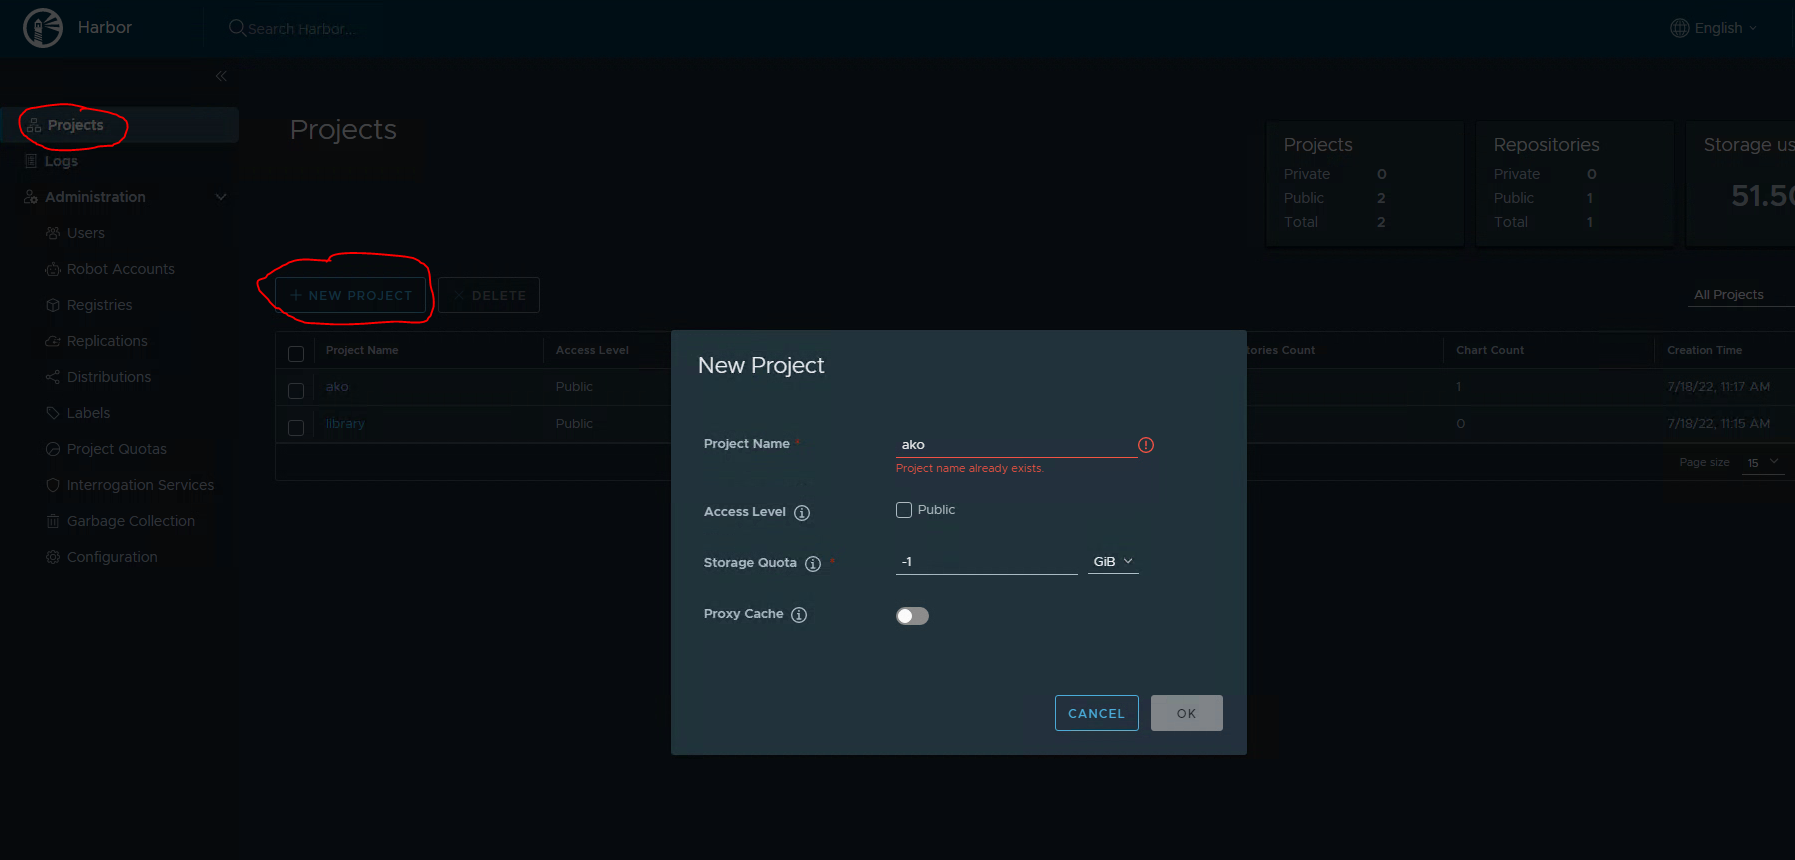
- Create a project in Harbor
I named the project ako. The storage quota is -1, which will not apply a quota. Check the Public box
Making the registry Public, does not require login.
2. Installing
I am going to use version 1.7.2
# Clone the AKO github branch
$ sudo git clone --branch release-1.7.2 https://github.com/vmware/load-balancer-and-ingress-services-for-kubernetes.git
$ sudo cd load-balancer-and-ingress-services-for-kubernetes

# build docker image
$ sudo cp Dockerfile.ako Dockerfile
$ sudo docker build -t ako/ako .
Sending build context to Docker daemon    118MB
Step 1/15 : ARG golang_src_repo=golang:latest
Step 2/15 : ARG photon_src_repo=photon:latest
Step 3/15 : FROM ${golang_src_repo} as build
<SNIP>
Step 15/15 : ENTRYPOINT ["./akc"]
 ---> Using cache
 ---> 23e0c41c2fce
Successfully built 23e0c41c2fce
Successfully tagged ako/ako:latest

# Tag the image with the right version
$ sudo docker tag ako/ako harbor.fqdn.nl/ako/ako:1.7.2

# Login to Harbor and push to the repo
$ sudo docker login harbor.fqdn.nl
$ docker push harbor.fqdn.nl/ako/ako:1.7.2
The push refers to repository [harbor.fqdn.nl/ako/ako]
15c398761e67: Layer already exists
6119169857c4: Layer already exists
ce8f80d9a6cb: Layer already exists
079797e2f9b7: Layer already exists
1.7.2: digest: sha256:ffcfa3b5eaf784bebedc543af6133e8e93d00c6468dfe7294563f050d593ebaf size: 1160

# Create helm Chart and change the version number
$ sudo cd helm/ako
$ sudo vi Chart.yaml

apiVersion: v2
name: ako
description: A Helm chart for Kubernetes

# A chart can be either an 'application' or a 'library' chart.
#
# Application charts are a collection of templates that can be packaged into versioned archives
# to be deployed.
#
# Library charts provide useful utilities or functions for the chart developer. They're included as
# a dependency of application charts to inject those utilities and functions into the rendering
# pipeline. Library charts do not define any templates and therefore cannot be deployed.
type: application

# This is the chart version. This version number should be incremented each time you make changes
# to the chart and its templates, including the app version.
version: 1.7.2

# This is the version number of the application being deployed. This version number should be
# incremented each time you make changes to the application.
appVersion: 1.7.2

# Make the helm package
$ sudo helm  package ako

# Paste this on the cli. It will set some evironment settings.
DOCKER_REPO=harbor.fqdn.nl/ako
DOCKER_USERNAME=admin
DOCKER_PASSWORD=Harbor12345
HRBR=`echo $DOCKER_REPO | cut -d / -f 1`
PRJ=`echo $DOCKER_REPO | cut -d / -f 2`
HELM_REPO=https://$HRBR/chartrepo/$PRJ
HELM_REPO_API=https://$DOCKER_USERNAME:$DOCKER_PASSWORD@$HRBR/api/chartrepo/$PRJ/charts
HELM_USERNAME=$DOCKER_USERNAME
HELM_PASSWORD=$DOCKER_PASSWORD

# Upload the Chart to Harbor
$ sudo curl -F chart=@ako-1.7.2.tgz $HELM_REPO_API || exit 1

# Add the repo to helm
# I am using the name 'akogit' to identify the repo.
$ sudo helm  repo add akogit https://harbor.fqdn.nl/chartrepo/ako
$ sudo helm search repo
NAME                    CHART VERSION   APP VERSION     DESCRIPTION
ako/ako                 1.7.1           1.7.1           A helm chart for Avi Kubernetes Operator
ako/ako-operator        1.3.1           1.3.1           A Helm chart for Kubernetes AKO Operator
ako/amko                1.7.1           1.7.1           A helm chart for Avi Multi Kubernetes Operator
akogit/ako              1.7.2           1.7.2           A Helm chart for Kubernetes

# (Optional) Singing with cosign
# As password use the passphrase you have set when generating the key-pair
$ export COSIGN_PASSWORD=<password>
$ cosign sign --key cosign.key harbor.fqdn.nl/ako/ako:1.7.2
Pushing signature to: harbor.fqdn.nl/ako/ako

# Verify the signature
$ cosign verify --key cosign.pub harbor.fqdn.nl/ako/ako:1.7.2 | jq .

Verification for harbor.fqdn.nl/ako/ako:1.7.2 --
The following checks were performed on each of these signatures:
  - The cosign claims were validated
  - The signatures were verified against the specified public key
[
  {
    "critical": {
      "identity": {
        "docker-reference": "harbor.fqdn.nl/ako/ako"
      },
      "image": {
        "docker-manifest-digest": "sha256:ffcfa3b5eaf784bebedc543af6133e8e93d00c6468dfe7294563f050d593ebaf"
      },
      "type": "cosign container image signature"
    },
    "optional": null
  }
]
4. Check Harbor
Goto Harbor UI, Projects, Ako, Repositories, ako/ako
You should see similar to what I have.

5. Upgrade Ako to the new release.
$ sudo helm list -n avi-system

NAME            NAMESPACE       REVISION        UPDATED                                 STATUS          CHART           APP VERSION
ako-1657030184  avi-system      1               2022-07-05 14:09:45.842259635 +0000 UTC deployed        ako-1.7.1       1.7.1

# Edit values.yaml to reflect the image to harbor.fqdn.nl
image:
  repository: harbor.fqdn.nl/ako/ako
  pullPolicy: IfNotPresent

$ sudo helm upgrade ako-1657030184  akogit/ako  --version 1.7.2 -f ./values.yaml  --set ControllerSettings.controllerHost=10.225.9.93 --set avicredentials.username=admin --set avicredentials.password=VMware1\! --namespace=avi-system

Release "ako-1657030184" has been upgraded. Happy Helming!
NAME: ako-1657030184
LAST DEPLOYED: Thu Jul 21 08:45:29 2022
NAMESPACE: avi-system
STATUS: deployed
REVISION: 3
TEST SUITE: None
5a. If you want to just install and not upgrade
$ sudo helm install  akogit/ako  --generate-name --version 1.7.2 -f ./values.yaml  --set ControllerSettings.controllerHost=10.225.9.93 --set avicredentials.username=admin --set avicredentials.password=VMware1\! --namespace=avi-system


#If you are starting installing from scretch, you need to get the values.yaml example file. Edit the file to match your evironment.

$ sudo helm show values akogit/ako --version 1.7.2 > values.yaml
More info about installation and upgrading can be found here
Conclusion
That concludes this blog.
Keep in mind that non-official releases can be unstable. If you want stability, use the official releases!
If you have any questions or comments, let me know.